Behringer F-CONTROL AUDIO FCA202 Quick Start Guide - Page 19
Controls - firewire
 |
View all Behringer F-CONTROL AUDIO FCA202 manuals
Add to My Manuals
Save this manual to your list of manuals |
Page 19 highlights
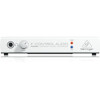
36 F-CONTROL AUDIO FCA202 F-CONTROL AUDIO FCA202 Controls (EN) Controls (1) You can connect standard commercial headphones fitted with a ¼" TRS jack plug to the socket. (2) Use the LEVEL control to adjust the headphone volume. Turn the control fully to the left before you connect the headphones. This helps you avoid the damage that is caused by high volume settings. (3) The POWER LED indicates that the equipment is ready to operate. It lights up as soon as the FCA202 is provided with power from the mains adapter or via the FireWire socket. (4) The FW LED lights up as soon as the FCA202 is correctly connected by a FireWire cable to a computer that is in operation. If the LED does not light up, check the FireWire connection to the computer. (5) Use the DC IN socket to connect the mains adapter provided. (6) The LOCK port in combination with a suitable security lock from Kensington offers you a very good way to protect your equipment against theft. For further information, visit kensington.com. (7) Make the connection to your computer using one of the two 6-pin FIREWIRE sockets. You can run other FireWire devices such as hard drives, from the second socket. This means that you always have a free FireWire port available, even if your computer has only one FireWire socket. (8) You can connect balanced or unbalanced audio cables with ¼" jack plugs to the BAL / UNBAL OUT sockets. 37 Quick Start Guide (9) You can connect unbalanced audio cables with ¼" TS jack plugs to the UNBAL IN sockets. (10) The ABOUT section gives information about the driver versions that are used. Compare the version numbers given here with the drivers available via Internet from behringer.com. If you have any problems, you should always try to install the newest driver software. (11) Use the LATENCY SELECT slider to set the desired latency. Click the APPLY button to accept the selection made. (12) The SAMPLING FREQUENCY selection menu allows you to set the sample rate for the digital converter. The available frequencies are 44.1 kHz, 48.0 kHz and 96.0 kHz. (13) The wiring diagram is provided as additional information. It shows the signal flow in the FCA202. Check Out behringer.com for Full Manual


