Behringer MIC100 Manual - Page 8
Control Elements - tube ultragain for guitar
 |
View all Behringer MIC100 manuals
Add to My Manuals
Save this manual to your list of manuals |
Page 8 highlights
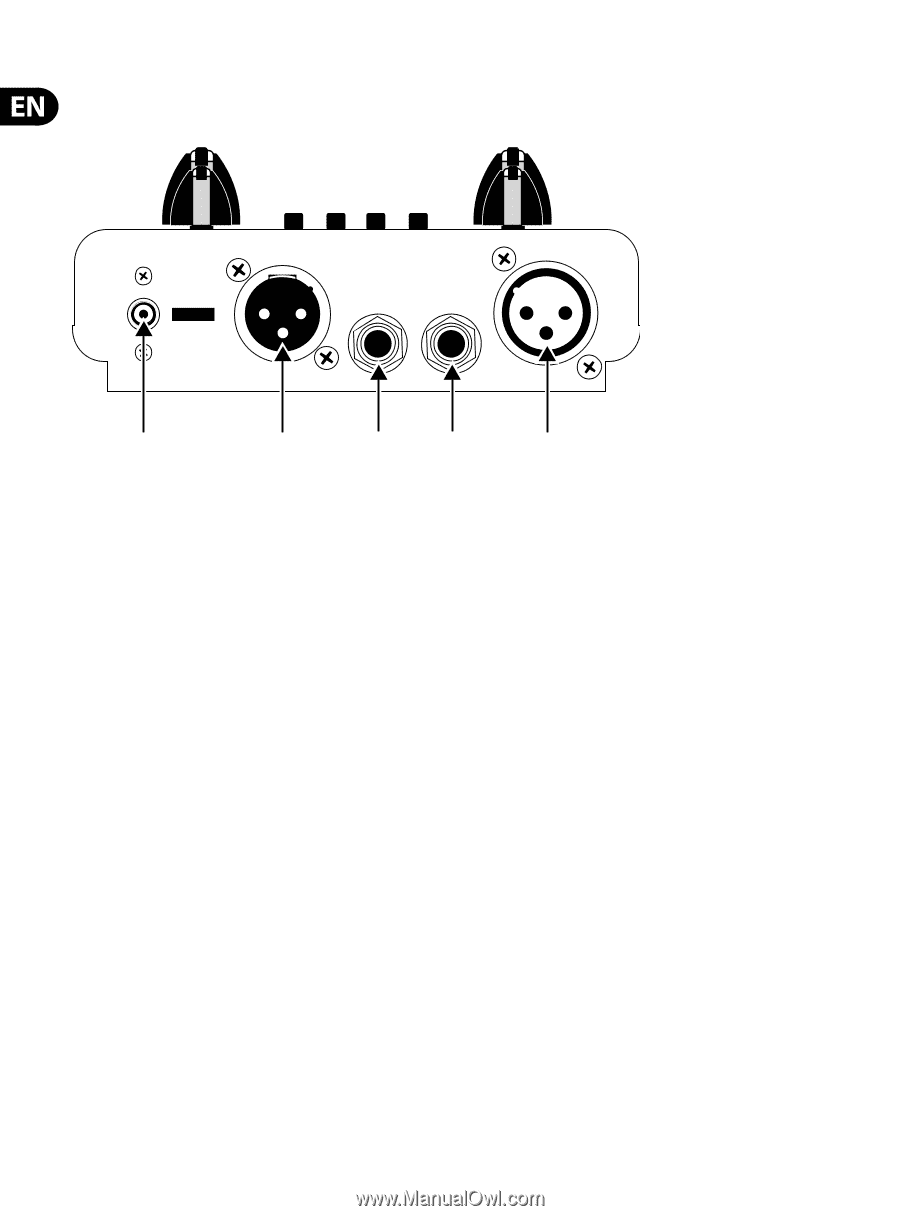
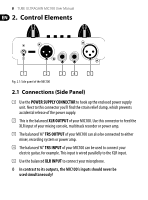
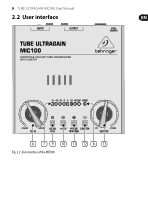
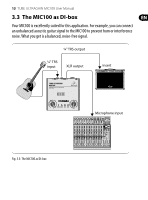
8 TUBE ULTRAGAIN MIC100 User Manual 2. Control Elements (1) (2) (3) (4) (5) Fig. 2.1: Side panel of the MIC100 2.1 Connections (Side Panel) (1) Use the POWER SUPPLY CONNECTOR to hook up the enclosed power supply unit. Next to this connector you'll find the strain relief clamp, which prevents accidental release of the power supply. (2) This is the balanced XLR OUTPUT of your MIC100. Use this connector to feed the XLR input of your mixing console, multitrack recorder or power amp. (3) The balanced ¼" TRS OUTPUT of your MIC100 can also be connected to either mixer, recording system or power amp. (4) The balanced ¼" TRS INPUT of your MIC100 can be used to connect your electric guitar, for example. This input is wired parallelly to the XLR input. (5) Use the balanced XLR INPUT to connect your microphone. ◊ In contrast to its outputs, the MIC100's inputs should never be used simultaneously!
-
 1
1 -
2
-
 3
3 -
 4
4 -
 5
5 -
 6
6 -
 7
7 -
 8
8 -
 9
9 -
 10
10 -
 11
11 -
 12
12 -
 13
13 -
14
-
15
-
16
-
17
-
18
-
19
 |
 |