Behringer RD-6-BU Quick Start Guide - Page 7
RD-6 Controls
 |
View all Behringer RD-6-BU manuals
Add to My Manuals
Save this manual to your list of manuals |
Page 7 highlights
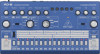
12 RD-6 RD-6 Controls (EN) Step 2: Controls (1) (2) (3) (4) (5) (6) (7) (8) (9) (10) (11) (12) (13) (14) (15) (16) (17) (18) (22) (23) (19) (20) (21) (24) (25) (26) (27) (28) (29) (30) (31) (32) (33) (34) (35) (36) (37) (38) (39) (40) (41) (42) Quick Start Guide 13 Voice Section (1) ACCENT - adjust the amount of accent given to the output for any steps programmed with an accent. (2) BASS DRUM - adjusts the level of the Bass Drum sent to the Mix Out and Voice Out. (3) SNARE DRUM - adjusts the level of the Snare Drum sent to the Mix Out and Voice Out. (4) LO HI TOM - adjusts the level of the Low and Hi Tom sent to the Mix Out and Voice Out. (5) CYMBAL/CLAP - adjusts the level of the Cymbal and Clap sent to the Mix Out and Voice Out. (6) OPEN/CLOSED HI HAT- adjusts the level of the Open and Closed Hi Hat sent to the Mix Out and Voice Out. Patch bay (3.5 mm TS input and output connections) (7) SYNC IN - this input allows the use of an external clock and start/ stop signal. (8) SYNC OUT - this output allows the external clock and start/stop signal to be sent to other devices. (9) LT TRIGGER OUT - sends a +15 V pulse to trigger external devices. (10) HT TRIGGER OUT - sends a +15 V pulse to trigger external devices. (11) PHONES - connect your headphones to this 3.5 mm TRS output. Make sure the volume is turned down before putting on headphones. Distortion Section These controls only have an effect when the DISTORTION switch (20) is ON. The circuit is located in the signal path just before the volume control and the final audio output. (12) DISTORTION - adjust the amount of distortion. (13) TONE - adjust the tone of the distortion. (14) LEVEL - adjust the distortion level. General Controls (15) TEMPO - adjust the rate at which the pattern and tracks play, from slow to fast. (16) CYMBAL/CLAP SELECT - Select either RD-6 Cymbal or BR110 Clap on the step keys. (17) TRACK/INSTRUMENT SELECT - this control selects either the track or instrument to be written or edited. (18) MODE SELECTOR - select from TRACK WRITE, TRACK PLAY, PATTERN PLAY, PATTERN WRITE. (19) POWER LED - POWER LED indicates that power is supplied to the unit and the rear-panel power switch is on. (20) DISTORTION ON/OFF - when OFF, the distortion is bypassed, and the DISTORTION, TONE, and LEVEL controls have no effect. (21) VOLUME - adjust the output level from the rear-panel output and the headphones output. Make sure the volume is turned down before putting on headphones. Sequencer Section (22) D.C./BAR RESET/CLEAR - this is used to clear a pattern from memory, to return a track to the beginning, and to signal that the last pattern is being added to a track. (23) SCALE SELECTOR - this determines the number of steps assigned to each quarter note beat, as shown by the relationships between the note images next to the scale selector switch. (24) PATTERN GROUP INDICATOR - depending on the MODE position, the pattern Group indicator will display either pattern I or II. (25) PATTERN GROUP - depending on the MODE selector position and the RUN/STOP circumstance, this button will act in different ways. (26) START / STOP - this allows you to start or stop playing the patterns and tracks. The LED will turn on when playing. (27) FUNCTION - this multipurpose switch is used in many ways during pattern and track writing. (28) STEP SELECTOR - these 16 buttons perform different functions depending on the RUN/STOP circumstance and the MODE selector position. (29) TAP - depending on the MODE selector setting and the RUN/STOP circumstance, this button will perform different functions. Rear Panel When a jack is inserted in one of the voice outs, that voice is removed from the mix out. (30) OH/CH VOICE OUT - 1/8" (3.5 mm) unbalanced output of the Open and Closed Hi-Hat. (31) CP VOICE OUT - 1/8" (3.5 mm) unbalanced output of the Clap. (32) CY VOICE OUT - 1/8" (3.5 mm) unbalanced output of the Cymbal. (33) LT/HT VOICE OUT - 1/8" (3.5 mm) unbalanced output of the Low Tom and Hi Tom. (34) SD VOICE OUT - 1/8" (3.5 mm) unbalanced output of the Snare Drum. (35) BD VOICE OUT - 1/8" (3.5 mm) unbalanced output of the Bass Drum. (36) MIX OUT - ¼" (6.35 mm) unbalanced mixed output. (37) START/STOP - ¼" (6.35 mm) connect a foot pedal to start and stop the RD-6. (38) MIDI OUT/THRU - output of MIDI data to an external MIDI device and/or a direct output of the MIDI IN to chain to other devices. (39) MIDI IN - to input MIDI from an external MIDI device such as a sequencer or DAW. (40) USB - connect to a computer for updates and USB MIDI DAW control. (41) POWER - turn the rhythm designer on or off. Make sure all the connections are made before turning on the unit. (42) DC INPUT - connect the supplied 9V DC power adapter here. The power adapter can be plugged into an AC outlet capable of supplying from 100V to 240V at 50 Hz/60 Hz. Use only the power adapter supplied.
-
 1
1 -
 2
2 -
 3
3 -
 4
4 -
 5
5 -
 6
6 -
 7
7 -
 8
8 -
 9
9 -
 10
10 -
 11
11 -
 12
12 -
13
-
14
-
15
-
16
-
17
-
18
-
19
-
20
-
21
-
22
 |
 |
