Behringer TRUTH B2030A Manual - Page 6
Control Elements - speaker
 |
View all Behringer TRUTH B2030A manuals
Add to My Manuals
Save this manual to your list of manuals |
Page 6 highlights
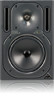
6 TRUTH B2031A/B2030A User Manual 2. Control Elements The control elements described in the following are the same on both loudspeakers. (1)(2) Fig. 2.1: Front panel display elements (here: B2030A) (1) ON: This LED lights up as soon as you switch on the speaker. (2) LIMIT: Lights up as soon as one of the built-in protections is activated. (6) Use the POWER switch to power up your TRUTH. The POWER switch should always be in the "Off" position when you are about to connect your unit to the mains. !! Caution ◊ The POWER switch does not fully disconnect the unit from the mains. Unplug the power cord completely when the unit is not used for prolonged periods of time. ◊ The TRUTH should be the last device in the signal chain to be switched on and the first to be switched off. This way, loud switch-on "thumps" that can occur when powering other equipment on or off can be avoided. (4) (7) Fig. 2.4: INPUT TRIM control (3) (5) (7) INPUT TRIM: Use this control to adapt the TRUTH's input sensitivity to the signal source. Fig. 2.2: Rear panel connectors All connectors of the TRUTH face downwards, so as to allow you to place the speaker as closely to a wall as possible. (3) INPUT: These are the balanced inputs of your TRUTH, laid out as 1/4" TRS and XLR connectors. (4) The mains connection is achieved via the standard IEC connector. A matching power cord is included. (5) FUSE COMPARTMENT/VOLTAGE SELECTION: Before plugging the unit into a power socket, please make sure you have selected the correct voltage. Faulty fuses must be replaced with fuses of appropriate rating without exception. Some units feature a fuse compartment that can be operated in two different positions, allowing alternating between 230 V and 120 V. ◊ When using the unit outside of Europe (running on 120 V), you have to implement a fuse with a higher rating. (6) (8) (9) (10) Fig. 2.5: Rear panel control elements (8) LOW FREQUENCY: With this switch you can adapt the woofer to a subwoofer system or emulate the sound characteristics of small speaker systems. (9) ROOM COMPENSATION: For maximum flexibility the TRUTH features a switch that adjusts the speaker depending on its setup position. (10) HIGH FREQUENCY: This switch adapts the speaker's frequency response to the damping characteristics of the control room. Fig. 2.3: The POWER switch
-
 1
1 -
 2
2 -
 3
3 -
 4
4 -
 5
5 -
 6
6 -
 7
7 -
 8
8 -
 9
9 -
 10
10 -
 11
11
 |
 |
