Behringer ULTRABASS BX1800 Manual - Page 7
Control Elements
 |
View all Behringer ULTRABASS BX1800 manuals
Add to My Manuals
Save this manual to your list of manuals |
Page 7 highlights
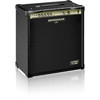
7 ULTRABASS BX1800 User Manual 3. Control Elements (1) (2) (3) (4) (5) (6) (7) (8) (9) (10) (11) (12) (13) (14) (15) (16) Fig. 3.1: Front view (1) Connect your bass to the INPUT jack, using a standard cable with a 1/4" TS connector. (2) Press the PAD switch when using active instruments with high output levels. In this case the INPUT jack features 6 dB less gain. For passive instruments the PAD button has to be depressed. (3) Pressing the SHAPE button will activate the Shape function. The Shape function on your BX1800 provides a revolutionary type of filter that you can use to modify your bass sound. (4) Use the VOLUME control to adjust the volume of the instrument channel. To change the balance between the instrument and CD volume level, use your instrument's volume control. (5) The LOW control allows you to boost or cut the low-frequency range. (6) Using the LOW MID control you can boost or cut the lower mids. (7) The HIGH MID control allows you to boost or cut the upper mids. (8) The HIGH control governs the high-frequency range to give your bass a more "cutting" sound. (9) Use the CD IN connectors to connect the output of your CD player, tape deck, CD or MD walkman. This way you can play along to music or bass guitar tutorial CDs. (10) The BX1800 features an FX INSERT-Loop for external effects. Connect the SEND output to the input of your effects device, for example, our proven multi-effects processor BEHRINGER VIRTUALIZER PRO DSP2024P. This output can also be used to connect your tuner. (11) Connect the RETURN jack to the output of your effects device. Since the BX1800 features a serial effects path, the mix ratio must be set on your effects device. (12) The PHONES jack is for headphones. When you plug in your headphones, the built-in loudspeaker is muted. ◊ The headphone signal can also be routed to a mixing console or sound reinforcement system. Connect the headphones output on your BX1800 to the line input (LINE IN) on the console (for example, BEHRINGER EURORACK UB1222FX-PRO). Please use a mono cable for this application. ◊ Some headphones produce distortion if the volume level is too high. Please cut back the VOLUME control until the distortion disappears. (13) Use the MASTER control to adjust the output level of the D.I. OUT output. (14) The GND LIFT switch disconnects (switch pressed) the ground connection at the D.I. OUT output to effectively eliminate hum noise resulting from ground loops. (15) Use the balanced D.I. OUT XLR output to feed the audio signal from your ULTRABASS to an external mixing console. The D.I. OUT signal is post-EQ. (16) Use the POWER switch to switch the BX1800 on or off. You should always make sure that the POWER switch is in the "Off" position when initially connecting the unit to the mains. To disconnect the unit from the mains, pull out the main cord plug. When installing the product, ensure that the plug is easily accessible. ◊ Please note: Merely switching the unit off does not mean that it is fully disconnected from the mains. When not using the unit for prolonged periods of time, please unplug the unit's power cord from the power outlet. (19) (18) (17) Fig. 3.2 Rear view (17) MAINS CONNECTION. Use the power cord supplied with the unit to connect it to the mains. (18) FUSE HOLDER/VOLTAGE SELECTOR. Before connecting the unit to the mains, make sure that the voltage setting matches your local voltage. A blown fuse should only be replaced by a fuse of the same type and rating. On some units, the fuse holder can be switched to one of two positions, i.e. 230 V and 120 V. When operating the unit outside Europe at 120 V, a higher fuse rating is required. (19) SERIAL NUMBER.
-
 1
1 -
 2
2 -
 3
3 -
 4
4 -
 5
5 -
 6
6 -
 7
7 -
 8
8 -
 9
9
 |
 |
