Behringer ULTRACOUSTIC ACX450 Manual - Page 5
Control Elements And Connections - used
 |
View all Behringer ULTRACOUSTIC ACX450 manuals
Add to My Manuals
Save this manual to your list of manuals |
Page 5 highlights
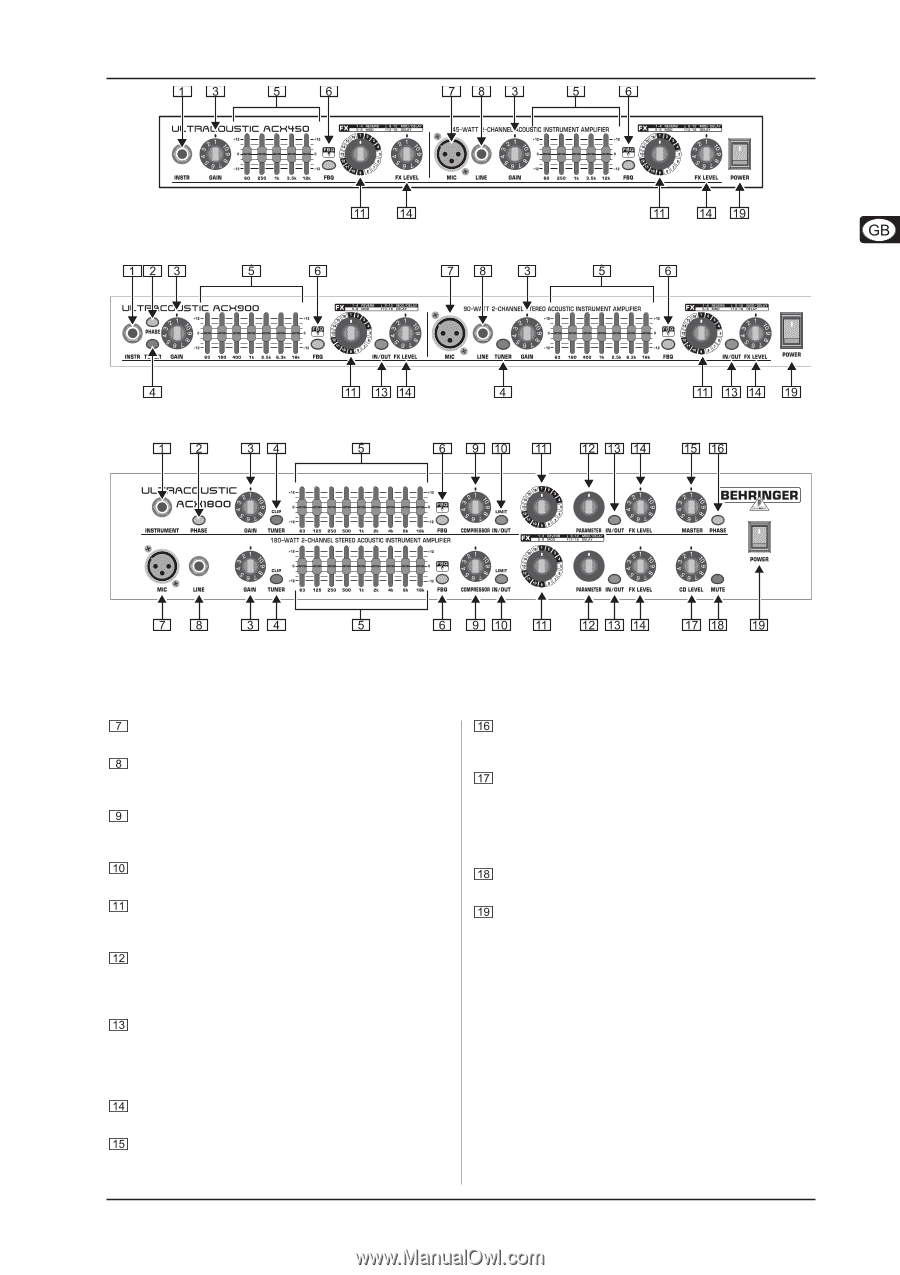
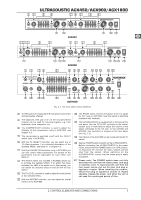
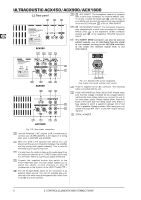
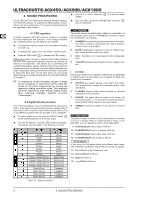
ULTRACOUSTIC ACX450/ACX900/ACX1800 ACX450 ACX900 ACX1800 Fig. 2.1: The front panel control elements The MIC jack is the balanced XLR microphone input of the microphone/line channel. The balanced LINE jack (1/4") of the microphone/line channel can be used for line-level signals, e.g. from keyboards, drum computers, etc. The COMPRESSOR controller is used to adjust the intensity of the compression (only in ACX1800, see chapter 4.3). The compressor is switched on/off with the IN/OUT switch (only in ACX1800). With the FX SELECT controller, you can select one of 16 effect programs. For a detailed description of the available effects, see table 4.1 in chapter 4.2. With the PARAMETER controller (only in ACX1800) you can edit certain effect parameters. For details on the parameters that are adjustable for each effect, see table 4.1. The IN/OUT switch (not included in ACX450) allows you to activate the selected effect. If an effect has been activated, the LED in the switch is on. Alternatively, you can switch the selected effect on and off with the foot switch. The FX LEVEL controller is used to adjust the level (share) of the selected effect. With the MASTER controller, you can adjust the overall volume of the ACX1800. The PHASE switch reverses the phase of the mix signal by 180° (only in ACX1800). Use this switch to eliminate problems with feedback. The ULTRACOUSTIC is equipped with a CD input at the rear panel. Use the CD LEVEL controller in the master section (only in ACX1800) to adjust the volume of the signal connected to the CD jack. In the ACX900 and ACX450, this controller is located on the rear panel (see fig. 2.2). The CD jack of the ACX1800 can be muted with the MUTE switch. Use the POWER switch to switch on the ULTRACOUSTIC. Before connecting the ULTRACOUSTIC to the power mains, ensure that the POWER switch is in OFF position. To disconnect the unit from the mains network, pull the plug from the socket. When switching on the ULTRACOUSTIC, ensure that the mains plug is easily accessible. + Please note: The POWER switch does not fully disconnect the unit from the mains power cord plug or extention cord. To disconnect the unit from the main power source, pull out the main cord plug or appliance coupler. When installing the product, ensure the plug or appliance coupler is readily operable. Unplug the power cord when the unit is not used for a prolonged period of time. 2. CONTROL ELEMENTS AND CONNECTIONS 5
-
 1
1 -
 2
2 -
 3
3 -
 4
4 -
 5
5 -
 6
6 -
 7
7 -
 8
8 -
 9
9 -
 10
10 -
 11
11 -
12
 |
 |