Behringer V-TONE GM108 Manual - Page 7
Basic Settings - amp
 |
View all Behringer V-TONE GM108 manuals
Add to My Manuals
Save this manual to your list of manuals |
Page 7 highlights
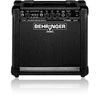
7 V-TONE GM108 User Manual (5) Use the SPEAKER switch to adjust yet another parameter: select one of the three outstanding loudspeaker simulations that best fits the amp you go with. UK: 4 x 12" speaker in an enclosed casing. US: 2 x 12" open-back speaker. FLAT: specially tailored for the GM108. (6) Hook up the output of your CD player, tape deck or walkman to the CD INPUT connector. An MD player will do too. This way, you can play music CDs or even CDs accompanying guitar-playing books and practice at the same time. Of course, you can do the same using your stereo, but then you couldn't hear both signals simultaneously via your headphones! The CD INPUT comes as a standard ¼" TRS stereo jack connector. If your CD player features RCA outputs, then you'll need an adapter or an adapter cable. You can get both at most audio stores. Fig. 5.3 in chapter 5 shows you what such an adapter looks like. You can also use a mono cable (fig. 5.4) without damaging the amp or your CD player. (7) Wanna have more bass? Then crank LOW all the way up. (8) The MID control is used to lower or increase mid frequencies. ◊ If you are playing alone, lower these frequencies relative to bass/highs to get a cool sound. When you're playing in a band, increase these frequencies relative to bass/highs to cut through. Just keep on tweaking your sound until you get it right! (9) The HIGH control regulates high frequencies. Use HIGH to get your guitar to sound "sharper". (10) Hook up your headphones using the HEADPHONE connector. Your amp's loudspeaker is automatically muted as soon as your headphones are connected. ◊ Some headphones can't handle extremely high volumes without beginning to distort. Turn the LEVEL control somewhat down until you notice the distortion is gone. (11) The MASTER control governs the overall volume of your V-TONE GM108. MASTER should always be at zero (all the way to the left) whenever you hit POWER or when you unplug the cable out of your guitar or your amp. Otherwise, loud crackling noise can occur, and they are good for neither your amp nor your ears. (12) Use POWER to power up your GM108. You should always make sure that the POWER switch is in the "Off" position when initially connecting the unit to the mains. ◊ Please take note: Merely switching the unit off does not mean that it is fully disconnected from the mains. When not using the unit for prolonged periods of time, please unplug the unit's power cord from the power outlet. 3.2 Rear panel (13) SERIAL NUMBER. Go to behringer.com and register your purchase online. (13) 1 Fig. 3.2: GM108 rear panel 4. Basic Settings The following four illustrations show you how you can setup your V-TONE GM108. These settings greatly differ from one another and let you fully exploit the sound diversity of your amp. That way, you have a solid foundation for working on developing your own, recognizable sound and tone. This setting creates a clear sound that is ideal for finger picking. If you want to use stomp boxes, this setting will be very helpful: The unique sound of your effects will come through more strongly. Fig. 4.2: Basic setting CLEAN 2
-
 1
1 -
 2
2 -
 3
3 -
 4
4 -
 5
5 -
 6
6 -
 7
7 -
 8
8 -
 9
9 -
 10
10 -
 11
11 -
 12
12
 |
 |
