Behringer V-TONE GMX212 Quick Start Guide - Page 8
Controls, Controles
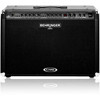 |
View all Behringer V-TONE GMX212 manuals
Add to My Manuals
Save this manual to your list of manuals |
Page 8 highlights
14 V-TONE GMX1200H/GMX212/GMX210/GMX112/GMX110 15 Quick Start Guide V-TONE GMX1200H/GMX212/GMX210/GMX112/GMX110 C ontrols (EN) Controls (17) The LEVEL control adjusts the volume of the (32) Use the SPEAKER OUT connector to respective channel. connect one additional loudspeaker to (1) The connector labeled INPUT is the ¼ " jack input of your V-TONE. (18) The PRESENCE control gives you an additional way to cut or boost the highs (GMX212 and GMX1200H). (2) On the GMX110, the CLEAN control modifies the volume of the CLEAN channel in relation to the MODELING CHANNEL. (19) The MASTER control regulates the overall volume as well as headphone volume. (3) Use the CHANNEL key to alternate between (20) The POWER switch powers up your V-TONE. the two modeling channels (except for the (21) Connect the stereo jack connector your GMX110/GMX112. This loudspeaker should have an impedance of 4 Ω. When this connector is used, the internal loudspeaker is automatically muted. (33) FUSE RETAINER/VOLTAGE SELECTOR. (34) Power is supplied via an IEC connector. (35) SERIAL NUMBER. GMX110). The channel LED (5) lights up when of the provided footswitch to the the channel is activated. On the GMX110, the CHANNEL key switches between CLEAN and MODELING CHANNEL. (4) The DRIVE control determines the amount of distortion in the respective MODELING CHANNEL. FOOTSWITCH connector. (22) MIDI IN. This connector lets you remotely control your V-TONE via MIDI. (23) You can connect two external loudspeakers (L/R) to the LOUDSPEAKER connectors (GMX212 and GMX1200H). The outputs deliver For more details on the full functionality of this product, see the product page on behringer.com and download the full manual. (5) The CHANNEL LED indicates the currently 60 W into 8 Ω per channel. selected channel. (24) The PHONES connector lets you monitor (6) Use the AMP switch to select one of the three the signal from your V-TONE with guitar amps that orient themselves on classic standard headphones. tube amps. (25) Those signals that are connected to the (7) Use the MODE switch to choose one of three SLAVE IN connectors are directly routed to possible gain settings (CLEAN, HI GAIN and the V-TONE's power amp. HOT) you wish to use with the basic sound you selected with the AMP switch. (26) You can take the stereo signal of your V-TONE at the TAPE outputs (RCA) and record it, (8) The SPEAKER switch offers the simulations of for example. two classic guitar speakers: 4 x 12" speaker in an enclosed casing (U.K.) and 2 x 12" speaker in an open casing (US). (27) The TAPE inputs (RCA) let you feed an additional stereo signal into your V-TONE. (9) The LOW control on the EQ section lets you cut or boost the bass frequencies. (28) You can take the stereo signal of your V-TONE at the LINE outputs to record it or route it to a P.A. system. This output is independent from (10) Use the MID control to cut or boost the mids. the MASTER control and does not render the (11) The HIGH control regulates the upper AUX signal. frequency range. (29) Use the AUX IN control to adjust the volume (12) If the tuner is activated, these LEDs (in connection with the FX display) indicate of the signal that is fed in via the AUX IN connectors (e. g. drum computer, playback). your guitar's tune. Activate the tuner by (30) The AUX IN lets you feed an additional stereo keeping the CHANNEL pressed for roughly signal into the amp. 2 seconds. (31) Your V-TONE features a serial insert loop that (13) The FX DISPLAY indicates either the program can be used to connect external effects (e. g. a number of the preset you selected or the wah-wah pedal). Connect the SEND connector value of the parameter dialed up using the on the V-TONE to the input of your effects unit. FX control. The SEND connector is tapped into directly (14) Use the PRESET control to dial up one of the effect presets (between 01 and 99). before (i.e. pre) the digital signal processor (DSP) of your V-TONE. Connect the output of your external effects unit to the RETURN (15) Use the IN/OUT key to activate/deactivate the connector of your V-TONE. selected effect. (16) The FX control adjusts the mix ratio between the original and the eff ect signal. (ES) Controles (16) El control FX te permite ajustar la proporción (29) Mediante el control AUX IN determinas el entre el sonido original y la señal del efecto. nivel de la señal de entrada en el conector (1) Utiliza esta entrada con jack de 6,3 mm para conectar tu guitarra con un cable jack mono que ofrezca buena resistencia mecánica y aislamiento electromagnético para evitar sorpresas desagradables durante los ensayos o conciertos. (17) El control LEVEL regula el volumen del canal respectivo. (18) El control PRESENCE te permite un aumento o atenuación adicional de agudos (GMX212 y GMX1200H). (19) El control MASTER determina el AUX IN (30). (30) AUX IN es una entrada estéreo adicional que te permite, por ejemplo, utilizar una pista de apoyo en el escenario sin que ésta sea reproducida a través de las salidas de línea (LINE OUT) que alimentan al sistema de sonorización. (2) En el GMX110, el control CLEAN regula el volumen del canal limpio (CLEAN) en relación con el canal de modelado (MODELING CHANNEL). volumen general, así como el volumen de los auriculares. (20) Con el interruptor POWER se enciende el V-TONE. (31) Tu V-TONE dispone de un punto de inserción (INSERT) que puedes utilizar para conectar efectos externos (un wah-wah, por ejemplo). Conecta la salida INSERT SEND del V-TONE (3) Con el pulsador CHANNEL puedes conmutar entre los dos canales de modelado (excepto GMX110). El LED del canal (5) activo (21) En el jack estéreo FOOTSWITCH puedes conectar el pedal incluido. a la entrada de tu procesador de efectos y la salida de éste a la entrada INSERT RETURN del V-TONE. La señal del envío se toma antes se encenderá. En el GMX110, el pulsador (22) MIDI INPUT. Este conector es la entrada MIDI de pasar por el procesador digital de señales CHANNEL conmuta entre el canal limpio y el de tu V-TONE y te permite conmutar entre (pre-DSP). de modelado. (4) El control DRIVE determina la cantidad de distorsión del canal de modelado respectivo. (5) EL LED CHANNEL indica el canal seleccionado. (6) Usa el interruptor AMP para escoger alguno de los tres sonidos básicos de amplificador de guitarra basados en modelos clásicos. canales, activar/desactivar o hacer un bypass de efectos (mediante cambios de programa), así como editar parámetros y configuraciones (presets) a través de distintos controla-dores. (23) LOUDSPEAKER. En estas salidas puedes conectar un par de altavoces externos (GMX212 y GMX1200H). Utiliza únicamente altavoces con una impedancia mínima de 8 Ω para obtener el mejor rendimiento (32) La salida SPEAKER OUT te permite conectar un altavoz adicional con impedancia de 4 Ω a tu GMX110/GMX112. Al utilizar esta salida, el altavoz interno se silencia automáticamente. (33) PORTAFUSIBLES / SELECCIÓN DE TENSIÓN. (34) La conexión a la red eléctrica se realiza mediante el cable de red con conector de tres (7) El interruptor MODE te permite elegir un de potencia. modo de ajuste de ganancia (CLEAN, HI GAIN (24) El conector PHONES te permite monitorizar espigas suministrado. (35) NÚMERO DE SERIE. y HOT) para combinarlo con el sonido de amplificador que hayas seleccionado. la señal del V-TONE mediante un par de auriculares (como nuestro modelo HPS3000). (8) El interruptor SPEAKER te ofrece dos simulaciones de cajas acústicas clásicas para guitarra: 4 altavoces de 12" en una caja cerrada (UK) y dos altavoces de 12" en una caja abierta (USA). (25) Las señales conectadas a la entrada Slave In se dirigen directamente al amplificador de potencia del V-TONE, lo que te permite conectar un preamplificador de guitarra externo o un amplificador de modelado Si quiere ver más detalles acerca de todas las funciones de este aparato, vaya a la página de este producto en nuestra web behringer.com y descárguese el manual completo. (9) El control LOW de la sección EQ te permite atenuar o aumentar las frecuencias bajas. (como el V-AMP 2 o el V-AMP PRO) sin tener que pasar por el preamplificador del V-TONE. (10) El control MID afecta las frecuencias medias. (26) En las salidas TAPE OUT dispones de la señal del V-TONE para enviarla a un grabador a (11) El control HIGH te permite modificar el rango través de conectores RCA. superior de frecuencias. (12) Si el afinador está activado, estos LEDs (en conjunto con la pantalla de FX) indican el (27) Las entradas TAPE IN te permiten alimentar una señal estéreo adicional en tu V-TONE, como una caja de ritmos o un reproductor tono de la guitarra. Activa el afinador de CD. manteniendo presionado el pulsador CHANNEL un par de segundos. (13) La pantalla FX indica el número de (28) En las salidas de línea LINE OUT puedes tomar la señal estéreo de tu V-TONE para una grabación o alimentar un sistema de configuración de efecto seleccionada o el sonorización. Esta salida es independiente parámetro elegido con el control FX. (14) Con el control PRESET puedes seleccionar una de las 99 configuraciones de efectos. del control MASTER y no reproduce la señal de la entrada AUX IN. (15) Con el pulsador IN/OUT activas o desactivas el efecto seleccionado.
-
 1
1 -
2
-
 3
3 -
 4
4 -
 5
5 -
 6
6 -
 7
7 -
 8
8 -
 9
9 -
 10
10 -
 11
11 -
 12
12 -
 13
13 -
14
-
15
 |
 |
