Beko ASD2341V Owners Manual - Page 11
Electrical connection, 3 Adjustment of the feet
 |
View all Beko ASD2341V manuals
Add to My Manuals
Save this manual to your list of manuals |
Page 11 highlights
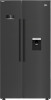
Installation 4.3 Adjustment of the feet If the product is not in balanced position, adjust the front adjustable stands by rotating right or left. 4.4 Electrical connection A WARNING: Do not use extension or multi sockets in power connection. B WARNING: Damaged power cable must be replaced by Authorised Service. In order to adjust the doors vertically, •Loosen the fixing nut at the bottom •Screw adjusting nut (CW/CCW) according to the position of the door •Tighten the fixing nut for the final position In order to adjust the doors horizontally, • Loosen the fixing bolt on the top • Screw the adjusting bolt (CW/CCW) on the side according to the position of the door • Tighten the fixing bolt on the top for the final position • Our firm will not assume responsibility for any damages due to usage without earthing and power connection in compliance with national regulations. • The power cable plug must be easily accessible after installation. Hot surface warning! The side walls of your product are equipped with cooler pipes to enhance C the cooling system. High pressure fluid may flow through these surfaces, and cause hot surfaces on the side walls. This is normal and it does not require servicing. Be careful when you contact these areas. adjusting nut fixing nut fixing nut adjusting nut 10 /29 EN Refrigerator / User Guide
-
 1
1 -
2
-
3
-
4
-
5
-
 6
6 -
 7
7 -
 8
8 -
 9
9 -
 10
10 -
 11
11 -
 12
12 -
 13
13 -
 14
14 -
 15
15 -
 16
16 -
17
-
18
-
19
-
20
-
21
-
22
-
23
-
24
-
25
-
26
-
27
-
28
-
29
-
30
-
31
-
32
-
33
-
34
-
35
-
36
 |
 |
