Beko WMP511 User Manual - Page 4
Connecting to the drain, 6 Adjusting the feet, 7 Electrical connection
 |
View all Beko WMP511 manuals
Add to My Manuals
Save this manual to your list of manuals |
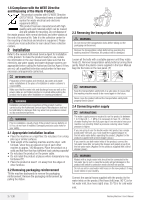
Page 4 highlights
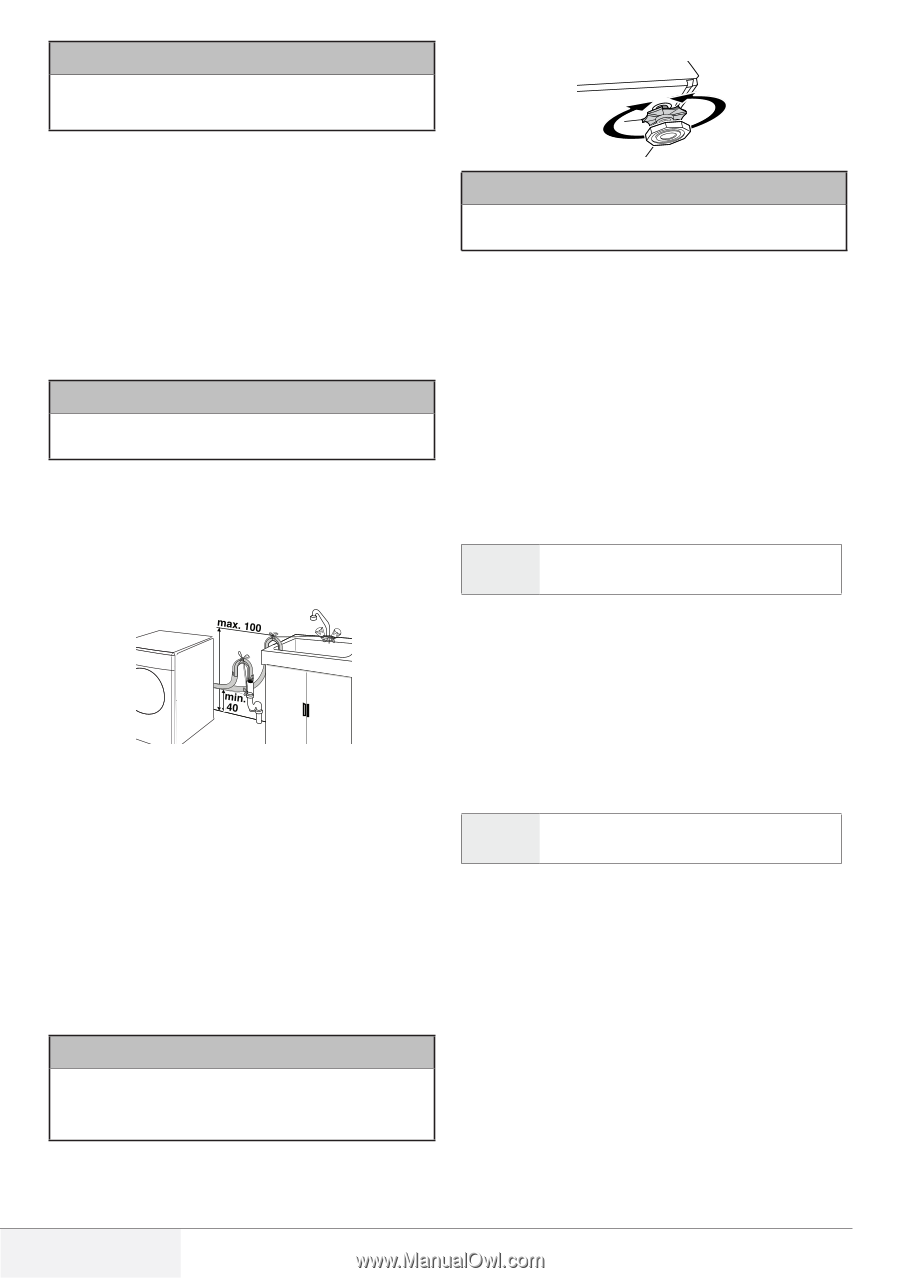
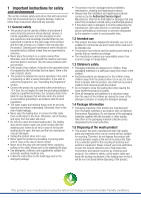
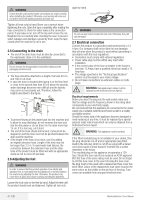
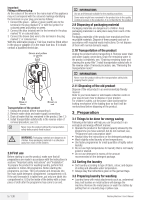
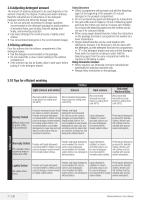
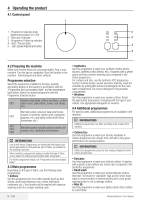
A WARNING Ensure that the cold and hot water connections are made correctly when installing the product. Otherwise, your laundry will come out hot at the end of the washing process and wear out. again by hand. Tighten all hose nuts by hand. Never use a wrench when tightening the nuts. Open the taps completely after making the hose connection to check for water leaks at the connection points. If any leaks occur, turn off the tap and remove the nut. Retighten the nut carefully after checking the seal. To prevent water leakages and damages caused by them, keep the taps closed when the machine is not in use. 2.5 Connecting to the drain • The end of the drain hose must be directly connected to the wastewater drain or to the washbasin. A WARNING Do not remove the transportation locks before taking out the packaging reinforcement. • The hose should be attached to a height of at least 40 cm, and 100 cm at most. • In case the hose is elevated after laying it on the floor level or close to the ground (less than 40 cm above the ground), water discharge becomes more difficult and the laundry may come out excessively wet. Therefore, follow the heights described in the figure. • To prevent flowing of dirty water back into the machine and to allow for easy discharge, do not immerse the hose end into the dirty water or do not drive it in the drain more than 15 cm. If it is too long, cut it short. • The end of the hose should not be bent, it should not be stepped on and the hose must not be pinched between the drain and the machine. • If the length of the hose is too short, use it by adding an original extension hose. Length of the hose may not be longer than 3.2 m. To avoid water leak failures, the connection between the extension hose and the drain hose of the product must be fitted well with an appropriate clamp as not to come off and leak. 2.6 Adjusting the feet A WARNING In order to ensure that the product operates more silently and vibration-free, it must stand level and balanced on its feet. Balance the machine by adjusting the feet. Otherwise, the product may move from its place and cause crushing and vibration problems. A WARNING Do not use any tools to loosen the lock nuts. Otherwise, they will get damaged. 2.7 Electrical connection Connect the product to a grounded outlet protected by a 13 A fuse. Our company shall not be liable for any damages that will arise when the product is used without grounding in accordance with the local regulations. • Connection must comply with national regulations. • Power cable plug must be within easy reach after installation. • If the current value of the fuse or breaker in the house is less than 13 Amps, have a qualified electrician install a 13 Amp fuse. • The voltage specified in the "Technical specifications" section must be equal to your mains voltage. • Do not make connections via extension cables or multiplugs. B WARNING: Damaged power cables must be replaced by the Authorized Service Agents. Electrical requirements Before you insert the plug into the wall socket make sure that the voltage and the frequency shown in the rating label corresponds to your electricity supply. We recommend that this appliance be connected to the mains supply via a suitable switched and fused socket in a readily accessible position. Should the mains lead of the appliance become damaged or need replacing at any time, it must be replaced by a special purpose made mains lead which can only be obtained from a Authorised Service Agent. B WARNING: This appliance must be earthed If the fitted moulded plug is not suitable for your socket, then the plug should be cut off and an appropriate plug fitted. Destroy the old plug, which is cut off as a plug with a bared cord could cause a shock hazard if inserted into a socket elsewhere in the house. The moulded plug on this appliance incorporates a 13A fuse. Should the fuse need to be replaced an ASTA approved BS1362 fuse of the same rating must be used. Do not forget to refit the fuse cover. In the event of losing the fuse cover, the plug must not be used until a replacement fuse cover has been fitted. Colour of the replacement fuse cover must be the same colour as that visible on the pin face of the plug. Fuse covers are available from any good electrical store. Loosen the lock nuts on the feet by hand. Adjust the feet until the product stands level and balanced. Tighten all lock nuts 4 / EN Washing Machine / User's Manual
-
 1
1 -
 2
2 -
 3
3 -
 4
4 -
 5
5 -
 6
6 -
 7
7 -
 8
8 -
 9
9 -
 10
10 -
11
-
12
-
13
-
14
-
15
-
16
-
17
-
18
-
19
-
20
 |
 |