Belkin AV61400-08 AV62400 User Manual - Page 13
Instructions for Mounting, RazorVision Unit
 |
View all Belkin AV61400-08 manuals
Add to My Manuals
Save this manual to your list of manuals |
Page 13 highlights
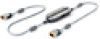
RazorVision™ Video Enhancement Cable Instructions for Mounting RazorVision Unit If you wish to mount the RazorVision to the inside of your cabinet or to your wall, please follow these steps: 1. Cut out the template on the following page along the perforated lines. 2. Place the page where you want to install the RazorVision. 3. Use a hammer and a small nail to make a starter hole for the screws. 4. Remove the template page from your cabinet or wall. 5. Tighten the supplied screws into your cabinet or wall, stopping approximately 1/8 inch (3mm) short of fully tightened. 6. Place the RazorVision mounting holes over these screws and then slide the unit down approximately 1/4 inch (6mm) until it locks in place. Replacement screws to mount the RazorVision are available at any hardware store; ask for #6 round head slotted wood screws. 12
-
 1
1 -
2
-
3
-
4
-
5
-
6
-
7
-
 8
8 -
 9
9 -
 10
10 -
 11
11 -
 12
12 -
 13
13 -
 14
14 -
 15
15 -
 16
16 -
 17
17 -
 18
18
 |
 |
