Belkin F1DC100S Installation Guide - Page 7
Connecting the KVM, Switch or Server
 |
UPC - 722868659328
View all Belkin F1DC100S manuals
Add to My Manuals
Save this manual to your list of manuals |
Page 7 highlights
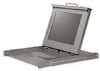
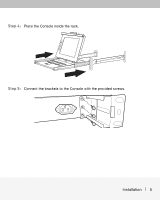
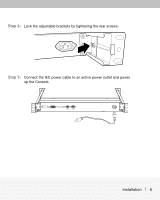
Connecting the KVM Switch or Server Step 1 Make sure your KVM switch or server is powered OFF. Step 2 Using the included PS/2 KVM Cable Kit, connect one set of VGA and PS/2 connectors to the back of the Console. (Refer to diagrams below.) Step 3 Connect the other end of the Cable Kit to the console monitor, keyboard, and mouse ports on your KVM switch or server. (Refer to diagrams below.) Step 4 Power ON the Console. Step 5 Power ON the KVM switch or server connected to the Console. You are now ready to use your LCD Rack Console. Console Console KVM Switch The Console offers two power on/off methods: • a front-control button; and • an LCD power-save (with drawer closure). Server Connecting the KVM Switch or Server 7
-
 1
1 -
 2
2 -
 3
3 -
 4
4 -
 5
5 -
 6
6 -
 7
7 -
 8
8 -
 9
9 -
 10
10
 |
 |
Connecting the KVM Switch or Server
7
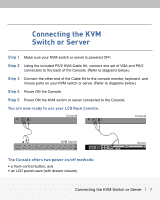
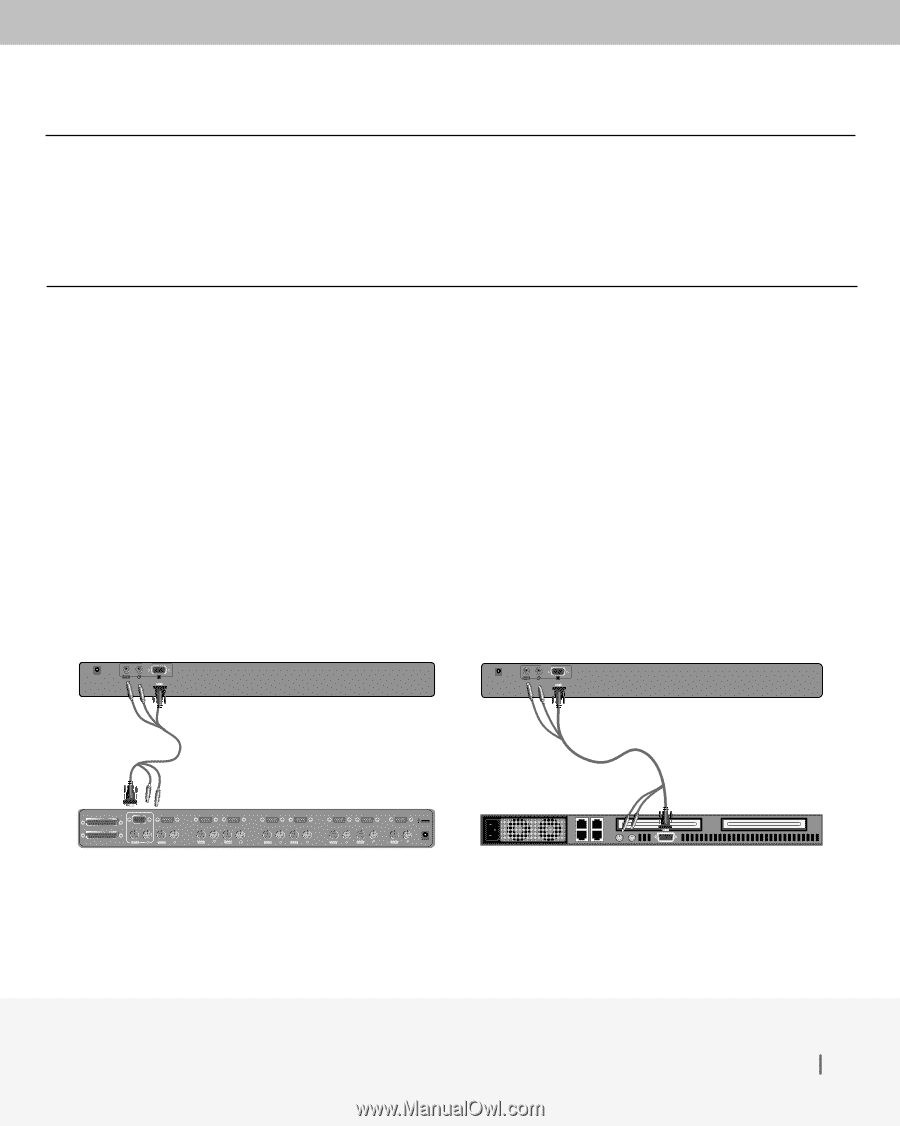
Connecting the KVM
Switch or Server
Step 1
Make sure your KVM switch or server is powered OFF.
Step 2
Using the included PS/2 KVM Cable Kit, connect one set of VGA and PS/2
connectors to the back of the Console. (Refer to diagrams below.)
Step 3
Connect the other end of the Cable Kit to the console monitor, keyboard, and
mouse ports on your KVM switch or server. (Refer to diagrams below.)
Step 4
Power ON the Console.
Step 5
Power ON the KVM switch or server connected to the Console.
You are now ready to use your LCD Rack Console.
Á¿ÂÃÀ³Ä½ÅÆÇ
ȾÇÀɳĽÅÆÇÊÁ¿ÂÃÀ³ËÆÇÅÆÇ
Console
KVM Switch
Console
Server
The Console offers two power on/off methods:
• a front-control button; and
• an LCD power-save (with drawer closure).