Belkin F1DS102U-B User Manual - Page 8
Connecting the PCs
 |
UPC - 722868438114
View all Belkin F1DS102U-B manuals
Add to My Manuals
Save this manual to your list of manuals |
Page 8 highlights
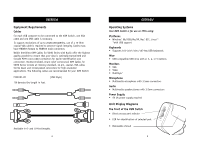
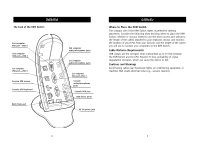
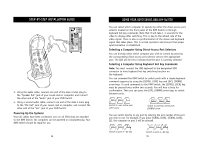
STEP-BY-STEP INSTALLATION GUIDE 7. Using the audio cable attached to your speakers, connect the male 3.5mm plug to "audio" on the Console of your KVM Switch. (This step is not required to use the KVM Switch.) 8. Using the mic cable attached to your microphone, connect the male 3.5mm plug to "mic" on the Console of your KVM Switch. (This step is not required to use the KVM Switch.) STEP-BY-STEP INSTALLATION GUIDE Connecting the PCs 1. Power up the computers. Once the operating system has loaded, connect the KVM Switch and the computer using the USB cable. The operating system will automatically install the KVM Switch. 2. Shut down your computer. Take the VGA cable and connect the male end of the cable to the VGA port on the back of the computer. Connect the female end of the VGA cable to the back of the KVM Switch for CPU1. Do this for all computers. 12 13
-
 1
1 -
2
-
 3
3 -
 4
4 -
 5
5 -
 6
6 -
 7
7 -
 8
8 -
 9
9 -
 10
10 -
 11
11 -
 12
12 -
 13
13 -
14
-
15
-
16
 |
 |
