BenQ 0.3 Wall Mount-WM03G2 Wall Mount User Manual - Page 7
Adjusting the projection angle
 |
View all BenQ 0.3 Wall Mount-WM03G2 manuals
Add to My Manuals
Save this manual to your list of manuals |
Page 7 highlights
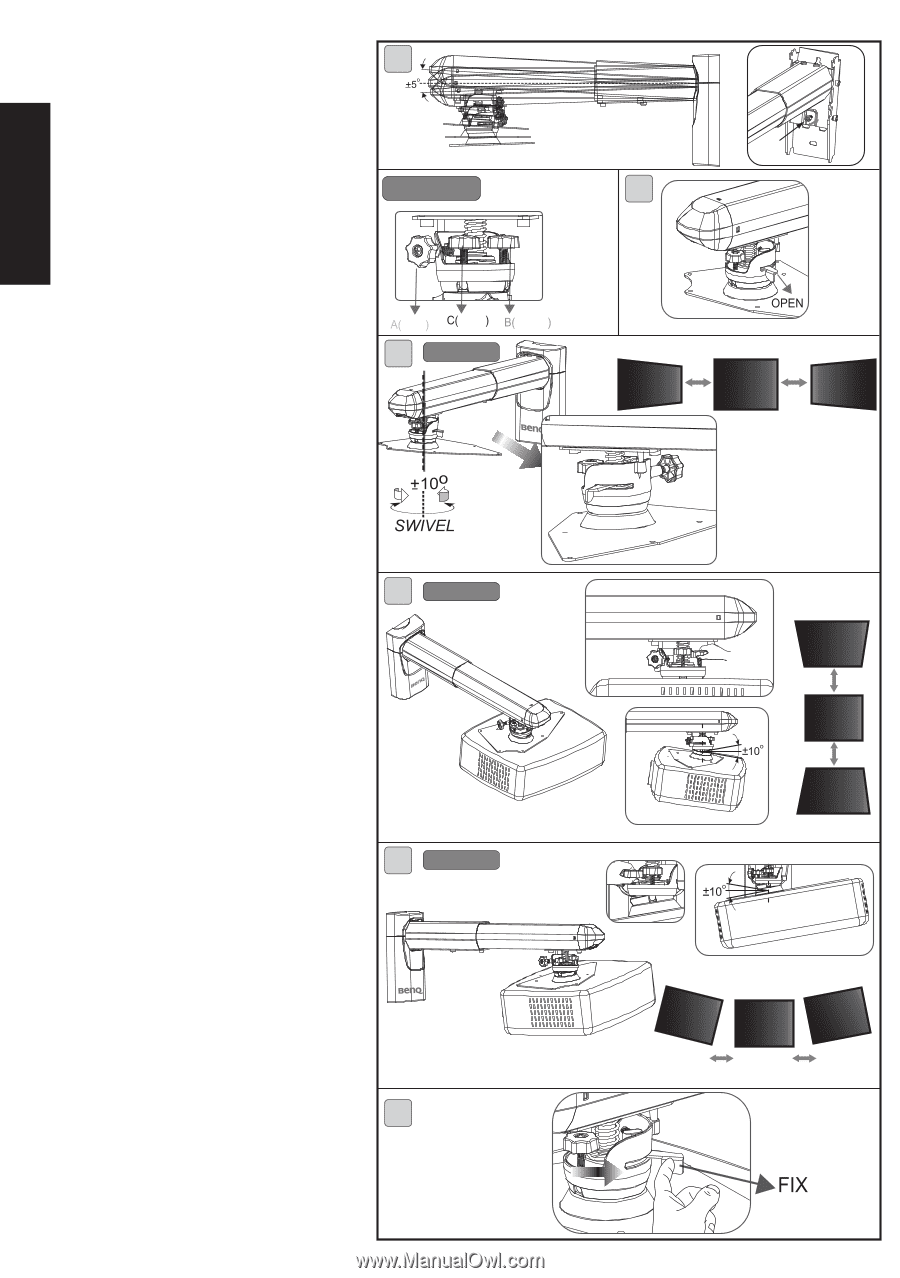
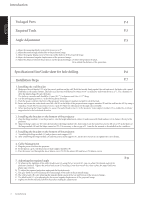
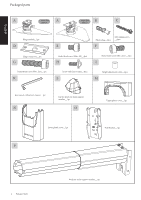
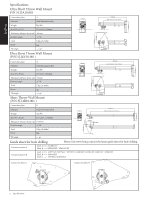
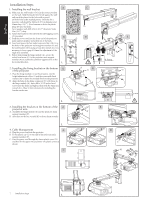
English Installation Steps 5. Adjusting the projection angle A. By adjusting the tightness of the socket head screw (G) using the hex wrench (K), you can adjust the desired angle of the projector cantilever. Tighten the socket head screw (E) by using a 5mm hex wrench (K), then replace the upper and lower plastic caps (M)(N). B. Push the knobs forwards to adjust the required projection angle. C. The gray knob (A) is used to adjust the sideways rotation angle of the projected image. D. The yellow knob (B) is used to adjust the angular displacement of the top and bottom of the projected image. E. The black knob (C) is used to adjust the horizontal angular movement of the projected image. F. Be sure to push back and tighten the knobs securely after making any adjustment. A Knob color indication G B Gray Black Yellow C Knob A (gray) D Knob B (yellow) E Knob C (black) F 8 Installation Steps
-
 1
1 -
 2
2 -
 3
3 -
 4
4 -
 5
5 -
 6
6 -
 7
7
 |
 |