BenQ FP882 User Manual - Page 7
Installation
 |
View all BenQ FP882 manuals
Add to My Manuals
Save this manual to your list of manuals |
Page 7 highlights
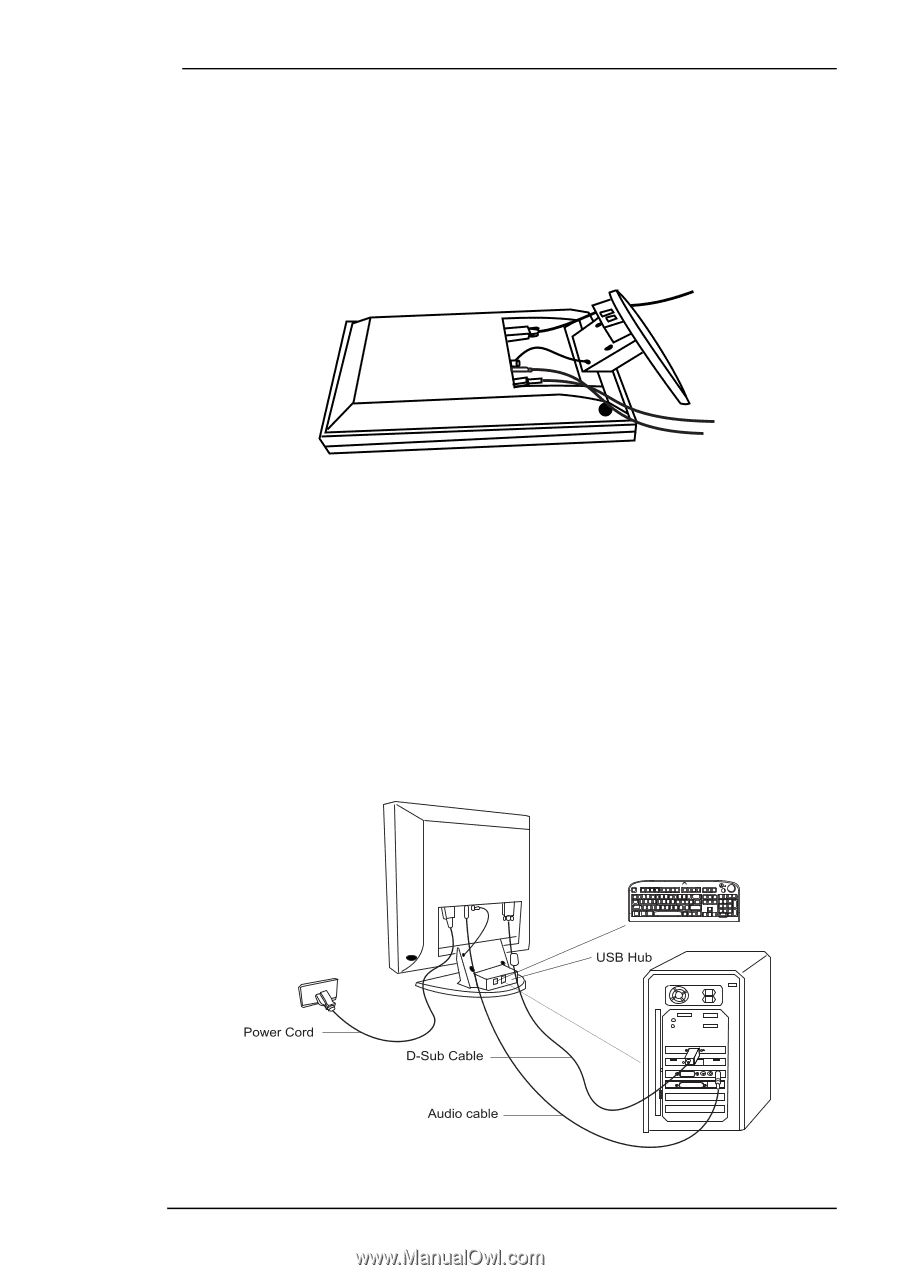
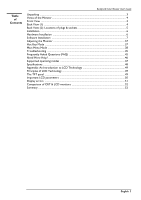
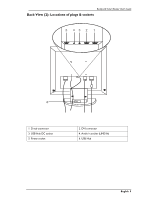
BenQ LCD Color Monitor User's Guide Installation Hardware Installation A. Make sure that the computer and monitor's power are both turned off. Please follow the steps to install your LCD monitor. 1 . Connect the signal cable and power cord to BenQ LCD monitor. 2 . Connect the audio cable to the Audio Input of BenQ LCD monitor. B. Connect the signal cable to the VGA output of the graphics card on the computer. C. Connect the audio cable to your computer. D. Connect the power cord at the back of the monitor to an AC power socket. Please make sure that the socket is not blocked or covered, so you can disconnect the unit from AC supply if you need to. Your monitor is equipped with an automatic power supply for a voltage range from 100 to 240 Volt at a frequency of 50 to 60 Hz. Be sure that your local power is within the supported range. If you are unsure, ask your electricity supplier. E. A USB-Hub is integrated in the base of your monitor pedestal. USB connectors automate peripheral connection by using plug&paly installation procedures. 1. Connect your USB Hub to your computer with USB cable. 2. Connect USB compatible devices such as a keyboard, mouse and so on to any of 2 downstream connectors. English 6
-
 1
1 -
 2
2 -
 3
3 -
 4
4 -
 5
5 -
 6
6 -
 7
7 -
 8
8 -
 9
9 -
 10
10 -
 11
11 -
 12
12 -
13
-
14
-
15
-
16
-
17
-
18
-
19
-
20
-
21
-
22
-
23
-
24
-
25
-
26
-
27
-
28
-
29
-
30
-
31
-
32
-
33
-
34
-
35
-
36
-
37
-
38
-
39
-
40
-
41
-
42
-
43
-
44
-
45
-
46
-
47
-
48
-
49
-
50
-
51
-
52
-
53
 |
 |