Beretta PX4 Storm Compact Beretta PX4 Storm Subcompact User Manual - Page 23
Barrel Obstructions, Check, Field Stripping - takedown
 |
View all Beretta PX4 Storm Compact manuals
Add to My Manuals
Save this manual to your list of manuals |
Page 23 highlights
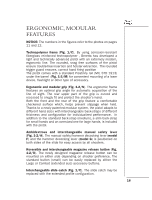
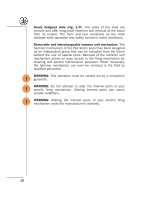
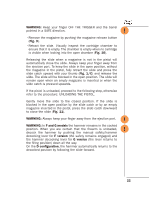
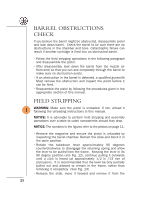
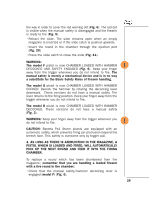
! 23 BARREL OBSTRUCTIONS CHECK If you believe the barrel might be obstructed, disassemble pistol and look down barrel. Check the barrel to be sure there are no obstructions in the chamber and bore. Catastrophic failure can result if another cartridge is fired into an obstructed barrel. • Follow the field stripping operations in the following paragraph and disassemble the pistol. • After disassembly, look down the barrel from the muzzle (or front end) so that you can see completely through the barrel to make sure no obstruction exists. • If an obstruction in the barrel is detected, a qualified gunsmith Must remove the obstruction and inspect the pistol before it can be fired. • Reassemble the pistol by following the procedures given in the appropriate section of this manual. FIELD STRIPPING WARNING: Make sure the pistol is unloaded. If not, unload it following the unloading instructions in this manual. NOTICE: It is advisable to perform field stripping and assembly operations over a table to catch components should they drop. NOTICE: The numbers in the figures refer to the photos on page 11. • Remove the magazine and ensure the pistol is unloaded by inspecting the barrel chamber. Retract the slide and block it in the open position. • Rotate the takedown lever approximately 90 degrees counterclockwise to disengage the retaining spring and allow the lever to be pulled from the frame. Keeping the lever in its 90 degree position (see Fig. 12), continue pulling it outwards until a click is heard (at approximately 1/2 in /13 mm of protrusion). It is recommended that the lever be only partially pulled out and allowed to remain in the frame, rather than removing it completely (See Fig. 13) • Release the slide, move it forward and remove it from the
-
 1
1 -
2
-
3
-
4
-
5
-
6
-
7
-
8
-
9
-
10
-
11
-
12
-
13
-
14
-
15
-
16
-
17
-
 18
18 -
 19
19 -
 20
20 -
 21
21 -
 22
22 -
 23
23 -
 24
24 -
 25
25 -
 26
26 -
 27
27 -
 28
28 -
29
-
30
-
31
-
32
-
33
-
34
-
35
-
36
-
37
-
38
-
39
-
40
-
41
-
42
-
43
-
44
-
45
-
46
-
47
-
48
 |
 |
