Bernina Artista 730 Manual
Bernina Artista 730 Manual
 |
View all Bernina Artista 730 manuals
Add to My Manuals
Save this manual to your list of manuals |
Bernina Artista 730 manual content summary:
- Bernina Artista 730 | Manual - Page 1
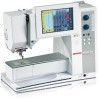
730, Bernina-Record Automatic Zigzag Sewing Machine with automatic ornamental stitch device Model 731 Automatic Zigzag Sewing Machine with automatic ornamental stitch device Model 732 Automatic Zigzag Sewing Machine without automat ic ornamental stitch device FR. GEGAUF LTD. BERNINA SEWING MACHINE - Bernina Artista 730 | Manual - Page 2
Ornamental Stitch Sewing 56 Blindstitch Sewing 57 Tucking 59 Hemstitch Sewing 62 Embroidering Initials 67 Eyelet Embroidery 69 Common Causes of Machine Troubles; how to avoid them 72 Accessories for Class 730 79 Accessories for Class 731 80 Accessories for Class 732 . ... Third - Bernina Artista 730 | Manual - Page 3
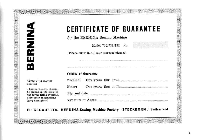
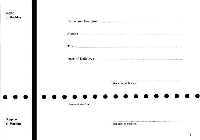
tM Ui CERTIFICATE OF GUARANTEE for the BERNINA Sewing Machine Model 730/731/732 No.. (Please quote in all your correspondences) Terms of guarantee overleaf (This certificate should be signed on the basis of the terms listed overleaf. only after instructions have been given) Validity of Guarantee - Bernina Artista 730 | Manual - Page 4
during five years in the machine, and during two years in the motor of the BERNINA Model 730, 731 or Model 732 Sewing Machine supplied by us. All if the buyer does not treat the machine in the right way, as indicated in the instructions for use, if the machine is not properly cleaned and lubricated, - Bernina Artista 730 | Manual - Page 5
Buyer of Machine Name mid Surmitne: Street: Town: Date of Delivery: • • • Supplier of Machine (Signature of Buyer) (Stamp of the firm) (Signature of Supplier) 3 - Bernina Artista 730 | Manual - Page 6
Date Notes o£ BERNINA Representative regarding instructions, home calls, and possible warranty work Notes - Bernina Artista 730 | Manual - Page 7
Thin Instruction-Book is applicable /or both Models 730, 731 and 732, with the exception of .tAntontaric Ornamental Sfitchc4a on page 5t. Removing and replacing Fla. 1 To unpack the machine, put the carrying case in upright position upon a table.and open the ease as you can see in Fig. 1. Grip the - Bernina Artista 730 | Manual - Page 8
9 10 11 12 13 14 15 8 7 6 16 v 3 2 17 18 19 20 record 21 22 • Wr' 23 26 25 24 6 Flu. 2 - Bernina Artista 730 | Manual - Page 9
a l3ERNINA-Record Sewing Machine, Model 730 (knee operated). The controls referred to in the Operating Instructions being marked and indentified. 1 Cover plate 2 Needle plate 3 Needle holder 4 Thread tension regulator 5 Face plate 6 Light switch 7 Take-up lever 8 Thread tension and thread guide - Bernina Artista 730 | Manual - Page 10
Fig. 2a shows a BERNINA Sewing Machine, Model 731 (knee operated). The controls referred to in the Operating Instructions being marked and identified. 9 10 11 12 13 14 15 8 7 6 BERNINA 5 4 3 1. • 16 17 18 19 20 21 22 23 26 25 24 - Bernina Artista 730 | Manual - Page 11
Light switch 7 Take-up lever 8 Thread tension and thread guide 9 Thread tension control plate 10 Sight hole for tension control 11 _Plate Fig, 3 shows a BERNINA Sewing Machine, Model 732 (knee operated), whereon the controls referred to in the Operating Instructions are marked and identified. 26 - Bernina Artista 730 | Manual - Page 12
Electrical part The drive of the BERNINA-Record, Model 730 (731/ 732), is functioning by the universal motor mounted at the rear. With knee lever operated machines motor and rheostat control are concealed beneath the protective housing. With pedal operated machines only the motor appears under this - Bernina Artista 730 | Manual - Page 13
. 5 tread plate downwards, the greater the speed of the machine. Practise speed control several times without threading the machine. The lamp is mounted in the swivelled head cover to enable an even distribution of light over the entire sewing area, completely free from any glare. Care of the motor - Bernina Artista 730 | Manual - Page 14
fall out of the bobbin case. 14 • FL:. '1 Spooling the Under Thread The winding of the bobbin bearing the under thread, with BERNINA of the Models 730, 731 and 732, is done with an automatic winder. It is placed below the hinged cover 14 which is connected in a hinged way with the head - Bernina Artista 730 | Manual - Page 15
of the two reel-pins 35. In order to prevent the whole machine from running needlessly when winding, turn with your right hand the handwheel the reel to the winder pretension device 34, and from here around thread guide bolt 38 to the bobbin 37. The thread should wind in clockwise direction - Bernina Artista 730 | Manual - Page 16
Inserting the bobbin into the case and threading the under thread Replacing bobbin case with bobbin into shuttle When replacing bobbin into case, make sure that bobbin turns in direction of arrow when thread is pulled (see fig. 9). After insertion ob bobbin pass thread through slot 27, below tension - Bernina Artista 730 | Manual - Page 17
-Record, Model 730, 731 and 732. In order to obtain satisfactory results, use only these first class needles, as also highgrade thread. First select the thread suitable for the intended work, and then the needle to accommodate the thread, using tothisintent the table on the oppositepage as a guide - Bernina Artista 730 | Manual - Page 18
the Upper Thread (Fig. 11 and 12) With BERNINA threading is done in one go from reel to 35 43 7 Fist. 11 4- - arranged. The central tension disc is protruding 45 somewhat from slot 44. When sewing with one • • thread only, it does not matter whether the thread is drawn at the left or at - Bernina Artista 730 | Manual - Page 19
for control. When the fixed marked line on top arm and the dot on mobile part of thread tension device are set one above the other, the perfect thread tension is attained. - With BERNINA sewing machines a numbered scale is not necessary. By means of the adjusting disc 9 the thread tension can - Bernina Artista 730 | Manual - Page 20
. make sure that locking lever 47 points to the right. In order to clamp the sewing table rigidly to the free arm, lever 47 is placed upright. Thread cutter The pressure foot holding device on the BERNINA Sewing machines is designed in such a way that it can also serve al thread cutter. This small - Bernina Artista 730 | Manual - Page 21
the machine Fluff is collected during sewing, particularly around the shuttle. Such fluff may detrimentally affect the proper function of the machine and it move it up towards the stand and insert the plate tongue into the guide provided in the stand. Then depress the cover plate at its foremost - Bernina Artista 730 | Manual - Page 22
off unused and may soil the fabric. Always oil your machine before sewing and not afterwards. Use clear oil which is free from resin and acid, such as is supplied by all the BERNINA representatives. The use of inferior oils may cause your machine to jam when the oil dries up and becomes tacky - Bernina Artista 730 | Manual - Page 23
Expert oiling guarantees the silent running of the sewing machine and increases its durability. The oiling points not visible in the figures 20 and 21 are indicated with red colour on the machine itself. When the machine has been kept in a cold room, it should be opened and placed in a warm room - Bernina Artista 730 | Manual - Page 24
sewing work involve the necessity of frequent changes of the various presser feet. For this reason the BERNINA-Record, Models 730,731 and 732 stitching adjust the machine as follows: 1. Raise thread take-up lever to its uppermost position. 2. Insert zigzag foot. If you intend to sew quite a lot - Bernina Artista 730 | Manual - Page 25
the stitch length dial above said knob. 7. Slide on sewing table. Make sure that the handwheel is always turned towards the operator. (Same as just above number zero, the machine will sew backward. Forward and backward sewing serves to strengthen certain sewing areas and to secure the ends - Bernina Artista 730 | Manual - Page 26
operated unnecessarily. 5. Adjust zigzag knob 18 upon zero position. The ItERNINA-Record, Models 730, 731 and 732, can be used for darning with or without the slide-on table, depending on the kind of material to be darned. Darning table linen, towels a.s.o. Cut out the whole damaged spot, so that - Bernina Artista 730 | Manual - Page 27
thus been completed, continue, as shown in fig. 24 b, to sew a second layer of threads across the first line of stitches, whereby Now pull the stocking over the free arm and the darning apparatus, until the damaged area comes to lie in the middle of the darning ring. It will be advantageous to slide - Bernina Artista 730 | Manual - Page 28
now centered in the darning ring can easily moved in any direction. When beginning it will be useful to sew a full circle around the damaged area to prevent running. Then sew aline of stitches across the direction of the fabric stitches. The lines should be of different lengths and as close to one - Bernina Artista 730 | Manual - Page 29
purpose. Fold the edge of the material over to the desired hem width and guide the fabric into the spiral-type guide tongue of the raised hemmer as far as the needle, then lower the hemmer. When sewing, lightly guide the prefolded edge (see fig. 29). If too much fabric enters the hemmer, the - Bernina Artista 730 | Manual - Page 30
Gathering foot (Only supplied against extra charge) Insert gathering foot. Adjust machine upon plain stitch sewing. Put the material to be gathered under the gathering foot, that is to say not into the transverse slot. Lower the gathering foot by means - Bernina Artista 730 | Manual - Page 31
machine upon plain stitch sewing and insert edger instead of regular presser foot. The edger with its stitch hole placed farthest to the right of foot is specially suited for edge stitching. For this purpose the edge stitcher is used without the quilting guide. The edger with the quilting guide - Bernina Artista 730 | Manual - Page 32
THE ZIPPER FOOT (specially designed for inserting zippers; available only against extra charge) Pig. 32 411 When inserting zippers be sure that for the stitching of the left side of the zipper the needle position to the right must be used (see fig. 34). Thus knob 17 should be set to the right ( - Bernina Artista 730 | Manual - Page 33
Layer of material Zipper Presser foot base ez Presser foot base Zipper Layer of material -- Needle insertion to the left "lc Presser foot base Fig. 33 U Needle insertion to the right Presser foot base Fla. 34 31 - Bernina Artista 730 | Manual - Page 34
Zigzag Zigzag Sewing, with service by hand Adjustment of Stitch Width At the right-hand top of the body of the machine the adjustment knob knob 18 a lever 17 is provided. This lever can also be adjusted when sewing, but when the machine is at a standstill, it can be set only when the needle is - Bernina Artista 730 | Manual - Page 35
sewing set the machine as follows: 1. Raise thread take-up lever 7 to its uppermost position. 2. Insert zigzag foot (not to be mistaken for the zig- zag embroidery M being set on sewing. 5. Adjust stitch regulator 22 onto two wished for stitch length. 6. Fix slide-on table. 7. Lower zigzag - Bernina Artista 730 | Manual - Page 36
Elastic Sewing of Knitted Goods • Always use darning thread for basting tricot and other knit goods. Never do it with basting thread. • Use perfectly straight and pointed needles. Size 70 to 80. ■ The thinnest area of material must be placed tinder and to the left of, presser foot. If the seam is - Bernina Artista 730 | Manual - Page 37
Stitch a zigzag seam along edge and about the depth of presser foot. Adjustment of machine: Zigzag Width upOn 3 or 4 Stitch length upon 1 Tricot seams With ordinary tricot it is advisable to make a fold with all seams and then stitch across. Zigzag width upon 2.5-3 Stitch length upon 1.5 - Bernina Artista 730 | Manual - Page 38
If a seam is stitched without being folded along the edge, it is recommended to stitch first a straight seam with plain stitches approximately 5/04" inside the edge, in place of basting, whereby the material and the seam are prevented at the same time from being distorted. Zigzag width upon zero - Bernina Artista 730 | Manual - Page 39
The tricot or elastic side seam Fir. 17. ktibi •••si • .."•)• Place both pieces of material on top of one another and stitch a first seam along the edge, the depth of a presser foot. Zigzag width L5 Stitch length Cut off projecting edge at about Lis" distance from seam. Now stitch another - Bernina Artista 730 | Manual - Page 40
to be sewn, approximately 5/64" to I/N" inside edge, in order to facilitate sewing on. Now attach the lace with zigzag stitches and then cut off the material hemmer too. The material or elastic fabric is inserted in the spiral guide as for roll hemming. The Zigzag stitch bridges the entire seam. - Bernina Artista 730 | Manual - Page 41
rather stiff material such as Poplin, Reps, or Wool a. s. o., a pearl yarn no. 8 is introduced into the guide hole of the embroidery foot and stitched onto the undersite of the fabric, sewing a zigzag stitch of 1.5, with a stitch length of 1.5 to 2. At.a distance of 5/64" a second row is sewn - Bernina Artista 730 | Manual - Page 42
ease. The sewing of the buttonhole is effected without, turning the cloth around. This can be made either step by step, the machine being stopped after normal sewing, see fig. 50, a hole has been drilled through the finger of the bobbin case through which the under thread has to be 17 It record Fig - Bernina Artista 730 | Manual - Page 43
the bobbin case is threaded as explained in this instruction booklet .on page 12. For sewing buttonholes, the machine should be adjusted as follows : 1. Insert buttonhole presser foot. 2. Feed-change knob 23 (fig. 2) must stand at sym- bol » sewing 3. Draw zigzag knob grip lever 18 downwards, so - Bernina Artista 730 | Manual - Page 44
18 and give it a strong push to the left, until it hurts stop Pig. zg Ti. Then sew a few end stitches, and after that stop the machine again and set the needle up fig. 57). 3. Sewing the righthand edge Bring the zigzag lever 18 back from lefthand stop II to righthand stop I and - Bernina Artista 730 | Manual - Page 45
stop II - towards the front and push it entirely to the right, passing thereby over stop 1 i see fig. 60). In this position the machine now sews the plain stitch, in order to make fastening threads. When stitching these securing fastening threads, it will be advisable to hold the fabric slightly - Bernina Artista 730 | Manual - Page 46
The BERNINA-Record, Model 730, is provided with a patented device by means of which the distance between stitches can be altered when sewing buttonholes with numbers equivalent to those of the fixed scale on the machine itself machine stkuid ),If number 1 is placed opposite the fixed scale, - Bernina Artista 730 | Manual - Page 47
use thin cotton cord and place it, as is shown in fig. 63, on the nose at the back end of the buttonhole foot, and sew the buttonhole in the described manner. The cord loop projecting beyond the back end of the finished buttonhole is tightened in such a way that the - Bernina Artista 730 | Manual - Page 48
away before having changed over from buttonhole adjustment to zigzag and straight plain sewing, in order to have the machine ready for sewingtheseworks whenusingit-another day. Sewing buttonholes without using the automatic buttonhole device Buttonholes may also be.sewn without using the automatic - Bernina Artista 730 | Manual - Page 49
11. Set zigzag knob 18 again at twice the bead width and sew the end stitches for the buttonhole bar. Again pull material somewhat back to and sew a few fastening stitches, again pulling the material lightly towards you to shorten the feed. 13. Finally lay the work on the wooden support and cut - Bernina Artista 730 | Manual - Page 50
are sewn in like manner too. ..:41.efr-PYS Fig. 66 Sewing on Buttons 1. Position needle to stitch in on the left. Adjust lever For top and bottom thread use darning cotton. Wool is employed to cover the damaged area. Top and bottom threads, and darning wool of a colour corresponding to the piece - Bernina Artista 730 | Manual - Page 51
Woollen socks are pulled over the free arm without using the darning ring for stockings. Darning with wool is performed in two stages, i. e.: 1. The damaged area is covered with wool. 2. The covering wool rows are sewn down. As appears clearly from fig. 67 a, the wool is introduced in the slot of - Bernina Artista 730 | Manual - Page 52
work is mainly employed on collars, ladies' and children's dresses, linen, and the like. The buttonhole presser foot is advantageously used for this type of sewing work. First draw the shapes to the underside of the cloth. The fabric from which the designs are cut should be of a pleasant contrasting - Bernina Artista 730 | Manual - Page 53
stitches, hand-operated Fig, 10 u Zigzag embroidering foot (1 rod line) Ordinary zigzag sewing font The zigzag ornamental stitch With the BERNINA zigzag sewing machine device on the Models no. 730 and 732 the most various ornamental stitcheS can be produced in the simplest possible manner - Bernina Artista 730 | Manual - Page 54
Fis; 71 Y :cord tS 21 32 The adjustment of the right stitch length for ornamental stitches and buttonholes is very easy on the BERNINA sewing machine thanks to the patented satin stiteh control. Suppose the stitch length regulating lever is on no. 2 and the stitch length must be adjusted - Bernina Artista 730 | Manual - Page 55
BERNINA-Record sewing machine of the Model 730 and 731 is equipped with the automatic oramental stitch device which enables the creation of ornamental stitches to be sewn without manipulating any controls. Just select the pattern desired, set the control lever, and then simply concentrate on guiding - Bernina Artista 730 | Manual - Page 56
made in the following manner: Pull lever 12 to the right in its guiding slot and displacing it until its line and the stitch symbol line up. stitch width. After threading the machine, ornamental stitching can be started exactly in the same way with or-dinary sewing. When switching back to normal - Bernina Artista 730 | Manual - Page 57
can be caried by changing the stitch length from almost zero to four. A further variation is feasible by combining individual ornamental stitches during the sewing itself as seen from the examples on side of this page. a) Patterns combined with each other (see fig. 74). b) Different seam patterns - Bernina Artista 730 | Manual - Page 58
THE ORNAMENT INDICATOR The BERNINA-Record of the Model 730 and 731 has been equipped with a novelty, the machine is beginning to sew said ornament. This device will be of great importance when sewing ornaments of which only one single ornament has to be stitched and placed within a certain area. It - Bernina Artista 730 | Manual - Page 59
elastic cloth guide between the fingers on its base, but otherwise is identical with an ordinary presser foot. Blindstitch sewing can be accomplished by means of the built-in blindstitch cam. 1. Setting of machine when sewing with ordinary zigzag stitch a) Attach blindstiich foot. b) Deflect needle - Bernina Artista 730 | Manual - Page 60
58 After having threaded the machine, put the lower flat piece of cloth underneath the blindstitch foot; then place the upper piece of material on top and fold it in such a way that it always touches the elastic guide; lower the blindstitch foot, and start sewing. The zigzag stitch width should - Bernina Artista 730 | Manual - Page 61
Pintucking i The complete pintucking attachment comprises the following parts: 3 double needles for pintucks of approximately she, 1/8" and 3/ 32". 3 pintuckera with 3, 5 and 7 grooves. When preparing the machine for pintucking, proceed as follows: 1. Set needle to centre position in stitch hole by - Bernina Artista 730 | Manual - Page 62
lever 8 Thread tension 9 Thread tension regulation disc. 35 Spool pin 44 Thread guide slit 45 Needle holder eyelet. Threading the two upper threads To thread the two upper threads of the machine for pintucking, proceed aS for normal sewing. Place the two reels of thread onto the two pins 35 of the - Bernina Artista 730 | Manual - Page 63
the container through the groove in the flap, up through the hole in the stitch plate between both teeth rows of the feed dog, and guided away from operator below and to the back of the pintucking foot. Ornamental stitch with double needle When employing one pintucking needle and the standard - Bernina Artista 730 | Manual - Page 64
hemstitch needle on BERNINA zigzag sewing machines Introduce the hemstitch needle into the sewing machine instead of the normal sewing needle. Threading is done in the well known manner (see Operation Instructions on page 14). As upper thread use darning or fine embroidery thread (f. i. DMC no - Bernina Artista 730 | Manual - Page 65
stitch width 2 and stitch length adjusting lever to 1. After having brought up the under thread, lay the fabric under the presser foot and begin to sew in the well known manner. The result will be a hemstitch as shown in fig. 83. If suitable ornamental stitches of the automatic system are used - Bernina Artista 730 | Manual - Page 66
seam. Leave the needle stuck into the fabric at the side where the second seam is wanted. Then turn the fabric by 180 degrees and sew the second seam alongside the first one. Stitch: lenght 1.5, width 3.5 The two outer seams are ornamental stitch no. 19 Stitch: length 1, width 3.5. Fie. f,G , Two - Bernina Artista 730 | Manual - Page 67
plate and zigzag presser foot Insert the double hemstitch needle into the machine instead of the normal sewing needle. The threading of the upper threads is made in the same way as when sewing pintueks (see Operating Instructions). As upper thread use f.i. DREG no. 100 with lefthand twist As lower - Bernina Artista 730 | Manual - Page 68
If a hemstitch known as two-needle hemstitch must be made, a second working operation will be needed. After having sewn the single hemstitch, turn the fabric by 180 degrees, allowing the point of the wide needle to touch the fabric which is then turned round that point. Now the second seam can be - Bernina Artista 730 | Manual - Page 69
is set almost upon zero. After having placed the embroidery frame under the needle, the under thread should be brought up. Lower sewing foot. Start machine and keep it running smoothly at a fair speed, thus achieving the best results. Guide the frame with both hands slowly and steadily along the - Bernina Artista 730 | Manual - Page 70
sew edge A and after completion, having reached the top of the initial, stop the machine, leave the needle stuck in the fabric with stitch to the right, and turn the embroidery and turn embroidery frame into the new direction. In that case you will not sew over the already sewn edge or part of it, - Bernina Artista 730 | Manual - Page 71
and round embroideries on the BERNINA- Record. With its aid different hole sizes can be surrounded, and round embroideries up to a diameter of approximately one inch can be produced. During sewing around the stitch width may be varied at will. For eyelet embroidery work arrange the machine as - Bernina Artista 730 | Manual - Page 72
normal stitch plate must be charged against the eyelet embroidery stitch plate which is foreseen with exchangeable slide provided with guide journals, whereby also the special embroidery presser foot must be inserted. Always use the embroidery frame We recommend winding strips of cloth around its - Bernina Artista 730 | Manual - Page 73
time. Then allow the machine to operate at regular speed and tuts at the same time three or four times around the guide pin at the same regular is reversed, as shown in fig. 97, the guide pin can be used as a centre in sewing circular embroideries. In doing so the needle pierces through the long - Bernina Artista 730 | Manual - Page 74
troubles are resulting from faulty manipulations of the machine. However, should other causes be presumed, the machine sewing work needle size no. 80 or no. 90. Re sizes of needles and threads see page 13; c) the machine thumb of left hand press down spring lever part 55 to the left of shuttle race, - Bernina Artista 730 | Manual - Page 75
quality. Needles should always be purchased at a BERNINA shop; b) Needle incorrectly set. Long groove thread and needle is not the right one (see table on page 13); e) Upper tension thread is too machine has been in use for a long time, thread breaking may have a cause only a competent sewing machine - Bernina Artista 730 | Manual - Page 76
the front, after having finished with the sewing work. Thus the needle got bent. Always remove the material from the machine by pulling it back from under the ; 2. use perfect needles of size no. 70 or 80; 3. the thin area of the material should be placed to the left under the presser foot; 4. sizes - Bernina Artista 730 | Manual - Page 77
drive belt may be too tight or too loose (ask the expert !) ; b) the sewing machine has been idle for a long time in a moistened room. In such a case it every sewing operation the thread take-up lever is raised to its uppermost position. This precaution will greatly help to avoid any troubles. - Bernina Artista 730 | Manual - Page 78
Notes of BERNINA Representative regarding instructions, home calls, and possible warranty work Date Notes 76 - Bernina Artista 730 | Manual - Page 79
Date Notes of BERNINA Representative regarding instructions, home calls, and possible warranty work Notes 77 - Bernina Artista 730 | Manual - Page 80
Date Notes of BERNINA Representative regarding instructions, home calls, and possible warranty work Notes 78 - Bernina Artista 730 | Manual - Page 81
support 1 plastic oiler 1 brush 1 darning attachment for stockings 1 pack of assorted needles of the 705 system 1 twin needle, 2 mm 53 11 10 00 53 10 60 00 in Carrying Case: 1 sewing table 1 motor cable with plug 1 pedal starter (only with machines provided with pedal starting device 1 instruction - Bernina Artista 730 | Manual - Page 82
buttonholer opener 1 wooden support 1 darning attachment for stockings 1 pack of assorted needles of the 705 system 53 11 10 00 53 10 60 00 In Carrying Case: 1 sewing table 1 motor cable with plug 1 pedal starter (only with machines provided with pedal starting device 1 instruction book 53 06 48 - Bernina Artista 730 | Manual - Page 83
1 wooden support 1 darning attachment for stockings 1 pack of assorted needles of the 705 system 1 pintuck foot with 7 grooves In Carrying Case: 53 11 10 00 53 10 60 00 sewing table 1 motor cable with plug 1 pedal starter (only with machines provided with pedal starting device 1 instruction book - Bernina Artista 730 | Manual - Page 84
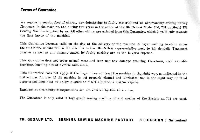
FR. GEGAUF LTD., BERNINA Sewing Machine Factory, STECKBORN 46, fi ea 41, -•:. C ,ry1a G4 • V~Va1131,:tlt.1 aaa 'a oa t iii % %VUT 'S ',Lvtitt
-
 1
1 -
 2
2 -
 3
3 -
 4
4 -
 5
5 -
 6
6 -
 7
7 -
8
-
9
-
10
-
11
-
12
-
13
-
14
-
15
-
16
-
17
-
18
-
19
-
20
-
21
-
22
-
23
-
24
-
25
-
26
-
27
-
28
-
29
-
30
-
31
-
32
-
33
-
34
-
35
-
36
-
37
-
38
-
39
-
40
-
41
-
42
-
43
-
44
-
45
-
46
-
47
-
48
-
49
-
50
-
51
-
52
-
53
-
54
-
55
-
56
-
57
-
58
-
59
-
60
-
61
-
62
-
63
-
64
-
65
-
66
-
67
-
68
-
69
-
70
-
71
-
72
-
73
-
74
-
75
-
76
-
77
-
78
-
79
-
80
-
81
-
82
-
83
-
84
 |
 |
BERNINA
MIllanMj
Model
730,
Bernina
-Record
Automatic
Zigzag
Sewing
Machine
with
automatic
ornamental
stitch
device
Model
731
Automatic
Zigzag
Sewing
Machine
with
automatic
ornamental
stitch
device
Model
732
Automatic
Zigzag
Sewing
Machine
without
automat
ic
ornamental
stitch
device
FR.
GEGAUF
LTD.
BERNINA
SEWING
MACHINE
FACTORY
STECKBORN
/
Switzerland