Binatone MBP26 User Guide - Page 3
Overview of the Parent Unit
 |
View all Binatone MBP26 manuals
Add to My Manuals
Save this manual to your list of manuals |
Page 3 highlights
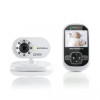
Overview of the Parent Unit 9 8 10 1 14 11 POWER 2 13 6 7 5 15 12 4 3 1. Display (LCD screen) 2. Scroll Up/Volume+ Button 3. Scroll Down/Volume- Button 4. Return/Switch Camera Button Press to return to previous menu level. Press to switch camera units (if paired with more than one camera). Press to pan left in digital pan/tilt mode. 5. Menu/OK Button Press to open the menu options. Press to confirm a selection. Press to pan right in digital pan/tilt mode. 6. Digital Pan/Tilt Press to enter/exit digital pan/tilt mode Parent unit display icons 7. Talk Key Press and hold to talk back through the camera. 8. Power indicator LED Blue when mains adaptor power ON. 9. Unit ON/OFF LED (Green) 10. Audio Level LED (Green, Orange, Red, Red) 11. Power / Video On-Off Button Press and hold to turn the unit ON or OFF. In monitor mode, press to turn the 12. display On/Off. Battery cover 13. Stand 14. Speaker 15. Power Adapter Socket Signal Level Indication (3 Levels) N Night Vision Mode (Video also changes to Black/White) Battery Level Indication (3 Levels) * Volume Level Control (8 Levels) Brightness Level Control (8 Levels) Alarm Setting (6h, 4h, 2h, OFF) Select Camera Add Camera Delete Camera Digital Pan/Tilt mode On Camera scan mode set
-
 1
1 -
 2
2 -
 3
3 -
 4
4 -
 5
5 -
 6
6 -
 7
7 -
 8
8 -
 9
9 -
10
-
11
-
12
-
13
-
14
-
15
-
16
-
17
-
18
-
19
-
20
-
21
-
22
-
23
-
24
-
25
-
26
-
27
 |
 |
