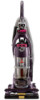
Bissell Pet Hair Eraser® Vacuum 87B43 User Guide - English
Bissell Pet Hair Eraser® Vacuum 87B43 Manual
 |
View all Bissell Pet Hair Eraser® Vacuum 87B43 manuals
Add to My Manuals
Save this manual to your list of manuals |
Bissell Pet Hair Eraser® Vacuum 87B43 manual content summary:
- Bissell Pet Hair Eraser® Vacuum 87B43 | User Guide - English - Page 1
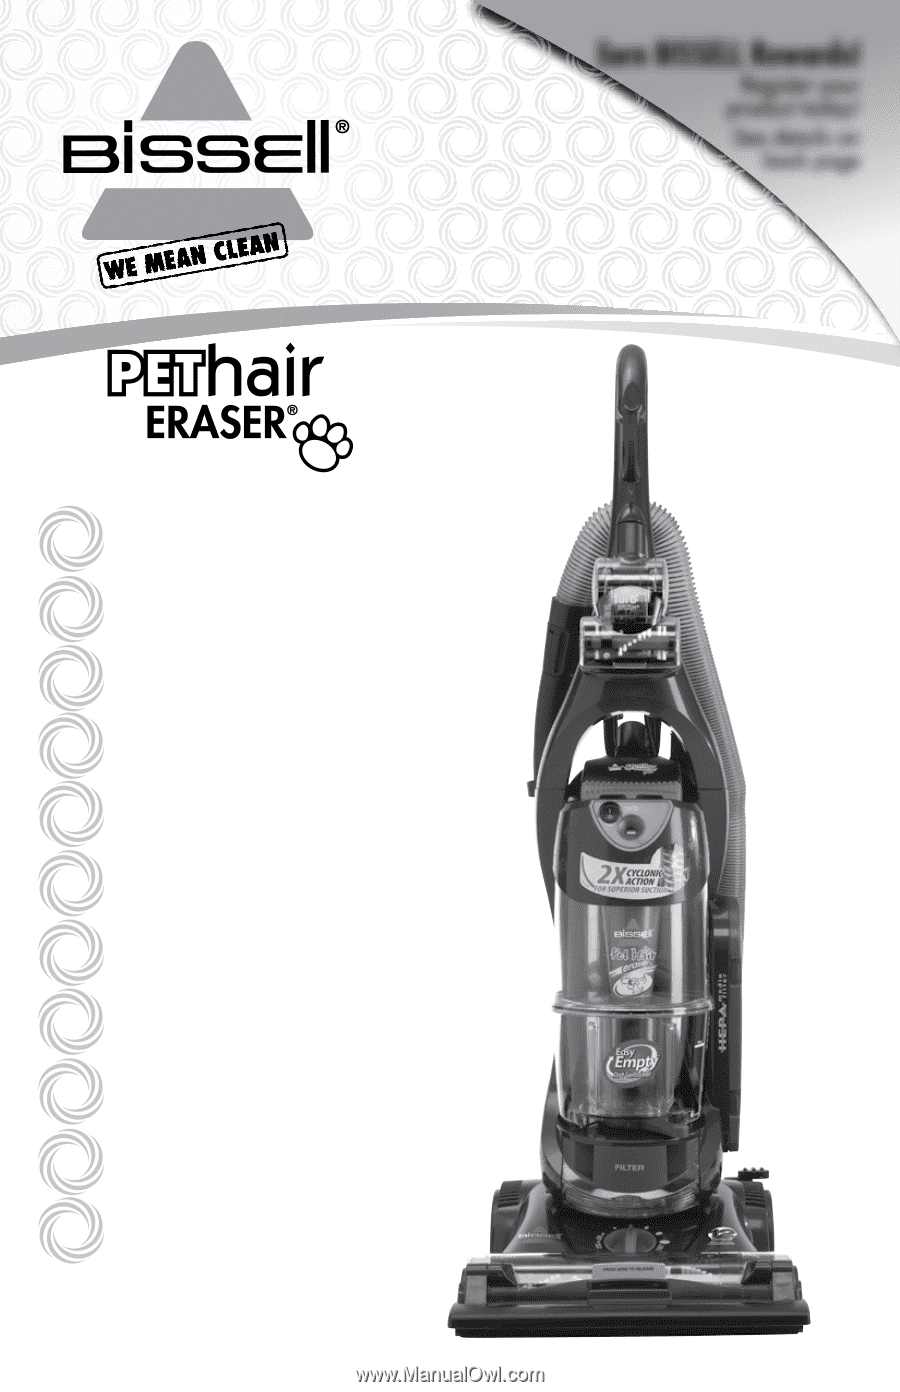
Earn BISSELL Rewards! Register your product today! See details on back page USER'S GUIDE 87B4, 3920, 6750 SERIES 2 Thank You 2 Product Registration 3 Safety Instructions 4 Product View 5-6 Assembly 6-9 Operations 10-16 Maintenance and Care 17-18 Troubleshooting 18 Replacement Parts 19 Warranty 20 - Bissell Pet Hair Eraser® Vacuum 87B43 | User Guide - English - Page 2
Thanks for buying a BISSELL Pet Hair Eraser Vacuum We're glad you purchased a BISSELL vacuum. Everything we know about floor care went into the design and construction of this complete, high-tech home cleaning system. Your BISSELL vacuum is well made, and we back it with a limited three year - Bissell Pet Hair Eraser® Vacuum 87B43 | User Guide - English - Page 3
anything that may reduce air flow. ■ Keep hair, loose clothing, fingers, and all parts of body away from openings and moving parts. ■ Turn off all controls before plugging or unplugging vacuum cleaner. ■ Use extra care when cleaning stairs. ■ Unplug before attaching the TurboBrush. ■ Do not pick up - Bissell Pet Hair Eraser® Vacuum 87B43 | User Guide - English - Page 4
Brush/ Upholstery Tool Carry Handle Stretch Hose Crevice Tool Extension Wand Clean Filter Indicator Twist 'n Snap™ Hose HEPA Media Post Motor Filter Lock 'n Seal® Lever Handle Release Pedal Height Adjustment Knob Pet Hair Lifter Wide Cleaning Foot Scuff Resistant Bumper 4 www.bissell - Bissell Pet Hair Eraser® Vacuum 87B43 | User Guide - English - Page 5
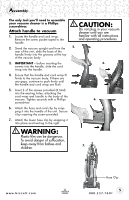
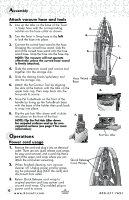
of the unit. Secure it by inserting the screw provided. 7. Attach the lower hose clip by snapping it into place and twisting to the right. CAUTION: Do not plug in your vacuum cleaner until you are familiar with all instructions and operating procedures. 2. 3. 6. Warning: Plastic film can be - Bissell Pet Hair Eraser® Vacuum 87B43 | User Guide - English - Page 6
two quick release cord wraps for easy cord removal, and a cord clip that is part of the upper cord wrap where you can attach the cord when vacuuming. Quick Release 2. When finished cleaning, turn vacuum Cord Wraps cleaner off. Unplug power cord by grasp- ing the polarized plug (NOT the cord - Bissell Pet Hair Eraser® Vacuum 87B43 | User Guide - English - Page 7
and it will release hair and suction it up when you push forward. NOTE: Turn vacuum off before you flip up or flip down the Pet Hair Lifter. www.bissell.com CAUTION: Before using your vacuum, make sure that the dirt container is in the locked position and that all filters (premotor and HEPA post - Bissell Pet Hair Eraser® Vacuum 87B43 | User Guide - English - Page 8
place on the front of the foot. Turn height adjustment knob to pet hair setting. 2. To vacuum non-carpet surfaces flip up. Push the yellow release button just above the feature, and it will flip up and out of the way. 2. 1. Transporting cleaner 1. To move your cleaner from room to room, put the - Bissell Pet Hair Eraser® Vacuum 87B43 | User Guide - English - Page 9
models. Use for pet hair pick-up on stairs, and upholstery. can block the vacuum hose or tools. Check them occasionally for obstructions. CAUTION: The rotating floor brush continues to rotate while tools are in use. To reduce the risk of injury from moving parts, always move the cleaner with the - Bissell Pet Hair Eraser® Vacuum 87B43 | User Guide - English - Page 10
: More frequent filter check and clean or replace all filters cleaning may be necessary if you are vacuuming new carpet, fine as suggested. dust, or have allergy concerns. Follow the instructions on the following pages to perform these simple maintenance steps. 10 www.bissell.com 800.237 - Bissell Pet Hair Eraser® Vacuum 87B43 | User Guide - English - Page 11
. 1. Unplug the vacuum from electrical outlet. filter is a white, pleated HEPA media filter. This filter is not washable and must be replaced when it becomes dirty. Post-Motor HEPA Media Filter WARNING: Do not operate cleaner with damp or wet filters or without all filters in place. www.bissell - Bissell Pet Hair Eraser® Vacuum 87B43 | User Guide - English - Page 12
clean your carpet. Also remove any debris that has accumulated under the brush cover. 1. Unplug the vacuum from electrical outlet. WARNING: To reduce the risk of injury from moving parts, turn vacuum cleaner off and disconnect power plug from electrical outlet. 3. 2. Place handle in low - Bissell Pet Hair Eraser® Vacuum 87B43 | User Guide - English - Page 13
Replace drive belt 2. 1. Unplug the vacuum from electrical outlet. 2. With rotating floor brush removed from vacuum cleaner (Steps 1-4 of check rotating floor brush and drive belt), grasp old drive belt and remove from motor pulley. Discard the old drive belt. 3 Place new drive belt over motor - Bissell Pet Hair Eraser® Vacuum 87B43 | User Guide - English - Page 14
the drive belt on the brush. Place ends of brush in slots on sides. Reposition faceplate and secure with two screws. NOTE: This tool is designed to remove pet hair from upholstered or carpeted surfaces. It should not be used on pets. 3. Pet TurboBrush® Pet TurboEraser™ 14 www.bissell.com 800 - Bissell Pet Hair Eraser® Vacuum 87B43 | User Guide - English - Page 15
any possible clog from the port to the pre-motor filter. Reattach tube by first installing the base and than push in the top of the tube. 8. If the clog persists, follow the instructions for checking the rotating floor brush and drive belt on page 12 and inspect the air passageway for obstructions - Bissell Pet Hair Eraser® Vacuum 87B43 | User Guide - English - Page 16
in and rotate it to the right or locked marking until the locking tabs stop the rotation. Troubleshooting Vacuum cleaner won't run Possible causes WARNING: To reduce the risk of electric shock, turn power OFF and disconnect polarized plug from electrical outlet before performing maintenance or - Bissell Pet Hair Eraser® Vacuum 87B43 | User Guide - English - Page 17
Troubleshooting Vacuum cleaner and tools won't pick up dirt Possible causes Remedies 1. Incorrect height adjustment 2. Hose not attached to suction opening 3. Twist 'n Snap hose not securely attached 4. Crack or hole in hose 5. Broken or worn drive belt 6. Rotating floor brush bristles worn 7. - Bissell Pet Hair Eraser® Vacuum 87B43 | User Guide - English - Page 18
Hose Wand Twist 'n Snap Vacuum Hose (clear) Wide Window Foot Brush Roll (gray) Style 7/8/14 Pre-Motor Foam Filter Style 8/14 HEPA Media POST-Motor Filter Hose & Cord Wrap Cord Clip Hose Clip Pet Hair Lifter 1 2 3 4 5 6 7 8 9 10 11 12 13 14 15 16 17 18 www.bissell.com 800.237.7691 - Bissell Pet Hair Eraser® Vacuum 87B43 | User Guide - English - Page 19
- BISSELL Pet Hair Eraser® Vacuum This warranty gives you specific legal rights, and you may also have other rights which may vary from state to state. If you need additional instruction regarding this warranty or have questions regarding what it may cover, please contact BISSELL Consumer Services - Bissell Pet Hair Eraser® Vacuum 87B43 | User Guide - English - Page 20
ATTN: Consumer Services Or visit the BISSELL website - www.bissell.com When contacting BISSELL, have model number of cleaner available. Please 19 for details. 20 www.bissell.com ©2010 BISSELL Homecare, Inc Grand Rapids, Michigan All rights reserved. Printed in China Part Number 110-4266 Rev 6/10
-
 1
1 -
 2
2 -
 3
3 -
 4
4 -
 5
5 -
 6
6 -
 7
7 -
8
-
9
-
10
-
11
-
12
-
13
-
14
-
15
-
16
-
17
-
18
-
19
-
20
 |
 |
Earn BISSELL Rewards!
R
egister your
product today!
See details on
back page
2
Thank You
USER'S GUIDE
87B4, 3920, 6750 SERIES
Product Registration
Safety Instructions
Product View
Assembly
Operations
Maintenance and Care
Consumer Services
Troubleshooting
2
3
4
5-6
6-9
10-16
20
17-18
Replacement Parts
Warranty
18
19
Earn BISSELL Rewards!
R
egister your
product today!
See details on
back page