Black & Decker CHV1510 Type 1 Manual - CHV1210 - Page 5
Warning - battery
 |
View all Black & Decker CHV1510 manuals
Add to My Manuals
Save this manual to your list of manuals |
Page 5 highlights
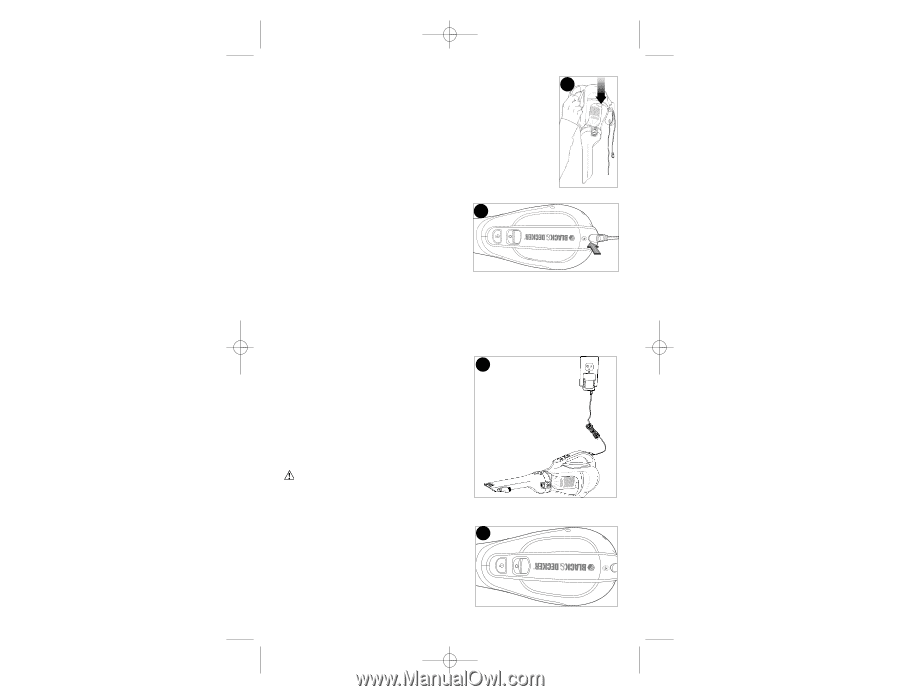
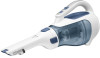
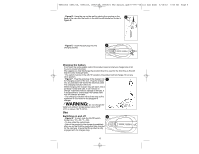
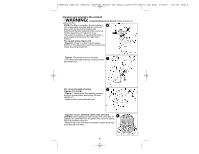
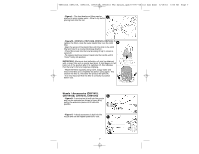
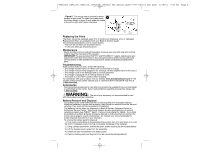
90564314 CHV1210, CHV1410, CHV1510, CHV1610 VAC manual.qxd:??????-00 Cir Saw book 6/15/10 7:53 AM Page 5 • Figure D - Hang the vac on the wall by placing the opening on the base of the vac over the hooks in the wall mount bracket as shown in D figure D. • Figure E - Insert the jack plug into the E charging socket. Charging the battery From new, the rechargeable cells of the product need a minimum charge time of 24 hours to ensure full power. We suggest you fully discharge the product when it is used for the first time as this will help the cells recharge faster. • The switch must be in the off ("O") position, the product will not charge if it is in any other position. • Figure F - Plug the jack plug of the charger into F the charging socket of the tool. Plug the charger into any standard 120 Volt 60 Hz electrical outlet. The charging indicator will be lit. While charging, the charger may get warm, this is perfectly normal and safe. It can remain on charge indefinitely without damage or danger. It is not possible to "overcharge" the battery cells with the charger provided. • The charging indicator will be lit as long as the appliance is connected to the plugged-in charger. WARNING: Do not charge the battery at ambient temperatures below 39°F (4°C) or above 104°F (40°C). Use Switching on and off • Figure G - To start, slide the On/Off switch G forward (i.e. "O"= Off, "I" = On). • To stop, slide the switch back. • Return the product to the charger immediately after use so that it will be ready and fully charged for the next use. Ensure that the product is fully engaged with the charger plug. 5
-
 1
1 -
 2
2 -
 3
3 -
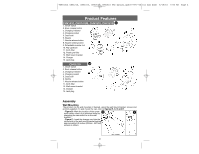 4
4 -
 5
5 -
 6
6 -
 7
7 -
 8
8 -
 9
9 -
 10
10 -
 11
11 -
12
-
13
-
14
-
15
-
16
-
17
-
18
-
19
-
20
-
21
-
22
-
23
-
24
-
25
-
26
-
27
-
28
-
29
-
30
-
31
-
32
 |
 |