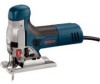
Bosch 1591EVSK Operating Instructions - Page 7
Assembly - jigsaw
 |
UPC - 000346334494
View all Bosch 1591EVSK manuals
Add to My Manuals
Save this manual to your list of manuals |
Page 7 highlights
Assembly BLADE INSTALLATION AND REMOVAL This jigsaw is equipped with the Bosch "One Touch" tool-less blade changing system. This system makes changing blades simple and fast. Insert the saw blade (teeth in cutting direction) until it latches in the plunger (Fig. 2.) When inserting the saw blade, the back of the blade must rest in the groove of the guide roller (Fig. 3). When changing the blade, tool should be held so that the blade is safely ejected. BLADE EJECTOR LEVER FIG. 4 PRECISION CONTROL BUTTON FIG. 2 BLADE PRECISION CONTROL GUIDES BLADE FIG. 3 PLUNGER PRECISION CONTROL GUIDES GUIDE ROLLER PRECISION CONTROL GUIDES Note: If the saw blade cannot be inserted into the plunger, the slots of the blade holder are not positioned as shown, or because the precision control guides are shut, push the blade ejector lever briefly to the front and release (Fig. 4). To change the saw blade, push the ejector lever to the center stop; this releases the precision control guides and ejects the saw blade (Fig. 4). PRECISION CONTROL The precision control guides were designed to improve vertical cut accuracy of the saw blade. To use this feature simply press the precision control button to close the guides for precision control. The saw blade is now guided laterally by the precision control guides which enables precision cuts. The precision control guides can be used for all applications, including bevel cuts. Precision control is recommended for cuts in thick wood, as the cutting angle is maintained and run-out of the saw blade is reduced. Refer to Operating Tips for more information. DUST EXTRACTION (Not included, available as accessory) A vacuum hose adapter tube and dust shroud (optional accessory) can be attached for dust and chip extraction. The vacuum hose adapter tube serves as the connector to the vacuum hose. ATTENTION: The vacuum hose adapter must only be used with dust shroud when connected to a vacuum. To use this feature, attach vacuum hose adapter tube to footplate. When inserting the adapter tube into the footplate be sure that the plastic post of the adapter tube engages into the corresponding hole on the housing (Fig. 5). -7-
-
 1
1 -
 2
2 -
 3
3 -
 4
4 -
 5
5 -
 6
6 -
 7
7 -
 8
8 -
 9
9 -
 10
10 -
 11
11 -
 12
12 -
13
-
14
-
15
-
16
-
17
-
18
-
19
-
20
-
21
-
22
-
23
-
24
-
25
-
26
-
27
-
28
-
29
-
30
-
31
-
32
-
33
-
34
-
35
-
36
 |
 |
