Bosch B24IW50NSP Installation Instructions - Page 22
Warning, Important
 |
View all Bosch B24IW50NSP manuals
Add to My Manuals
Save this manual to your list of manuals |
Page 22 highlights
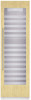
q Fix the hinge box cover. 6. Preparing the installation cavity i 2 antiĆtipĆbrackets are required for each appliance or appliance combination (SideĆbyĆSide). q Specify the attachment points of the antiĆtipĆbrackets. Specify the detailed dimensions according to the section on Installation dimensions" starting on page 9. d WARNING d Assure that there are no electrical wires or plumbing in the area which the screws could penetrate - risk of injury and damage! q Change the attachment plates crosswise. 22 (609,6-647,7) q If the installation cavity is deeper than the appliance, place a solid wooden beam behind the antiĆtipĆbrackets and attach securely to the base or the wall. The length of the wooden beam is equal to the width of the installation cavity! ! IMPORTANT NOTE ! If possible, always screw the wooden beam to existing studs on the rear panel of the cavity. In some installations the subĆflooring or finished floor may necessitate angling the wood screws used to fasten the antiĆtipĆbrackets to the back wall. i Important information for secure attachment of the antiĆtip brackets: - The supplied set contains fastening screws for various applications. Select the fastening screws according to the local conditions. - If the supplied fastening screws do not permit secure attachment of the antiĆtip brackets and therefore the appliance, another method must be used to attach the antiĆtip brackets securely.
-
 1
1 -
2
-
3
-
4
-
5
-
6
-
7
-
8
-
9
-
10
-
11
-
12
-
13
-
14
-
15
-
16
-
 17
17 -
 18
18 -
 19
19 -
 20
20 -
 21
21 -
 22
22 -
 23
23 -
 24
24 -
 25
25 -
 26
26 -
 27
27 -
28
-
29
-
30
-
31
-
32
-
33
-
34
-
35
-
36
-
37
-
38
-
39
-
40
-
41
-
42
-
43
-
44
-
45
-
46
-
47
-
48
-
49
-
50
-
51
-
52
-
53
-
54
-
55
-
56
-
57
-
58
-
59
-
60
-
61
-
62
-
63
-
64
-
65
-
66
-
67
-
68
-
69
-
70
-
71
-
72
-
73
-
74
-
75
-
76
-
77
-
78
-
79
-
80
-
81
-
82
-
83
-
84
-
85
-
86
-
87
-
88
-
89
-
90
-
91
-
92
-
93
-
94
-
95
-
96
-
97
-
98
-
99
-
100
-
101
-
102
-
103
-
104
-
105
-
106
-
107
-
108
-
109
-
110
-
111
-
112
-
113
-
114
-
115
-
116
-
117
-
118
-
119
-
120
-
121
-
122
-
123
-
124
 |
 |
