Bosch HDI7152U Use & Care Manual - Page 14
Reassembly, Cleaning, Half Oven Rack Some Models, Closed Position, Back of Rack, Front of Rack, Stop
 |
UPC - 825225842279
View all Bosch HDI7152U manuals
Add to My Manuals
Save this manual to your list of manuals |
Page 14 highlights
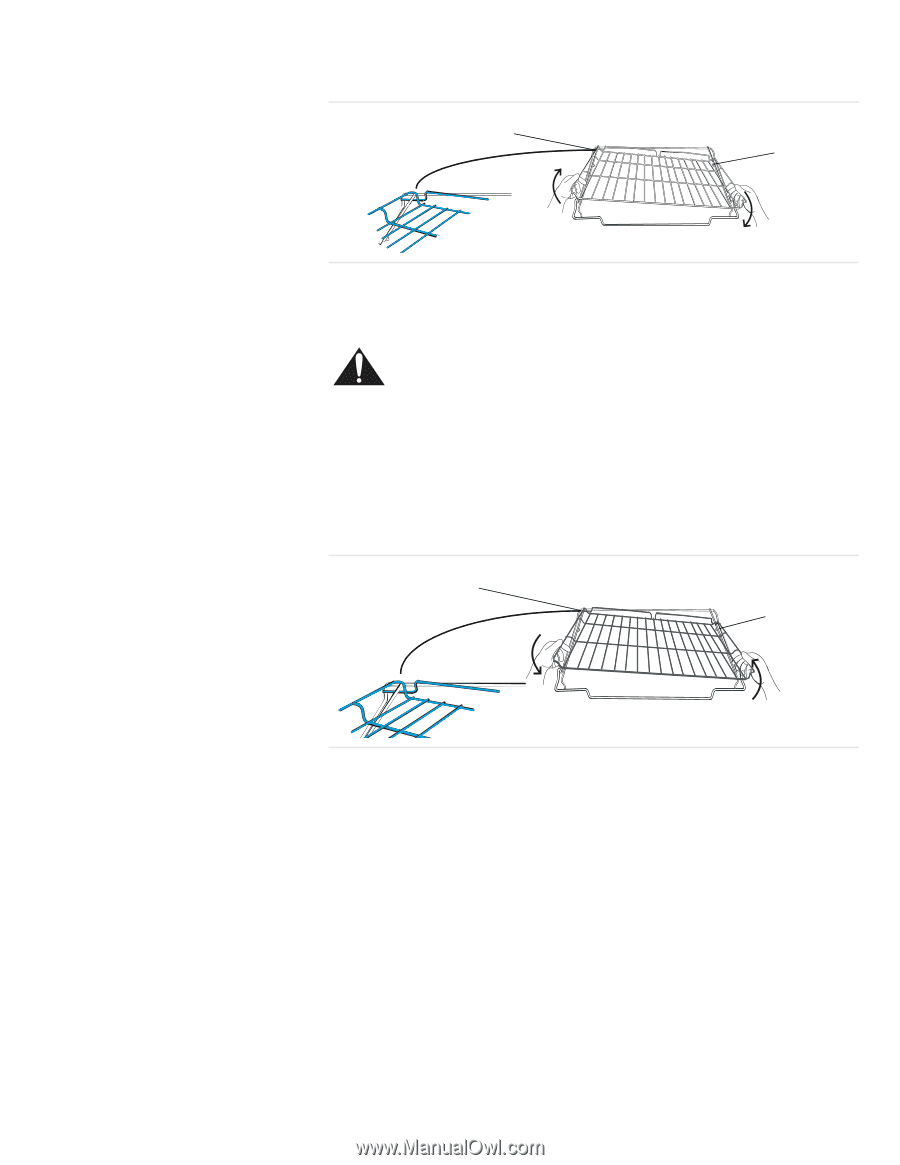
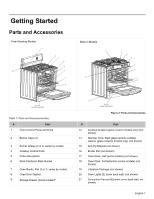
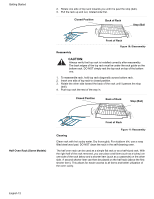
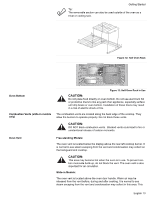
Getting Started 2. Rotate one side of top rack towards you until it is past the stop (ball). 3. Pull the rack up and out, rotated side first. Closed Position Back of Rack Stop (Ball) Reassembly Front of Rack Figure 10: Disassembly CAUTION: Always verify that top rack is installed correctly after reassembly. The back edges of the top rack must be under the rack guide on the bottom rack. DO NOT simply rest the top rack on top of the bottom one. 1. To reassemble rack, hold top rack diagonally across bottom rack. 2. Insert one side of top rack to closed position. 3. Rotate the other side toward the back of the rack until it passes the stop (ball). 4. Push top rack the rest of the way in. Closed Position Back of Rack Stop (Ball) Half Oven Rack (Some Models) Front of Rack Figure 11: Reassembly Cleaning Clean rack with hot sudsy water. Dry thoroughly. For stubborn dirt, use a soap filled steel wool pad. DO NOT clean the rack in the self-cleaning oven. The half oven rack can be used as a simple flat rack or as a half-sized rack. With the right half of the rack removed, you can place a tall item (such as a turkey) on one side of the rack below and a shorter item (such as a casserole) on the other side. A second shorter item can then be placed on the half rack (above the first shorter item). This allows for easier access to all items and better utilization of the oven cavity. English 12
-
 1
1 -
2
-
3
-
4
-
5
-
6
-
7
-
8
-
 9
9 -
 10
10 -
 11
11 -
 12
12 -
 13
13 -
 14
14 -
 15
15 -
 16
16 -
 17
17 -
 18
18 -
 19
19 -
20
-
21
-
22
-
23
-
24
-
25
-
26
-
27
-
28
-
29
-
30
-
31
-
32
-
33
-
34
-
35
-
36
-
37
-
38
-
39
-
40
-
41
-
42
-
43
-
44
-
45
-
46
-
47
-
48
-
49
-
50
-
51
-
52
-
53
-
54
-
55
-
56
 |
 |