Bosch HDI7282U Use & Care Manual - Page 12
Electronic Ignitor, High Power Burner, Precision Burner, Oven Racks, Flat Oven Racks, Inserting - lowes
 |
UPC - 825225844426
View all Bosch HDI7282U manuals
Add to My Manuals
Save this manual to your list of manuals |
Page 12 highlights
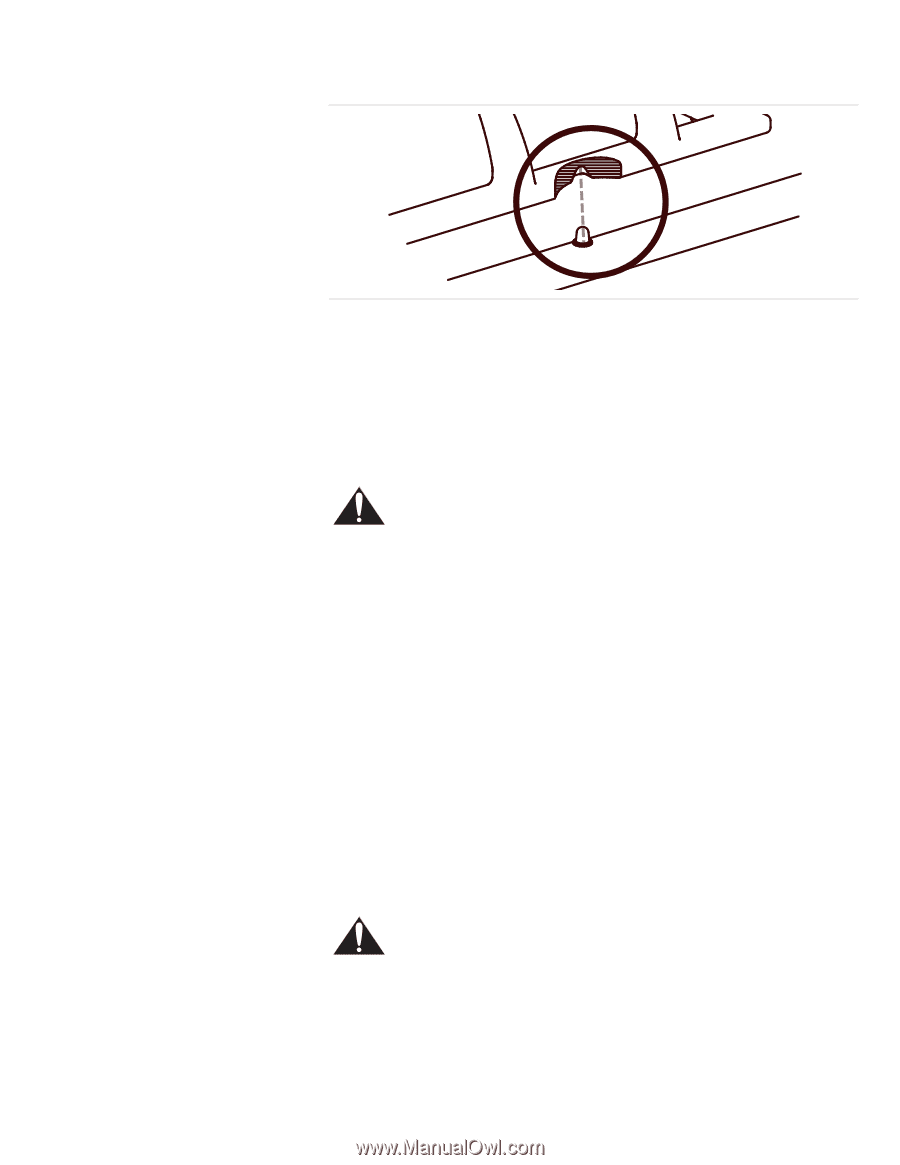
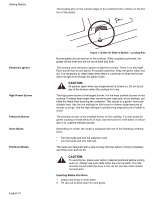
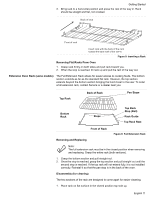
Getting Started The locating pins on the outside edges of the cooktop fit into notches on the bottom of the grates. Electronic Ignitor High Power Burner Precision Burner Oven Racks Flat Oven Racks English 10 Figure 7: Grates for Slide-in Models - Locating Pins Burner grates should rest flat on the cooktop. When properly positioned, the grates will be level and will not move back and forth. The cooktop uses electronic ignitors to light the burners, There is no pilot light. Each burner has its own ignitor. For proper operation, keep the ignitor clean and dry. It is necessary to clean these when there is a boilover or when the burner does not light even though the ignitor clicks. CAUTION: All ignitors spark when any single burner is turned on. Do not touch any of the burners when the cooktop is in use. The high power burner is the largest burner. It is the most powerful burner on the cooktop. It retains heat longer than normal burner caps and, at low settings, prohibits the flame from touching the cookware. This results in a gentle, more predictable heat. Use the low settings on this burner to simmer large amounts of sauces or soups. Use the high settings to quickly bring large amounts of water to a boil. The precision burner is the smallest burner on the cooktop. It is well suited for gentle cooking of small amounts of food. Use the burner to melt butter or chocolate or to prepare delicate sauces. Depending on model, the range is equipped with one of the following combinations: • Two flat racks and one full extension rack • Two flat racks and one half rack The racks are designed with a stop so they will stop before coming completely out of the oven and not tilt. CAUTION: To avoid burns, place oven racks in desired positions before turning oven on. Always use oven mitts when the oven is warm. If a rack must be moved while the oven is hot, do not let oven mitts contact hot elements. Inserting Racks Into Oven 1. Grasp rack firmly on both sides. 2. Tilt rack up to allow stop into rack guide.
-
 1
1 -
2
-
3
-
4
-
5
-
6
-
 7
7 -
 8
8 -
 9
9 -
 10
10 -
 11
11 -
 12
12 -
 13
13 -
 14
14 -
 15
15 -
 16
16 -
 17
17 -
18
-
19
-
20
-
21
-
22
-
23
-
24
-
25
-
26
-
27
-
28
-
29
-
30
-
31
-
32
-
33
-
34
-
35
-
36
-
37
-
38
-
39
-
40
-
41
-
42
-
43
-
44
-
45
-
46
-
47
-
48
-
49
-
50
-
51
-
52
-
53
-
54
-
55
-
56
 |
 |