| Section |
Page |
| Table of Contents |
2 |
| About This Manual |
3 |
| How This Manual Is Organized |
3 |
| Safety |
3 |
| Important Safety Instructions READ AND SAVE THESE INSTRUCTIONS |
3 |
| Important Safety Instructions |
3 |
| Fire Safety |
3 |
| Burn Prevention |
4 |
| Child Safety |
5 |
| Cleaning Safety |
5 |
| Cookware Safety |
5 |
| Proper Installation and Maintenance |
6 |
| Figure 1: Tipping Precautions |
6 |
| Food Safety |
7 |
| Getting Started |
7 |
| Parts and Accessories |
7 |
| Figure 2: Parts and Accessories |
7 |
| Table 1: Parts and Accessories Key |
7 |
| Radiant Element |
8 |
| Dual Element |
8 |
| Triple Element |
8 |
| Bridge Element (some models) |
8 |
| Retained Heat |
8 |
| Temperature Limiter |
8 |
| Hot Surface Indicator |
8 |
| Oven Racks |
8 |
| Flat Oven Racks |
8 |
| 1. Grasp rack firmly on both sides. |
9 |
| 2. Tilt rack up to allow stop into rack guide. |
9 |
| 3. Bring rack to a horizontal position and press the rest of the way in. Rack should be straight and flat, not crooked. |
9 |
| Figure 3: Inserting a Rack |
9 |
| 1. Grasp rack firmly on both sides and pull rack toward you. |
9 |
| 2. When the stop is reached, tilt rack up and pull the rest of the way out. |
9 |
| Extension Oven Rack (some models) |
9 |
| Figure 4: Full Extension Rack |
9 |
| 1. Grasp the bottom section and pull straight out. |
9 |
| 2. Once the stop is reached, grasp the top section and pull straight out until the second stop is reached. If the top rack will not extend fully, it is not installed correctly. Reinstall it so that the pan stop is in the back of the oven. |
9 |
| 1. Place rack on flat surface in the closed position top side up. |
10 |
| 2. Rotate one side of top rack towards you until it is past the stop (ball). |
10 |
| 3. Pull the rack up and out, rotated side first. |
10 |
| Figure 5: Disassembly |
10 |
| 1. To reassemble rack, hold top rack diagonally across bottom rack. |
10 |
| 2. Insert one side of top rack to closed position. |
10 |
| 3. Rotate the other side toward the back of the rack until it passes the stop (ball). |
10 |
| 4. Push top rack the rest of the way in (See Figure 3). |
10 |
| Figure 6: Reassembly |
10 |
| Half Oven Rack (Some Models) |
10 |
| Figure 7: Half Oven Rack |
11 |
| Oven Bottom |
11 |
| Oven Vent |
11 |
| Automatic Shutoff |
11 |
| Self-Cleaning |
11 |
| Indicators and Other Features |
11 |
| Cooling Fan (Slide-in models only) |
12 |
| Convection Fan |
12 |
| Control (Panel) |
12 |
| Oven Control Panel |
12 |
| Figure 8: Oven Control Panel |
12 |
| Table 2: Oven Control Panel |
12 |
| The Clock |
13 |
| About the Clock |
13 |
| Setting the Clock |
13 |
| 1. CLOCK will be displayed and the hour digits will flash. Turn knob to select hour and AM or PM. |
13 |
| CLOCK |
13 |
| 2. Press Time. CLOCK will still be displayed and the minute digits will flash. |
13 |
| 3. Turn knob. Set minutes. |
13 |
| 4. Press Time and the clock is now set. |
13 |
| Changing the Clock |
13 |
| 1. Press Time. TIMER 1 flashes in display. |
13 |
| 2. Turn knob to select CLOCK. |
13 |
| 3. Press Time and hour digits flash. |
13 |
| 4. Turn knob to change hours. |
13 |
| 5. Press Time again and minute digits flash. |
13 |
| 6. Turn knob to change minutes. |
13 |
| 7. Press Time again and the clock is set. |
13 |
| The Select Functions Menu |
13 |
| 1. Press and hold COOKING MODE press pad for five (5) seconds. SELECT FUNCTION is displayed. |
13 |
| 2. Turn knob slowly to desired feature. There will be a slight delay before each message (or feature) can be seen in the display. Turn knob slowly and wait approximately one second for display to show next feature. |
13 |
| 3. Press START to choose the function. |
13 |
| 4. Turn knob to desired setting and press START. When all settings for the function are complete, SELECT FUNCTION flashes again. |
13 |
| 5. Press OFF to exit the Select Functions Menu. |
13 |
| Change the Beep Volume |
14 |
| 1. Access SELECT FUNCTIONS Menu. |
14 |
| 2. Turn knob clockwise until VOLUME is displayed. |
14 |
| 3. Press Start. |
14 |
| 4. Turn knob to select volume level Low, Medium or High. |
14 |
| 5. Press Start. |
14 |
| Change the Temperature Scale |
14 |
| 1. Access SELECT FUNCTIONS Menu. |
14 |
| 2. Turn knob clockwise until SELECT TEMP F-C is displayed. |
14 |
| 3. Press Start. |
14 |
| 4. Turn knob to select Fahrenheit (F) or Celsius (C). |
14 |
| 5. Press Start to accept new selection. |
14 |
| Turn Clock Display ON or OFF |
14 |
| 1. Access SELECT FUNCTIONS Menu. |
14 |
| 2. Turn knob clockwise until CLOCK DISPLAY is displayed. |
14 |
| 3. Press START. |
14 |
| 4. Turn knob to select ON or OFF |
14 |
| 5. Press START to accept new selection. |
14 |
| Access Demo Mode |
14 |
| Change the Display Language |
14 |
| 1. Access SELECT FUNCTIONS Menu. |
14 |
| 2. Turn knob clockwise until desired language is displayed. |
14 |
| 3. Press Start. |
14 |
| 4. Turn knob clockwise to select a different language. |
14 |
| 5. Press Start to accept a language change. |
14 |
| Lock / Unlock the Oven Control Panel |
14 |
| 1. Access SELECT FUNCTIONS Menu. |
14 |
| 2. Turn knob clockwise until LOCK KEYS is flashing. |
14 |
| 3. Press Start. KEY PAD LOCKED is displayed. The display will beep if a key is pressed to indicate that the keypad is locked. |
14 |
| 4. To unlock keypads, press Cooking Mode and hold for 5 seconds. Display will read UNLOCKING KEY PAD. |
14 |
| 5. When unlocked, the clock will again appear in the display. |
14 |
| Change the Oven Temperature Offset |
14 |
| 1. Access SELECT FUNCTIONS Menu. |
14 |
| 2. Turn knob clockwise until OVEN TEMP OFFSET is displayed. |
14 |
| 3. Press START. 0� F is displayed. |
14 |
| 4. Turn the knob to increase temperature in 25� F increments. |
14 |
| 5. Press START to accept a temperature change. |
15 |
| Reset the Factory Settings |
15 |
| 1. Access SELECT FUNCTIONS Menu. |
15 |
| 2. Turn knob clockwise until RESET DEFAULTS is displayed. |
15 |
| 3. Press START. Display reads SELECT FUNCTIONS. |
15 |
| Set the Sabbath Feature |
15 |
| 1. Verify that the oven is turned off. |
15 |
| 1. Access SELECT FUNCTIONS Menu. |
15 |
| 2. Turn knob clockwise until SABBATH OPTION appears. |
15 |
| 3. Press START. BAKE will show in display and temperature will flash. |
15 |
| 4. Turn knob to set oven temperature. |
15 |
| 5. Turn oven light on if desired (press LIGHT). |
15 |
| 6. Press START. Oven starts after 5 seconds. |
15 |
| 1. Turn the warming drawer on to the desired heat setting. See “Turning on the Warming Drawer” on page 21. |
15 |
| 2. Verify that the oven is turned off. |
15 |
| 3. Access SELECT FUNCTIONS Menu. |
15 |
| 4. Turn knob clockwise until SABBATH OPTION appears. |
15 |
| 5. Press START. BAKE will show in display and temperature will flash. |
15 |
| 6. Turn knob to set oven temperature. |
15 |
| 7. Turn oven light on if desired (press LIGHT). |
15 |
| 8. Press START. Oven starts after 5 seconds. Sabbath Feature is activated for both the warming drawer and the oven. |
15 |
| Change the Time Format |
16 |
| 1. Access SELECT FUNCTIONS Menu. |
16 |
| 2. Turn knob clockwise until TIME FORMAT is displayed. |
16 |
| 3. Press Start. |
16 |
| 4. Turn knob to select 12 hour or 24 hour format. |
16 |
| 5. Press Start to accept new selection. |
16 |
| Turn Automatic Convection Conversion ON or OFF |
16 |
| 1. Access SELECT FUNCTIONS Menu. |
16 |
| 2. Turn knob clockwise until AUTO CONVECT BAKE is displayed. |
16 |
| 3. Press Start. |
16 |
| 4. Turn knob to select ON or OFF. |
16 |
| 5. Press Start to accept new selection. |
16 |
| Before Using the Appliance for the First Time |
16 |
| Operation - Cooktop |
16 |
| About the Cooktop |
16 |
| Operation |
16 |
| Setting the Burner Heat Level |
17 |
| Single Element Control Knob |
17 |
| Figure 9: Single Element Burner Knob |
17 |
| Dual Element Control Knob |
17 |
| Figure 10: Dual Element Burner Knob |
17 |
| Triple Element Control Knob (some models) |
17 |
| Figure 11: Triple Element Knob |
18 |
| Bridge Element Control Knob (some models) |
18 |
| 1. Push in on the control knob and turn clockwise to the desired heat setting. Tip: To complete the connection and create an even longer cooking surface , turn ON the other single element, too. |
18 |
| 1. Turn the knob counterclockwise. |
18 |
| Figure 12: Bridge Element Knob |
18 |
| Operation - Oven |
18 |
| About the Oven |
18 |
| Operation |
19 |
| Setting the Cooking Mode and Temperature |
19 |
| 1. Press COOKING MODE. |
19 |
| 2. BAKE will flash in the display. |
19 |
| BAKE |
19 |
| 3. If no change is made within 5 seconds, control will beep and flash. If this occurs, press START. |
19 |
| 4. To change the cooking mode, turn knob. |
19 |
| 5. Press START. |
19 |
| 6. The selected mode will appear in the display, along with the default temperature for that mode, which will be blinking. |
19 |
| 7. To select a different temperature, turn knob to the right or left (in 5� increments) to desired temperature. |
19 |
| 8. Press START. If not pressed, oven automatically turns on in 5 seconds. |
19 |
| 9. The display alternates between the cooking mode and preheat. |
19 |
| 10. To change temperature during cooking, press Temperature. Turn the knob to select new temperature and press START. |
19 |
| 11. Once cooking has been completed, press OFF to turn off oven. |
19 |
| Automatic Convection Conversion (models with convection bake) |
19 |
| Hot Oven Indicator |
19 |
| Using the Timer |
19 |
| 1. Press TIME and TIMER 1 will flash in display. |
20 |
| TIMER 1 |
20 |
| 1 : 00 |
20 |
| 2. Turn knob to set minutes. If setting only minutes, press START. Otherwise, continue to step 4. |
20 |
| Set TIMER 2 |
20 |
| 3. Press TIME again and the hours will flash. |
20 |
| 4. Turn knob to set hours. |
20 |
| 5. Press TIME again. The TIMER is now set. |
20 |
| 6. If TIME or START is not pressed, oven will begin beeping and timer display will begin flashing. |
20 |
| Changing the Timer/s |
20 |
| 1. Press TIME. TIMER 1 will appear in display. Select either TIMER 1 or 2. |
20 |
| 0: 00 |
20 |
| 2. Press TIME. RESET TIMER 1 (2) appears in the display. Minute digits flash. |
20 |
| 3. Turn knob clockwise or counterclockwise to change minutes. |
20 |
| 4. Press TIME again and hour digits will flash. |
20 |
| 5. Turn knob clockwise or counterclockwise to change hours. |
20 |
| 6. Press TIME and new time is set. |
20 |
| Clearing the Timer/s |
20 |
| 1. Press TIME once. TIMER 1 flashes. |
20 |
| 2. Turn knob to select CLEAR TIMER 1(2). Press TIME. |
20 |
| CLEAR TIMER 1 |
20 |
| 3. If Time pad is not pressed, range will beep and display will continue flashing. |
20 |
| 4. Press TIME to return to the main screen. |
20 |
| Cancelling |
20 |
| Using Timed or Delayed Cook |
20 |
| Setting a Timed Mode |
20 |
| 1. Press COOKING MODE. |
20 |
| 2. BAKE will be displayed. To select a different cooking mode, turn the knob. |
20 |
| 3. Press START. |
20 |
| 4. Turn knob to select desired temperature. |
20 |
| 5. Press TIME. TIMED BAKE appears. |
20 |
| 350� |
20 |
| 6. Press TIME. SET BAKE TIME appears in the display and minutes flash. |
20 |
| 7. Set minutes. Press TIME. |
20 |
| 8. Hours Flash. Set hours. Press START. |
20 |
| 9. TIMED BAKE appears in display and the oven begins to preheat. |
20 |
| Delaying the Start of a Timed Mode |
21 |
| 1. Follow steps 1 through 5 above. |
21 |
| 2. Turn knob until DELAYED BAKE appears. |
21 |
| DELAYED BAKE |
21 |
| 3. Press Time. SET BAKE TIME appears in display and minutes flash. |
21 |
| 4. Set minutes and then press TIME. Hours Flash. |
21 |
| 5. Set hours and then press TIME. SET BAKE END appears in the display. |
21 |
| 6. Press TIME. |
21 |
| 7. Use knob to enter the time of day the oven will stop cooking or turn off. |
21 |
| 8. Set hours and then press TIME. |
21 |
| 9. Set minutes and then press TIME. |
21 |
| 10. At the end of the programmed cooking time, the oven will automatically turn off. Display will show TIME COOK END and reminder beeps will sound. Press OFF to clear. |
21 |
| To Check the Cooking Time and Stop Time After a Delay Has Been Set |
21 |
| 1. Press Time. |
21 |
| 2. Turn knob to BAKE END or BAKE TIME. |
21 |
| 3. Press Time. |
21 |
| Setting the Sabbath Feature |
21 |
| Using the Probe (some models) |
21 |
| Setting the Probe |
21 |
| 1. Prepare meat and place in roasting pan (or on rack in roasting pan as recipe specifies). Insert the probe into the meat. Make... |
21 |
| 2. Place roasting pan with meat in cold oven on recommended oven rack. Plug probe into the probe receptacle. The probe symbol will appear in display. |
21 |
| 3. Press COOKING MODE and select BAKE, CONVECTION BAKE or CONVECTION ROAST. |
21 |
| 4. Press START. The default oven temperature will appear. |
21 |
| 5. Turn knob to change oven temperature if necessary. |
21 |
| 6. Touch START. |
21 |
| 7. Turn knob to set the probe temperature (desired end temperature of the food). |
21 |
| 8. Press START. |
21 |
| Changing the Oven Temperature When Using the Probe |
22 |
| 1. Touch TEMPERATURE. Oven temp will flash in the display. |
22 |
| 2. Turn the knob to desired temperature and press START twice. |
22 |
| Changing the Probe Temperature |
22 |
| 1. Touch TEMPERATURE. The oven temperature will flash. |
22 |
| 2. Press start and PROBE TEMP will flash. |
22 |
| 3. Turn the knob to desired temperature and press START again. |
22 |
| Operation - Warming Drawer (some models) |
22 |
| About the Warming Drawer |
22 |
| Warming Drawer Specifications |
22 |
| 1. Stainless Steel Drawer Interior |
22 |
| 2. Gasket |
22 |
| 3. Rail Lock |
22 |
| Figure 13: Warming Drawer Parts |
22 |
| Figure 14: Warming Drawer Settings |
23 |
| Operation |
23 |
| Preheating |
23 |
| Preheat Times: |
23 |
| Turning on the Warming Drawer |
23 |
| When Only Using the Warming Drawer |
23 |
| 1. Press COOKING MODE. |
23 |
| 2. Turn knob to select WARMING DRAWER. |
23 |
| 3. Press START. |
23 |
| 4. Turn knob to select heat setting. |
23 |
| 5. Press START. |
23 |
| When Also Using The Oven |
23 |
| 1. Press COOKING MODE. |
23 |
| 2. Press START to select WARMING DRAWER. |
23 |
| 3. Turn knob to select heat setting. |
23 |
| 4. Press START. |
23 |
| Setting the Sabbath Feature |
23 |
| 1. Turn the warming drawer on the desired heat level. |
23 |
| 2. Activate the Sabbath Feature. See “Set the Sabbath Feature” on page 13. |
23 |
| Turning Off the Warming Drawer |
24 |
| When Only Using the Warming Drawer |
24 |
| 1. Press OFF. |
24 |
| When Using the Warming Drawer and the Oven |
24 |
| 1. Press OFF. |
24 |
| 2. Turn knob to select CANCEL DRWR, CANCEL OVEN, or CANCEL BOTH. |
24 |
| 3. Press OFF. |
24 |
| Crisping Stale Items |
24 |
| Warming Empty Serving Bowls and Plates |
24 |
| Getting the Most Out of Your Appliance |
24 |
| Getting the Most Out of Your Cooktop |
24 |
| Cooktop Cooking Guide |
24 |
| Boiling Water |
24 |
| Recommended Settings |
24 |
| Table 3: Cooking Guide |
25 |
| Bridge Element Tips (some models) |
25 |
| Cookware Selection Guide |
25 |
| Cookware Characteristics |
25 |
| To Test the Flatness of Your Pans |
25 |
| Cookware Tips |
25 |
| Specialty Pans |
26 |
| Getting the Most Out of Your Oven |
26 |
| Oven Cooking Guide |
26 |
| Rack Position |
26 |
| Figure 15: Rack Positions |
26 |
| Multiple Rack Cooking |
26 |
| Pan Placement |
26 |
| Figure 16: Pan Placement |
26 |
| Baking Pans |
26 |
| Preheating the Oven |
27 |
| The Probe (some models) |
27 |
| Oven Cooking Modes |
27 |
| Bake, Proof and Warm |
27 |
| Convection Bake |
28 |
| Automatic Convection Conversion |
28 |
| Table 4: Convection Baking Chart |
28 |
| Broil |
29 |
| Table 5: Broiling Chart |
29 |
| Convection Broil (some models) |
30 |
| Table 6: Convection Broiling Chart |
30 |
| Convection Roast |
31 |
| Table 7: Convection Roast Chart |
31 |
| Dehydrate (some models) |
31 |
| Table 8: Dehydrate Chart |
32 |
| Getting the Most Out of Your Warming Drawer |
32 |
| General Tips |
32 |
| Table 9: Warming Drawer Chart |
33 |
| Cleaning and Maintenance |
33 |
| Care and Cleaning |
33 |
| Care and Cleaning - the Cooktop |
33 |
| Precautions for Long Life and Good Appearance of the Surface |
33 |
| Before Use Care |
34 |
| Daily Cleaning Techniques |
34 |
| 1. Clean the surface when completely cool with the glass ceramic cooktop cleaner. Exception: Remove dry sugar, sugar syrup, tomato products and milk immediately with the razor blade scraper (See Cooktop Care Chart, next page). |
34 |
| 2. Wipe off spatters with a clean, damp sponge or paper towel. Rinse and dry. Use white vinegar if smudge remains; rinse. |
34 |
| 3. Apply a small amount of the glass ceramic cooktop cleaner. When dry, buff surface with a clean paper towel or cloth. |
34 |
| Using the Razor Blade Scraper |
34 |
| Figure 17: Scraper |
34 |
| Cleaning the Control Knobs |
34 |
| 1. Pull out and off to remove both knob. Wipe with hot, soapy cloth, rinse and dry. Do not soak. |
34 |
| 2. To replace, push knob straight onto shaft. |
34 |
| Do Not Use the Following Cleaners |
34 |
| Table 10: Cooktop Care Chart |
34 |
| Care and Cleaning - Oven |
35 |
| Self Cleaning the Oven |
35 |
| Preparing the Oven for Self Clean |
35 |
| 1. Remove all utensils and bakeware. |
35 |
| 2. Remove oven racks. If oven racks are left in the oven during the self-clean cycle, they will permanently lose the shiny finish and change to a dull dark finish. See Oven Cleaning Chart for proper care. |
35 |
| 3. Wipe up excessive soil, spills and grease before self-cleaning the oven. Excess grease will cause flames and smoke inside the oven during self-cleaning. |
36 |
| Figure 18: Cleaning Guidelines |
36 |
| 4. Review illustration above. Some areas of the oven must be cleaned by hand before the cycle begins. Use a soapy sponge or plas... |
36 |
| 5. Be sure oven light is turned off and the light bulbs and lens covers are in place. Do not operate oven without light bulb and cover in place. |
36 |
| Setting the Self-Clean Mode |
36 |
| 1. Press COOKING MODE. |
36 |
| 2. Turn knob until SELF CLEAN mode appears. Press START. |
36 |
| 3. The default cleaning time is 4 hours. To change cleaning time, turn knob to change number of hours. Otherwise, continue to step 4. |
36 |
| 3 |
36 |
| 4. Press START. SELF CLEAN flashes. Press START. |
36 |
| 5. REMOVE RACKS appears in the display as a reminder to remove oven racks. |
36 |
| REMOVE RACKS |
36 |
| 6. Press START again to begin the self- clean. |
36 |
| Delaying the Start of the Self-Clean |
36 |
| 1. Press COOKING MODE. |
36 |
| 2. Turn knob until SELF CLEAN mode appears. Press START. |
36 |
| 3. The default cleaning time is 4 hours. To change cleaning time, turn knob to change number of hours. Otherwise, continue to step 4. |
36 |
| 4. Press START. |
36 |
| 5. Turn knob until DELAYED CLEAN mode appears. Press START. |
37 |
| 3: 00 |
37 |
| 6. SELF CLEAN END appears in the display. |
37 |
| 5: 45 |
37 |
| 7. Turn knob to enter the time of day you want the self-clean to end: Set hours, press time, set minutes. |
37 |
| 8. Press START. The display will remind you to remove oven racks. |
37 |
| 9. Press START. The display shows DELAYED CLEAN. The self-clean will automatically start at the appropriate time. |
37 |
| After Self-Cleaning |
37 |
| 1. At the end of the programmed cleaning time, the oven will automatically turn off. SELF CLEAN END appears in the display. Press OFF to clear. |
37 |
| 2. The self-clean mode may produce ash which will settle in the bottom of the oven. If this happens, remove ash with a damp cloth before using the oven. |
37 |
| 3. Wipe rack edges with cooking oil to allow for proper glide. Wipe off excess. |
37 |
| Cleaning Guide |
37 |
| Table 11: Cleaning Guide |
37 |
| Drawers (Storage or Warming) |
38 |
| Maintenance |
38 |
| Oven Maintenance |
38 |
| Removing the Door |
38 |
| 1. Be sure to read the above WARNING before attempting to remove oven door. |
38 |
| 2. Open the door completely. |
38 |
| 3. Flip lever on hinge toward you. |
38 |
| Figure 19: Hinge Positions |
38 |
| 4. Close the door to approximately halfway open. |
38 |
| 5. Holding the door firmly on both sides using both hands, pull the door straight out of the hinge slots. Hold firmly, the door is heavy. |
38 |
| 6. Place the door in a convenient and stable location for cleaning. |
38 |
| Replacing the Oven Door |
38 |
| 1. Holding the door firmly in both hands, place hinges in hinge slots. |
38 |
| 2. Open door all the way to expose hinges and slots. Push lever (one on each hinge) away from you (back toward range). |
39 |
| 3. After moving the hinge brackets back down into position, be sure to close and open the door slowly to assure that it is correctly and securely in place. |
39 |
| 4. Door should be straight, not crooked. |
39 |
| Replacing an Oven Light |
39 |
| 1. Read the WARNING above. |
39 |
| 2. Turn off power at the main power supply (fuse or breaker box). |
39 |
| 3. Remove the lens by unscrewing it. |
39 |
| 4. Remove the light bulb from its socket by unscrewing it. |
39 |
| 5. Replace the bulb with a new 40 watt appliance bulb. Avoid touching the bulb with fingers, as oils from hands can damage the bulb when it becomes hot. |
39 |
| 6. Screw the lens back on. |
39 |
| 7. Turn power back on at the main power supply (fuse or breaker box). |
39 |
| Service |
39 |
| Self Help |
39 |
| The Cooktop |
39 |
| Table 12: Cooktop Troubleshooting Chart |
39 |
| The Oven |
40 |
| Table 13: Oven Troubleshooting Chart |
40 |
| Warranty |
41 |
| General Information |
41 |
| Standard Limited Warranty |
41 |
| Other Conditions of the Limited Warranties |
41 |
| How to Obtain Warranty Service |
41 |
| Notice To California Owners |
41 |
| Table des matières |
42 |
| Concernant ce guide |
43 |
| Présentation de ce guide |
43 |
| Sécurité |
43 |
| Instructions de sécurité importantes LIRE ET CONSERVER CES INSTRUCTIONS |
43 |
| Instructions de sécurité importantes |
43 |
| Sécurité pour le feu |
43 |
| Prévention de brûlures |
44 |
| Sécurité pour les enfants |
45 |
| Sécurité pour le nettoyage |
45 |
| Sécurité pour les casseroles |
46 |
| Installation et entretien |
46 |
| Figure 1 : Attention à ne pas faire basculer |
46 |
| Sécurité pour les aliments |
47 |
| Mise en œuvre |
47 |
| Pièces et accessoires |
47 |
| Figure 2: Pièces et accessoires |
47 |
| Tableau 1: Pièces et accessoires |
47 |
| Élément radiant |
48 |
| Élément jumelé |
48 |
| Élément triple |
48 |
| Élément pont (certains modèles) |
48 |
| Chaleur conservée |
48 |
| Limiteur de température |
48 |
| Voyant de surface chaude |
48 |
| Grilles de four |
48 |
| Grilles plates |
49 |
| 1. Saisir fermement la grille par les côtés. |
49 |
| 2. Incliner la grille vers le haut pour mettre la butée dans le guide. |
49 |
| 3. Amener la grille en position horizontale et pousser au fond. La grille doit être à plat, droite et non croche. |
49 |
| Figure 3: Insérer la grille |
49 |
| 1. Saisir fermement la grille par les côtés. |
49 |
| 2. Lorsque la butée est atteinte, incliner vers le haut et tirer complètement. |
49 |
| Grille rallonge (certains modèles) |
49 |
| Figure 4: Grille pleine rallonge |
49 |
| 1. Saisir les deux sections et tirer. |
50 |
| 2. Une fois la butée atteinte, saisir la section supérieure et tirer jusqu'à la seconde butée. Si la grille supérieure ne s'étire pas complètement, elle est mal installée. La réinstaller afin que la butée soit à l'arrière du four. |
50 |
| 1. Placer la grille sur une surface plate, en position fermée vers le haut. |
50 |
| 2. Tourner un côté de la grille supérieure vers soi jusqu'à ce qu'elle passe la butée (bille). |
50 |
| 3. Tirer la grille vers le haut et sortir. Tourner le côté d'abord. |
50 |
| Figure 5: Démontage |
50 |
| 1. Pour réassembler, tenir la grille diagonalement au-dessus de la grille inférieure. |
50 |
| 2. Insérer un côté de la grille supérieure en position fermée. |
50 |
| 3. Tourner l'autre côté vers l'arrière de la grille jusqu'à ce qu'il passe la butée (bille). |
50 |
| 4. Pousser complètement la grille supérieure (figure 3). |
50 |
| Figure 6: Réassemblage |
50 |
| Demie grille (certains modèles) |
51 |
| Figure 7: Demie grille |
51 |
| Fond du four |
51 |
| Event de four |
51 |
| Arrêt automatique |
51 |
| Autonettoyage |
51 |
| Voyants et autres caractéristiques |
51 |
| Ventilateur de refroidissement (modèle à encastrer seulement) |
52 |
| Ventilateur à convection |
52 |
| Panneau de contrôles |
52 |
| Panneau de contrôles du four |
52 |
| Figure 8: Panneau de contrôles du four |
52 |
| Tableau 2: Panneau de contrôles du four |
52 |
| La pendule |
53 |
| Concernant la pendule |
53 |
| Réglage de la pendule |
53 |
| 1. PENDULE s'affiche et les chiffres de l'heure clignotent. Tourner le bouton pour choisir l'heure et AM ou PM. |
53 |
| CLOCK |
53 |
| 2. Presser heure. PENDULE figure et les chiffres de minutes clignotent. |
53 |
| 3. Tourner le bouton. Régler les minutes. |
53 |
| 4. Presser heure et la pendule est réglée. |
53 |
| Changer la pendule |
53 |
| 1. Presser heure. MINUTERIE 1 clignote à l'affichage. |
53 |
| 2. Tourner le bouton pour choisir PENDULE. |
53 |
| 3. Presser heure et les chiffres de l'heure clignotent. |
53 |
| 4. Tourner le bouton pour changer les heures. |
53 |
| 5. Presser heure de nouveau et les minutes clignotent. |
53 |
| 6. Tourner le bouton pour changer les minutes. |
53 |
| 7. Presser heure de nouveau et la pendule est réglée. |
53 |
| Menu sélection de fonctions |
53 |
| 1. Presser et maintenir MODE CUISSON, presser pendant 5 secondes. SÉLECTION FONCTIONS figure. |
53 |
| 2. Tourner le bouton lentement à la caractéristique désirée. Il y a un léger délai avant chaque message (ou caractéristique) figurant à l'affichage. Tourner le bouton lentement et attendre environ 1 seconde afin que figure la fonction suivante. |
53 |
| 3. Presser MARCHE pour choisir une fonction. |
53 |
| 4. Tourner un bouton au réglage désiré et presser MARCHE. Lorsque tous les réglages pour la fonction sont complétés, SÉLECTION FONCTIONS clignote de nouveau. |
53 |
| 5. Presser ARRÊT pour quitter le menu. |
53 |
| Changer le volume du bip |
54 |
| 1. Accéder au menu SÉLECTION FONCTIONS. |
54 |
| 2. Tourner le bouton dans le sens horaire jusqu'à ce que VOLUME figure. |
54 |
| 3. Presser marche. |
54 |
| 4. Tourner le bouton pour choisir bas, moyen ou élevé. |
54 |
| 5. Presser marche. |
54 |
| Changer la gamme de température |
54 |
| 1. Accéder au menu SÉLECTION FONCTIONS. |
54 |
| 2. Tourner le bouton dans le sens horaire jusqu'à ce que SELECT TEMP F-C figure. |
54 |
| 3. Presser marche. |
54 |
| 4. Tourner le bouton pour choisir Fahrenheit (F) ou Celsius (C). |
54 |
| 5. Presser marche pour accepter le choix. |
54 |
| Affichage pendule marche ou arrêt |
54 |
| 1. Accéder au menu SÉLECTION FONCTIONS. |
54 |
| 2. Tourner le bouton dans le sens horaire jusqu'à ce que AFFICHAGE PENDULE figure. |
54 |
| 3. Presser marche. |
54 |
| 4. Tourner le bouton pour choisir marche ou arrêt. |
54 |
| 5. Presser marche pour accepter le choix. |
54 |
| Accès mode démo |
54 |
| Changer la langue d'affichage |
54 |
| 1. Accéder au menu SÉLECTION FONCTIONS. |
54 |
| 2. Tourner le bouton dans le sens horaire jusqu'à ce que la langue désirée figure. |
54 |
| 3. Presser marche. |
54 |
| 4. Tourner le bouton pour choisir une autre langue. |
54 |
| 5. Presser marche pour accepter le choix. |
54 |
| Verrouillage/déverrouillage du panneau de contrôle du four |
54 |
| 1. Accéder au menu SÉLECTION FONCTIONS. |
54 |
| 2. Tourner le bouton dans le sens horaire jusqu'à ce que VERROUILLAGE TOUCHES figure. |
54 |
| 3. Presser marche. TOUCHES VERROUILLÉES figure. L'affichage émet un bip si une touche est pressée pour indiquer qu'elle est verrouillée. |
54 |
| 4. Pour déverrouiller, presser mode cuisson et maintenir 5 secondes. L'affichage indique TOUCHE DÉVERROUILLÉE. |
54 |
| 5. Lorsque déverrouillé, la pendule figure de nouveau à l'affichage. |
54 |
| Changer le décalage température du four |
54 |
| 1. Accéder au menu SÉLECTION FONCTIONS. |
54 |
| 2. Tourner le bouton dans le sens horaire jusqu'à ce que DÉCALATE TEMPÉRATURE FOUR figure. |
54 |
| 3. Presser marche. 0 �F figure. |
54 |
| 4. Tourner le bouton pour augmenter la température en tranches de 25 ˚F. |
54 |
| 5. Presser marche pour accepter le choix. |
54 |
| Remise aux réglages en usine |
55 |
| 1. Accéder au menu SÉLECTION FONCTIONS. |
55 |
| 2. Tourner le bouton dans le sens horaire jusqu'à ce que REMISE PAR DÉFAUT figure. |
55 |
| 3. Presser marche. L'affichage indique REMISE PAR DÉFAUT. |
55 |
| Réglage fonction Sabbat |
55 |
| 1. S'assurer que le four est hors circuit. |
55 |
| 2. Accéder au menu SÉLECTION FONCTIONS. |
55 |
| 3. Tourner le bouton dans le sens horaire jusqu'à OPTION SABBAT. |
55 |
| 4. Presser MARCHE. CUISSON figure à l'affichage et la température clignote. |
55 |
| 5. Tourner le bouton pour régler la température du four. |
55 |
| 6. Mettre l'éclairage en circuit, si désiré (presser ÉCLAIRAGE). |
55 |
| 7. Presser MARCHE. Le four s'active après 5 secondes. |
55 |
| 1. Mettre le tiroir réchaud en circuit au réglage de chaleur désirée. Voir “Mise en circuit du tiroir réchaud” à la page 22. |
55 |
| 2. S'assurer que le four est hors circuit. |
55 |
| 3. Accéder au menu SÉLECTION FONCTIONS. |
55 |
| 4. Tourner le bouton dans le sens horaire jusqu'à OPTION SABBAT. |
55 |
| 5. Presser MARCHE. CUISSON figure à l'affichage et la température clignote. |
55 |
| 6. Tourner le bouton pour régler la température. |
55 |
| 7. Mettre l'éclairage en circuit, si désiré (presser ÉCLAIRAGE). |
55 |
| 8. Presser MARCHE. Le four s'active après 5 secondes. Le mode Sabbat est activé pour le tiroir réchaud et le four. |
55 |
| Changer le format heure |
56 |
| 1. Accéder au menu SÉLECTION FONCTIONS. |
56 |
| 2. Tourner le bouton dans le sens horaire jusqu'à ce que FORMAT HEURE figure. |
56 |
| 3. Presser marche. |
56 |
| 4. Tourner le bouton pour choisir le format 12 ou 24 heures |
56 |
| 5. Presser marche pour accepter le choix. |
56 |
| Mettre la conversion convection automatique en ou hors circuit |
56 |
| 1. Accéder au menu SÉLECTION FONCTIONS. |
56 |
| 2. Tourner le bouton dans le sens horaire jusqu'à ce que CUISSON CONVECTION AUTO figure. |
56 |
| 3. Presser marche. |
56 |
| 4. Tourner le bouton pour choisir marche ou arrêt |
56 |
| 5. Presser marche pour accepter le choix. |
56 |
| Avant d'utiliser l'appareil la première fois |
56 |
| Fonctionnement - surface de cuisson |
57 |
| Concernant la surface de cuisson |
57 |
| Fonctionnement |
57 |
| Régler le niveau de chaleur du brûleur |
57 |
| Bouton de contrôle d'élément simple |
57 |
| Figure 9: Bouton de contrôle d'élément simple |
57 |
| Bouton de contrôle d'élément jumelé |
57 |
| Figure 10: Bouton de contrôle d'élément jumelé |
58 |
| Bouton de contrôle d'élément triple (certains modèles) |
58 |
| Figure 11: Bouton pour élément triple |
58 |
| Contrôle de l'élément pont (certains modèles) |
58 |
| 1. 1. Pousser le bouton de contrôle et tourner dans le sens horaire au réglage désiré. |
58 |
| 2. Conseil : pour compléter la connexion et créer une plus grande surface de cuisson, mettre l'autre élément simple en circuit. |
58 |
| 1. Tourner le bouton dans le sens contre horaire. |
58 |
| 2. Élément pont avec élément simple arrièreÉlément pont avec élément simple avant. |
59 |
| Figure 12: Bouton d'élément pon |
59 |
| Fonctionnement - four |
59 |
| Concernant le four |
59 |
| Fonctionnement |
59 |
| Régler le mode cuisson et la température |
59 |
| 1. Presser MODE CUISSON. |
59 |
| 2. CUISSON clignote à l'affichage. |
59 |
| BAKE |
59 |
| 3. Si aucun changement n'est fait en 5 secondes, il y a un bip et un clignotement. Si cela se produit, presser MARCHE. |
59 |
| 4. Pour changer le mode cuisson, tourner le bouton. |
59 |
| 5. Presser MARCHE. |
59 |
| 6. Le mode choisi figure à l'affichage avec la température par défaut pour ce mode qui clignote. |
59 |
| 7. Pour choisir une autre température, tourner le bouton vers la droite ou la gauche (en tranches de 5˚) à la température désirée. |
59 |
| 8. Presser MARCHE, sinon le four se met automatiquement en circuit en 5 secondes. |
59 |
| 9. L'affichage alterne entre le mode de cuisson et préchauffage. |
59 |
| 10. Pour changer la température pendant la cuisson, presser température. Tourner le bouton pour choisir une nouvelle température et presser MARCHE. |
60 |
| 11. Une fois la cuisson complétée, presser ARRÊT pour mettre le four hors circuit. |
60 |
| Conversion convection automatique (modèles avec cuisson à convection) |
60 |
| Voyant four chaud |
60 |
| Utilisation de la minuterie |
60 |
| 1. Presser MINUTERIE et MINUTERIE 1 clignote. |
60 |
| TIMER 1 |
60 |
| 1 : 00 |
60 |
| 2. Tourner le bouton pour régler les minutes. Si seules les minutes sont réglées, presser MARCHE. Autrement, passer à l'étape 4. |
60 |
| Set TIMER 2 |
60 |
| 3. 3. Presser HEURE de nouveau et les heures clignotent. |
60 |
| 4. 4. Tourner le bouton pour régler les heures. |
60 |
| 5. 5. Presser HEURE. La MINUTERIE est réglée. |
60 |
| 6. 6. Si HEURE ou MARCHE n'est pas pressée, le four émet un bip et la minuterie clignote. |
60 |
| Changer les minuteries |
60 |
| 1. .Presser MINUTERIE et MINUTERIE 1 clignote. Choisir MINUTERIE 1 ou 2. |
60 |
| 0: 00 |
60 |
| 2. Presser HEURE. REMISE MINUTERIE 1 (2) figure. Les minutes clignotent. |
60 |
| 3. Tourner le bouton dans le sens horaire ou contre horaire pour changer les minutes. |
60 |
| 4. Presser HEURE de nouveau et l'heure clignote. |
60 |
| 5. Tourner le bouton dans le sens horaire ou contre horaire pour changer les heures. |
60 |
| 6. Presser HEURE et l'heure est réglée. |
60 |
| Effacer les minuteries |
60 |
| 1. Presser HEURE une fois. MINUTERIE 1 clignote. |
60 |
| 2. Tourner le bouton pour choisir EFFACER MINUTERIE 1 (2). Presser HEURE. |
61 |
| CLEAR TIMER 1 |
61 |
| 3. Si la touche heure n'est pas pressée, le four émet un bip et l'affichage clignote. |
61 |
| 4. 4. Presser HEURE pour revenir à l'écran principal. |
61 |
| Annulation |
61 |
| Utilisation de la cuisson minutée ou différée |
61 |
| Régler un mode minuté |
61 |
| 1. Presser MODE CUISSON |
61 |
| 2. CUISSON figure. Pour choisir un mode différent, tourner le bouton. |
61 |
| 3. Presser MARCHE. |
61 |
| 4. Tourner le bouton pour choisir la température désiré.e |
61 |
| 5. Presser HEURE. CUISSON MINUTÉE figure. |
61 |
| 6. Presser HEURE. RÉGLER DURÉE CUISSON figure et les minutes clignotent. |
61 |
| 7. Régler les minutes. Presser HEURE. |
61 |
| 8. Les heures clignotent. Régler les heures. Presser MARCHE. |
61 |
| 9. CUISSON MINUTÉE figure et le four commence à préchauffer. |
61 |
| 350� |
61 |
| Différer la mise en marche du mode minuté |
61 |
| 1. Suivre les étapes 1 à 5 ci-dessus. |
61 |
| 2. Tourner le bouton jusqu'à CUISSON DIFFÉRÉE.. |
61 |
| DELAYED BAKE |
61 |
| 3. Presser heure. RÉGLER DURÉE CUISSON figure et les minutes clignotent. |
61 |
| 4. Régler les minutes et presser HEURE. Les heures clignotent. |
61 |
| 5. Régler les heures, presser HEURE. RÉGLER FIN CUISSON figure. |
61 |
| 6. Presser HEURE. |
61 |
| 7. Utiliser le bouton pour entrer l'heure du jour où le four doit arrêter la cuisson ou se mettre hors circuit. |
61 |
| 8. Régler les heures, presser HEURE. |
61 |
| 9. Régler les minutes et presser HEURE. |
61 |
| Pour vérifier la durée de cuisson et arrêter la durée après que le différé est réglé |
62 |
| 1. Presser heure |
62 |
| 2. Tourner le bouton à FIN CUISSON ou DURÉE CUISSON |
62 |
| 3. Presser heure. |
62 |
| Régler la fonction Sabbat |
62 |
| Utilisation de la sonde (certains modèles) |
62 |
| Réglage de la sonde |
62 |
| 1. Préparer la viande et la placer dans la rôtissoire (ou sur un grille dans la rôtissoire selon la recette). Insérer la sonde d... |
62 |
| 2. Placer la rôtissoire avec la viande dans un four froid sur la grille recommandée. Brancher la sonde sur la prise. Le symbole de sonde figure à l’affichage. |
62 |
| 3. Presser MODE CUISSON et choisir CUISSON, CUISSON À CONVECTION ou RÔTISSAGE À CONVECTION. |
62 |
| 4. Presser MARCHE. La température par défaut s’affiche. |
62 |
| 5. Tourner le bouton pour changer la température du four, au besoin. |
62 |
| 6. Presser MARCHE. |
62 |
| 7. Tourner le bouton pour régler la température de la sonde (température finale désirée de l’aliment). |
62 |
| 8. Presser MARCHE. |
62 |
| Changer la température du four avec utilisation de la sonde |
62 |
| 1. Presser TEMPÉRATURE. La température du four clignote à l’affichage. |
62 |
| 2. Tourner le bouton à la température désirée et presser MARCHE deux fois. |
62 |
| Changer la température de la sonde |
62 |
| 1. Presser TEMPÉRATURE. La température du four clignote à l’affichage. |
62 |
| 2. Presser marche et TEMP. SONDE clignote. |
62 |
| 3. Tourner le bouton à la température désirée et presser MARCHE de nouveau. |
62 |
| Fonctionnement - tiroir réchaud (certains modèles) |
63 |
| Concernant le tiroir réchaud |
63 |
| Données techniques du tiroir réchaud |
63 |
| 1. Intérieur en acier inoxydable |
63 |
| 2. Joint |
63 |
| 3. Verrouillage de guide |
63 |
| Figure 13: Pièces du tiroir réchaud |
63 |
| Figure 14: Réglages du tiroir réchaud |
63 |
| Fonctionnement |
63 |
| Préchauffer |
64 |
| Durées de préchauffage : |
64 |
| Mise en circuit du tiroir réchaud |
64 |
| Tiroir réchaud seulement |
64 |
| 1. Presser MODE CUISSON. |
64 |
| 2. Tourner le bouton pour choisir TIROIR RÉCHAUD. |
64 |
| 3. Presser MARCHE. |
64 |
| 4. Tourner le bouton pour le réglage de chaleur. |
64 |
| 5. Presser MARCHE. |
64 |
| Avec le four |
64 |
| 1. Presser MODE CUISSON. |
64 |
| 2. Presser MARCHE pour choisir TIROIR RÉCHAUD. |
64 |
| 3. Tourner le bouton pour le réglage de chaleur. |
64 |
| 4. Presser MARCHE. |
64 |
| Régler le mode Sabbat |
64 |
| 1. Mettre le tiroir réchaud au niveau de chaleur désirée. |
64 |
| 2. Actionner le mode Sabbat. Voir “Régler le mode Sabbat” à la page 22. |
64 |
| Mise hors circuit du tiroir réchaud |
64 |
| Tiroir réchaud seulement |
64 |
| 1. Presser ARRÊT. |
64 |
| Tiroir réchaud et four |
64 |
| 1. Presser ARRÊT |
64 |
| 2. Tourner le bouton pour choisir ANNULATION TIROIR, ANNULATION FOUR ou ANNULATION LES DEUX. |
64 |
| 3. Presser ARRÊT. |
64 |
| Pour rendre croustillant |
64 |
| Réchauffer des bols ou assiettes vides |
64 |
| Tirer pleinement avantage de l'appareil |
65 |
| Tirer pleinement avantage de la surface de cuisson |
65 |
| Guide de cuisson pour la surface de cuisson |
65 |
| Bouillir l'eau |
65 |
| Réglages recommandés |
65 |
| Tableau 3: Guide de cuisson |
65 |
| Conseils pour l'élément pont (certains modèles) |
65 |
| Guide de sélection de casserole |
66 |
| Caractéristiques |
66 |
| Pour vérifier le plat des casseroles |
66 |
| Conseils pour casseroles |
66 |
| Casseroles spécialisées |
66 |
| Tirer pleinement avantage du four |
66 |
| Guide de cuisson avec le four |
66 |
| Position de grilles |
66 |
| Figure 15: Position de grilles |
66 |
| Cuisson sur plusieurs grilles |
66 |
| Emplacement des plats |
67 |
| Figure 16: Emplacement des plats |
67 |
| Plats à cuisson |
67 |
| Préchauffer le four |
67 |
| La sonde (certains modèles) |
67 |
| Modes de cuisson du four |
68 |
| Cuisson, levage, réchaud |
68 |
| Cuisson à convection |
68 |
| Conversion convection automatique |
68 |
| Tableau 4: Tableau de cuisson à convection |
69 |
| Gril |
69 |
| Tableau 5: Gril |
70 |
| Gril à convection (certains modèles |
70 |
| Tableau 6: gril à convection |
71 |
| Rôtissage à convection |
71 |
| Tableau 7: Convection Roast Chart |
71 |
| Déshydratation (certains modèles) |
72 |
| Tableau 8: Déshydratation |
73 |
| Tirer pleinement avantage du tiroir réchaud |
73 |
| Conseils généraux |
73 |
| Tableau 9: Tiroir réchaud |
74 |
| Nettoyage et entretien |
74 |
| Entretien et nettoyage |
74 |
| Entretien et nettoyage de la surface de cuisson |
74 |
| Précautions pour une longue durée et une belle apparence |
74 |
| Avant l'entretien |
75 |
| Techniques de nettoyage quotidien |
75 |
| 1. Nettoyer la surface complètement refroidie avec le nettoyant à surface en céramique vitrifiée. |
75 |
| 2. Essuyer les éclaboussures avec un essuie-tout ou une éponge propre et humide. Rincer et assécher. Utiliser du vinaigre blanc pour les taches tenaces ; rincer. |
75 |
| 3. Appliquer une petite quantité de nettoyant à surface en céramique vitrifiée. Lorsque sec, essuyer la surface avec un chiffon ou un essuie-tout propre. |
75 |
| Utilisation du grattoir à lame |
75 |
| Figure 17: Grattoir |
75 |
| Nettoyage des boutons de contrôle |
75 |
| 1. Tirer et enlever les boutons. Essuyer avec un chiffon savonneux chaud, rincer et sécher. Ne pas faire tremper. |
75 |
| 2. Pour remettre, pousser le bouton sur la tige. |
75 |
| Ne pas utiliser les nettoyants suivants |
75 |
| Tableau 10: Entretien de la surface de cuisson |
75 |
| Entretien et nettoyage - four |
76 |
| Autonettoyage du four |
76 |
| Préparation pour l'autonettoyage |
76 |
| 1. Retirer tout ustensile et casseroles. |
76 |
| 2. Retirer les grilles du four, si elles sont en place pendant l'autonettoyage, elles perdront de façon permanente leur fini et deviendront foncées. Voir le tableau d'entretien du four. |
76 |
| 3. Essuyer l'excédant de résidus, saletés et de graisse avant l'autonettoyage. |
77 |
| Figure 18: Directives de nettoyage |
77 |
| 4. Voir l'illustration ci-dessus. Certaines zones du four doivent être nettoyées à la main avant le début du cycle. Utiliser une... |
77 |
| 5. S'assurer que l'éclairage est hors circuit et que l'ampoule et le couvercle sont en place. Ne pas actionner le four si l'ampoule ou le couvercle n'est pas en place. |
77 |
| Réglage du mode autonettoyage |
77 |
| 1. Presser MODE CUISSON. |
77 |
| 2. Tourner le bouton pour afficher AUTONETTOYAGE. Presser MARCHE. |
77 |
| 3 |
77 |
| 3. Durée par défaut : 4 heures. Pour changer la durée, tourner le bouton pour changer les heures. Sinon, passer à l'étape 4. |
77 |
| 4. Presser MARCHE. AUTONETTOYAGE clignote. Presser MARCHE. |
77 |
| 5. ENLEVER GRILLES figure à l'affichage pour rappeler d'enlever les grilles. |
77 |
| 6. Presser MARCHE de nouveau pour commencer l'autonettoyage. |
77 |
| REMOVE RACKS |
77 |
| Différer l'autonettoyage |
77 |
| 1. Presser MODE CUISSON. |
77 |
| 2. Tourner le bouton pour afficher AUTONETTOYAGE. Presser MARCHE. |
77 |
| 3: 00 |
77 |
| 3. Durée par défaut : 4 heures. Pour changer la durée, tourner le bouton pour changer les heures. Sinon, passer à l'étape 4. |
77 |
| 4. Presser MARCHE. |
77 |
| 5. Tourner le bouton pour que figure AUTONETTOYAGE DIFFÉRÉ. Presser MARCHE. |
77 |
| 6. FIN AUTONETTOYAGE figure à l'affichage. |
78 |
| 5: 45 |
78 |
| 7. Tourner le bouton pour entrer l'heure du jour à laquelle l'autonettoyage prend fin. Régler les heures, presser heure, régler les minutes. |
78 |
| 8. Presser MARCHE. L'affichage rappel d'enlever les grilles. |
78 |
| 9. Presser MARCHE. L'affichage indique AUTONETTOYAGE DIFFÉRÉ. L'autonettoyage commence automatiquement à l'heure choisie. |
78 |
| Après l'autonettoyage |
78 |
| 1. À la fin de l'heure programmée, le four se met automatiquement hors circuit. FIN AUTONETTOYAGE figure. Presser ARRÊT pour effacer. |
78 |
| 2. Le mode autonettoyage peut produire de la cendre au fond du four. Si cela se produit, essuyer avec un chiffon humide avant d'utiliser le four. |
78 |
| 3. Essuyer les bords de grilles avec de l'huile. Essuyer l'excès. |
78 |
| Guide de nettoyage |
78 |
| Table 11: Nettoyage du four |
78 |
| Tiroirs (réchaud ou de rangement) |
79 |
| Entretien |
79 |
| Entretien du four |
79 |
| Retrait de la porte |
79 |
| 1. S'assurer de lire l'AVERTISSEMENT ci-dessus avant d'enlever la porte. |
79 |
| 2. Ouvrir la porte complètement. |
79 |
| 3. Basculer le levier de la charnière vers soi. |
79 |
| Figure 19: Positions de charnières |
79 |
| 4. Fermer la porte à environ mi chemin. |
80 |
| 5. Tenir fermement la porte par les côtés avec les deux mains, tirer la porte droit hors des fentes de charnières. Maintenir fermement, la porte est lourde. |
80 |
| 6. Placer la porte dans un endroit stable pour le nettoyage. |
80 |
| Installation de la porte |
80 |
| 1. Tenir fermement la porte avec les deux mains. Placer les charnières dans les fentes. |
80 |
| 2. Ouvrir la porte complètement pour exposer charnières et fentes. Pousser le levier (un sur chaque charnière) loin de soi (vers l'appareil). |
80 |
| 3. Après avoir placer les fixations de charnières en position, fermer et ouvrir la porte lentement pour s'assurer qu'elle est correcte et bien en place. |
80 |
| 4. La porte doit être droite, non croche. |
80 |
| Remplacer les ampoules du four |
80 |
| 1. Lire l'AVERTISSEMENT ci-dessus. |
80 |
| 2. Mettre hors circuit à l'alimentation principale (fusible ou coupe-circuit). |
80 |
| 3. Dévisser la lentille pour l'enlever. |
80 |
| 4. Dévisser l'ampoule de la douille. |
80 |
| 5. Remplacer l'ampoule par une nouvelle ampoule d'électroménagers 40 watts. Éviter de toucher l'ampoule avec les doigts, car les huiles de la main peuvent l'endommager lorsqu'elle devient chaude. |
80 |
| 6. Visser l'ampoule. |
80 |
| 7. Remettre en circuit à l'alimentation principale (fusible ou coupe-circuit). |
80 |
| Service |
80 |
| Aide |
80 |
| La surface de cuisson |
81 |
| Tableau 12: Guide de dépannage pour la surface de cuisson |
81 |
| Le four |
81 |
| Tableau 13: Guide de dépannage du four |
81 |
| Garantie |
82 |
| Généralités |
82 |
| Garantie limitée standard |
83 |
| Autres conditions des garanties limitées |
83 |
| Comment obtenir un service sous garantie |
83 |
| Avis aux propriétaires en Californie |
83 |
| Acerca de este manual |
85 |
| Cómo está organizado este manual |
85 |
| Seguridad |
85 |
| Instrucciones Importantes de Seguridad LEA Y GUARDE ESTAS INSTRUCCIONES |
85 |
| Instrucciones Importantes de Seguridad |
85 |
| Seguridad contra incendios |
85 |
| Prevención de quemaduras |
86 |
| Seguridad para niños |
87 |
| Seguridad durante la limpieza |
87 |
| Seguridad de los utensilios de cocinar |
88 |
| Instalación y Mantenimiento correcto |
88 |
| Figura 1: Precauciones de volcadura |
88 |
| Seguridad de los alimentos |
89 |
| Comenzar |
90 |
| Partes y accesorios |
90 |
| Figura 2: Partes y accesorios |
90 |
| Tabla 1: Llave para partes y accesorios |
90 |
| Elemento radiante |
90 |
| Elemento doble |
91 |
| Elemento triple |
91 |
| Elemento puente (algunos modelos) |
91 |
| Calor retenido |
91 |
| Regulador de temperatura |
91 |
| Indicador de superficie caliente |
91 |
| Rejillas del horno |
91 |
| Rejillas planas del horno |
91 |
| 1. Agarre la rejilla firmemente en ambos lados. |
91 |
| 2. Incline la rejilla hacia arriba para encajar el tope en el portarejillas. |
91 |
| 3. Cambie la rejilla a una posición horizontal y empújela completamente. La rejilla debe estar recta y plana, no torcida. |
92 |
| Figura 3: Insertar una rejilla |
92 |
| 1. Agarre la rejilla firmemente en ambos lados y jálela hacia usted. |
92 |
| 2. Al llegar al tope, incline la rejilla hacia arriba y jálela completamente. |
92 |
| Rejilla de extensión (algunos modelos) |
92 |
| Figura 4: Rejilla de extensión completa |
92 |
| 1. Agarre la sección inferior y jálela hacia usted. |
92 |
| 2. Una vez que llegue al tope, agarre la sección superior y jálela hacia usted hasta llegar al segundo tope. Si la rejilla super... |
92 |
| 1. Coloque la rejilla sobre una superficie plana en la posición cerrada con el lado superior hacia arriba. |
92 |
| 2. Gire un lado de la rejilla superior hacia usted hasta que salga del tope (bola). |
92 |
| 3. Jale la rejilla y sáquela con el lado girado primero. |
93 |
| Figura 5: Desmontaje |
93 |
| 1. Para reensamblar la rejilla, sostenga la rejilla superior diagonalmente sobre la rejilla inferior. |
93 |
| 2. Inserte un lado de la rejilla superior a la posición cerrada. |
93 |
| 3. Gire el otro lado hacia el fondo de la rejilla hasta que rebase el tope (bola). |
93 |
| 4. Empuje la rejilla completamente hacia adentro (Vea Figura 3). |
93 |
| Figura 6: Reensamblado |
93 |
| Rejilla media (algunos modelos) |
93 |
| Figura 7: Rejilla media del horno |
94 |
| Piso del horno |
94 |
| Abertura de ventilación del horno |
94 |
| Apagón automático |
94 |
| Autolimpieza |
94 |
| Indicadores y otras características |
94 |
| Ventilador de enfriamiento (Sólo los modelos deslizables) |
95 |
| Ventilador de convección |
95 |
| Panel de Control |
95 |
| Panel de control del horno |
95 |
| Figura 8: Panel de control del horno |
95 |
| Tabla 2: Panel de control del horno |
95 |
| El reloj |
96 |
| Acerca del reloj |
96 |
| Poner el reloj |
96 |
| 1. Aparecerá CLOCK (Reloj) y los dígitos de la hora parpadean. Gire la perilla para seleccionar la hora y am o pm. |
96 |
| CLOCK |
96 |
| 2. Oprima TIME (Hora). Aún aparece CLOCK y los dígitos de minutos parpadearán. |
96 |
| 3. Gire la perilla. Ajuste los minutos. |
96 |
| 4. Oprima TIME y el reloj queda configurado. |
96 |
| Cambiar el reloj |
96 |
| 1. Oprima TIME (Hora). TIMER 1 (Cronómetro) parpadeará en la pantalla. |
96 |
| RELOJ 1 |
96 |
| 2. Gire la perilla para seleccionar CLOCK. |
96 |
| 3. Oprima TIME y parpadearán los dígitos de la hora. |
96 |
| 4. Gire la perilla para cambiar las horas. |
96 |
| 5. Oprima TIME nuevamente y parpadearán los dígitos de minutos. |
96 |
| 6. Gire la perilla para cambiar los minutos. |
96 |
| 7. Oprima TIME nuevamente y el reloj quedará configurado. |
96 |
| El Menú Select Functions (Seleccionar Funciones) |
96 |
| 1. Mantenga oprimido el botón MODO DE COCINAR (COOKING MODE) por cinco (5) segundos. SELECT FUNCTION aparece en la pantalla. |
97 |
| 2. Gire la perilla lentamente a la opción deseada. Habrá un ligero retardo antes de poder ver cada mensaje (u opción) en la pantalla. Gire la perilla lenta- mente y espere aproximadamente un segundo para ver la siguiente opción en la pantalla. |
97 |
| 3. Oprima START para seleccionar la función. |
97 |
| 4. Gire la perilla al ajuste deseado y oprima START. Cuando se han completado todos los ajustes para la función, SELECT FUNCTION vuelve a parpadear. |
97 |
| 5. Oprima OFF para salir del menú Seleccionar Función. |
97 |
| Cambiar el volumen del pitido |
97 |
| 1. Acceda al menú SELECT FUNCTION. |
97 |
| 2. Gire la perilla en sentido del reloj hasta que aparezca VOLUME (Volumen). |
97 |
| 3. Oprima START. |
97 |
| 4. Gire la perilla para seleccionar el nivel de volumen, Bajo, Mediano o Alto. |
97 |
| 5. Oprima START. |
97 |
| Cambiar la escala de la temperatura |
97 |
| 1. Acceda al menú SELECT FUNCTION. |
97 |
| 2. Gire la perilla en sentido del reloj que aparezca SELECC TEMP F-C. |
97 |
| 3. Oprima Start. |
97 |
| 4. Gire la perilla para seleccionar grados Fahrenheit (F) o Celsio (C). |
97 |
| 5. Oprima Start para aceptar la nueva seleción. |
97 |
| Prender y apagar el reloj |
97 |
| 1. Acceda al menú SELECT FUNCTION. |
97 |
| 2. Gire la perilla en sentido del reloj hasta que aparezca CLOCK DISPLAY. |
97 |
| 3. Oprima START. |
97 |
| 4. Gire la perilla para seleccionar ON (Prender) u OFF (Apagar). |
97 |
| 5. Oprima START para aceptar la nueva selección. |
97 |
| Acceder al modo de demostración |
97 |
| Cambiar el idioma en la pantalla |
97 |
| 1. Acceda al menú SELECT FUNCTION. |
97 |
| 2. Gire la perilla en sentido del reloj hasta que aparezca el idioma deseado. |
97 |
| 3. Oprima START. |
97 |
| 4. Gire la perilla en sentido del reloj para seleccionar un idioma diferente. |
97 |
| 5. Oprima START para aceptar el idioma nuevo. |
97 |
| Bloquear/desbloquear el panel de control del horno |
97 |
| 1. Acceda al menú SELECT FUNCTION. |
97 |
| 2. Gire la perilla en sentido del reloj hasta que parpadee LOCK KEYS. |
97 |
| 3. Oprima Start. Aparece KEY PAD LOCKED. La pantalla emite un pitido cuando se oprime una tecla para indicar que el teclado está bloqueado. |
97 |
| 4. Para desbloquear los teclados, oprima COOKING MODE (Modo de Cocinar) y mantenga oprimido por 5 segundos. La pantalla indicará UNLOCKING KEY PAD. |
98 |
| 5. Cuando está desbloqueado, el reloj volverá a aparecer en la pantalla. |
98 |
| Cambiar la compensación de la temperatura del horno |
98 |
| 1. Acceda al menú SELECT FUNCTION. |
98 |
| 2. Gire la perilla en sentido del reloj hasta que aparezca COMP HORN TEMP. |
98 |
| 3. Oprima START. Aparece 0� F. |
98 |
| 4. Gire la perilla para aumentar la temperatura en incrementos de 25�F. |
98 |
| 5. Oprima START para aceptar el cambio de la temperatura. |
98 |
| Restablecer los ajustes de fábrica |
98 |
| 1. Acceda al menú SELECT FUNCTION. |
98 |
| 2. Gire la perilla en sentido del reloj hasta que aparezca RESET DEFAULTS. |
98 |
| 3. Oprima START. La pantalla muestra SELECT FUNCTION. |
98 |
| Poner la opción Sabatina |
98 |
| 1. Verifique que el horno esté apagado. |
98 |
| 2. Acceda al menú SELECT FUNCTION. |
98 |
| 3. Gire la perilla en sentido del reloj hasta que aparezca SABBATH OPTION. |
98 |
| 4. Oprima START. La pantalla indicará BAKE (Hornear) y la temperatura empieza a parpadear. |
98 |
| 5. Gire la perilla para fijar la temperatura del horno. |
98 |
| 6. Prenda la luz del horno si así lo desea (oprima LIGHT) (Luz). |
98 |
| 7. Oprima START. El horno comienza después de 5 segundos. |
98 |
| 1. Cambie el cajón calentador al ajuste de calor deseado. Vea “Prender el cajón calentador” en la página 23 |
98 |
| 2. Verifique que el horno esté apagado. |
99 |
| 3. Acceda al menú SELECT FUNCTION. |
99 |
| 4. Gire la perilla en sentido del reloj hasta que aparezca SABBATH OPTION. |
99 |
| 5. Oprima Start. La pantalla indicará BAKE (Hornear) y la temperatura empieza a parpadear. |
99 |
| 6. Gire la perilla para fijar la temperatura del horno. |
99 |
| 7. Prenda la luz del horno si así lo desea (oprima LIGHT) (Luz). |
99 |
| 8. Oprima Start. El horno comienza después de 5 segundos. La opción Sabatina es activada para el cajón calentador y el horno. |
99 |
| Cambiar el formato de la hora |
99 |
| 1. Acceda al menú SELECT FUNCTION. |
99 |
| 2. Gire la perilla en sentido del reloj hasta que aparezca TIME FORMAT. |
99 |
| 3. Oprima Start. |
99 |
| 4. Gire la perilla para seleccionar el formato de 12 horas o de 24 horas. |
99 |
| 5. Oprima Start para aceptar la nueva seleción. |
99 |
| Prender o Apagar la conversión automática al modo de convección |
99 |
| 1. Acceda al menú SELECT FUNCTION. |
99 |
| 2. Gire la perilla en sentido del reloj hasta que aparezca AUTO CONVECT BAKE. |
99 |
| 3. Oprima Start. |
99 |
| 4. Gire la perilla para seleccionar ON u OFF (Prender o Apagar) |
99 |
| 5. Oprima Start para aceptar la nueva selección. |
99 |
| Antes de usar el aparato por primera vez |
99 |
| Funcionamiento - Parrilla |
100 |
| Acerca de la parrilla |
100 |
| Funcionamiento |
100 |
| Ajustar la temperatura de los quemadores |
100 |
| Perilla de control para un elemento sencillo |
100 |
| Figura 9: Perilla de control de un elemento sencillo |
100 |
| Perilla de control para el elemento doble |
100 |
| Figura 10: Perilla de control de un elemento doble |
101 |
| Perilla de control para el elemento triple (algunos modelos) |
101 |
| Figura 11: Perilla de control del elemento triple |
101 |
| Perilla de control del elemento puente (algunos modelos) |
101 |
| 1. Empuje la perilla de control y gírela en sentido del reloj hasta el ajuste de calor deseado. |
101 |
| 2. Consejo: Para terminar la conexión y crear una superficie de cocinar aún más larga, prenda también el otro elemento sencillo. |
101 |
| 1. Gire la perilla en sentido contrario del reloj. |
102 |
| Figure 12: Perilla de control del elemento puente |
102 |
| Funcionamiento - Horno |
102 |
| Acerca del horno |
102 |
| Funcionamiento |
102 |
| Ajustar el modo de cocinar y la temperatura |
102 |
| 1. Oprima COOKING MODE. |
102 |
| 2. BAKE parpadea en la pantalla. |
102 |
| BAKE |
102 |
| 3. Cuando no se realiza otro ajuste dentro de 5 segundos, el control emitirá un pitido y parpadea. Cuando esto sucede, oprima START. |
102 |
| 4. Gire la perilla para cambiar el modo de cocinar. |
102 |
| 5. Oprima START. |
102 |
| 6. El modo seleccionado aparecerá en la pantalla, junto con la temperatura de default para ese modo, la cual estará parpadeando. |
102 |
| 7. Para seleccionar una temperatura diferente, gire la perilla hacia la derecha o izquierda (en incrementos de 5�) hasta llegar a la temperatura deseada. |
102 |
| 8. Oprima START. Si no oprime START, el horno se prenderá automáticamente en 5 segundos. |
102 |
| 9. La pantalla alterna entre el modo de cocinar y precalentar. |
102 |
| 10. Para cambiar la temperatura durante el proceso de cocinar, simplemente oprima Temperature. Gire la perilla para seleccionar una temperatura nueva y oprima START. |
103 |
| 11. Una vez que haya terminado el horneado, oprima OFF para apagar el horno. |
103 |
| Conversión automática al modo de convección (modelos con horneado por convección) |
103 |
| Indicador del horno caliente |
103 |
| Usar el cronómetro |
103 |
| 1. Oprima TIME y TIMER 1 parpadea en la pantalla. |
103 |
| TIMER 1 |
103 |
| 1 : 00 |
103 |
| 2. Gire la perilla para fijar los minutos. Si ajusta solamente los minutos, oprima START. De lo contrario, siga con el paso 4. |
103 |
| FIJ RELOJ 2 |
103 |
| 3. Oprima TIME nuevamente y las horas parpadean. |
103 |
| 4. Gire la perilla para fijar las horas. |
103 |
| 5. Oprima TIME nuevamente. Ahora el TIMER (Cronómetro) está configurado. |
103 |
| 6. Si no oprime TIME o START, el horno comenzará a emitir pitidos y la pantalla del reloj comienza a parpadear. |
103 |
| Cambiar el cronómetro(s) |
103 |
| 1. Oprima TIME. TIMER 1 aparece en la pantalla. Seleccione TIMER 1 o 2. |
103 |
| 0: 00 |
103 |
| 2. Oprima TIME. RESET TIMER 1 (2) aparece en la pantalla. Los minutos parpadean. |
103 |
| 3. Gire la perilla en sentido del reloj o en contrasentido para cambiar los minutos |
104 |
| 4. Oprima TIME nuevamente y parpadean los dígitos de las horas. |
104 |
| 5. Gire la perilla en sentido del reloj en contrasentido para cambiar las horas. |
104 |
| 6. Oprima TIME el tiempo nuevo está configurado. |
104 |
| Borrar el cronómetro(s) |
104 |
| 1. Oprima TIME una vez. TIMER 1 parpadea. |
104 |
| 2. Gire la perilla para seleccionar CLEAR TIMER 1(2). Oprima TIME. |
104 |
| CLEAR TIMER 1 |
104 |
| 3. Si no oprime el botón TIME, el horno emitirá un pitido y la pantalla sigue parpadeando. |
104 |
| 4. Oprima TIME para regresar a la pantalla principal. |
104 |
| Cancelar |
104 |
| Usar el modo de cocinar cronometrado o retardado |
104 |
| Configurar un modo cronometrado |
104 |
| 1. Oprima COOKING MODE. |
104 |
| 2. BAKE aparece en la pantalla. Para seleccionar otro modo de cocinar, gire la perilla. |
104 |
| 3. Oprima START. |
104 |
| 4. Gire la perilla para seleccionar la temperatura deseada. |
104 |
| 5. Oprima TIME. TIMED BAKE aparece en la pantalla. |
104 |
| 350� |
104 |
| 6. Oprima TIME. SET BAKE TIME aparece en la pantalla y los minutos parpadean. |
104 |
| 7. Fije los minutos. Oprima TIME. |
104 |
| 8. Las horas parpadean. Fije las horas. Oprima START. |
104 |
| 9. TIMED BAKE aparece en la pantalla y el horno comienza a precalentar. |
104 |
| Retardar el inicio de un modo cronometrado |
104 |
| 1. Siga los pasos 1 hasta 5 de arriba. |
104 |
| 2. Gire la perilla hasta que aparezca DELAYED BAKE. |
104 |
| DELAYED BAKE |
104 |
| 3. Oprima Time. SET BAKE TIME aparece en la pantalla y los minutos parpadean. |
104 |
| 4. Fije los minutos y luego oprima TIME. Las horas parpadean. |
104 |
| 5. Fije las horas y luego oprima TIME. SET BAKE END aparece en la pantalla. |
104 |
| 6. Oprima Time. |
104 |
| 7. Use la perilla para ingresar la hora del día cuando el horno deje de cocinar o cuando se apague. |
104 |
| 8. Fije las horas y luego oprima TIME. |
104 |
| 9. Fije los minutos y luego oprima TIME. |
105 |
| 10. Al final del tiempo programado de cocinar, el horno se apaga automáticamente. La pantalla indicará TIME COOK END (Fin del Horneado Cronometrado) y se escucharán pitidos de recordatorio. Oprima OFF para apagarlo. |
105 |
| Para revisar el tiempo de cocinar y el tiempo de detención después de haber fijado un retardo |
105 |
| 1. Oprima Time. |
105 |
| 2. Gire la perilla a BAKE END o BAKE TIME. |
105 |
| 3. Oprima Time. |
105 |
| Poner la opción Sabatina |
105 |
| Usar el termómetro (algunos modelos) |
105 |
| Configurar el termómetro |
105 |
| 1. Prepare la carne y póngala en la olla para asar (o sobre la rejilla como lo especifica la receta). Inserte el termómetro en l... |
105 |
| 2. Coloque la olla con la carne en el horno frío sobre la rejilla recomendada. Ponga el termómetro en el receptáculo. El símbolo del termómetro aparecerá en la pantalla. |
105 |
| 3. Oprima COOKING MODE (Modo de Cocinar) y seleccione BAKE, CONVECTION BAKE o CONVECTION ROAST. (HORNEADO, HORNEADO DE CONVECCIÓN o ASADO DE CONVECCIÓN). |
105 |
| 4. Oprima START. Aparecerá la temperatura del horno por default. |
105 |
| 5. Gire la perilla para cambiar la temperatura del horno si es necesario. |
105 |
| 6. Oprima START. |
105 |
| 7. Gire la perilla para ajustar la temperatura del termómetro (la temperatura final deseada del alimento). |
105 |
| 8. Oprima START. |
105 |
| Cambiar la temperatura del horno usando el termómetro |
106 |
| 1. Oprima TEMPERATURA. La temperatura del horno parpadeará. |
106 |
| 2. Gire la perilla a la temperatura deseada y oprima START dos veces. |
106 |
| Cambiar la temperatura del termómetro |
106 |
| 1. Oprima TEMPERATURA. La temperatura del horno parpadeará. |
106 |
| 2. Oprima start y PROBE TEMP (TEMPERATURA DEL TERMÓMETRO) parpadeará. |
106 |
| 3. Gire la perilla a la temperatura deseada y oprima START nuevamente. |
106 |
| Funcionamiento - Cajón Calentador (algunos modelos) |
106 |
| Acerca del cajón calentador |
106 |
| Especificaciones del cajón calentador |
106 |
| 1. Interior del cajón de acero inoxidable |
106 |
| 2. Empaque |
106 |
| 3. Bloqueo del riel |
106 |
| Figura 13: Partes del cajón calentador |
106 |
| Figura 14: Ajustes del cajón calentador |
107 |
| Funcionamiento |
107 |
| Precalentar |
107 |
| Tiempos para precalentar |
107 |
| Prender el cajón calentador |
107 |
| Cuando se usa solamente el cajón calentador |
107 |
| 1. Oprima COOKING MODE. |
107 |
| 2. Gire la perilla para seleccionar WARMING DRAWER (Cajón calentador). |
107 |
| 3. Oprima START. |
107 |
| 4. Gire la START para seleccionar el ajuste de calor. |
107 |
| 5. Oprima Start. |
107 |
| Cuando se usa también el horno |
107 |
| 1. Oprima COOKING MODE. |
107 |
| 2. Oprima Start para seleccionar WARMING DRAWER. |
107 |
| 3. Gire la perilla para seleccionar el ajuste de calor. |
107 |
| 4. Oprima START. |
107 |
| Poner la opción Sabatina |
107 |
| 1. Ajuste la temperatura deseada en el cajón calentador. |
107 |
| 2. Active la opción Sabatina. Vea “Poner la opción Sabatina” en la página 14. |
107 |
| Apagar el cajón calentador |
108 |
| Cuando se usa solamente el cajón calentador |
108 |
| 1. Oprima OFF. |
108 |
| Cuando se usa el cajón calentador y el horno |
108 |
| 1. Oprima OFF. |
108 |
| 2. Gire la perilla para seleccionar CANCEL DRWR, CANCEL OVEN, o CANCEL BOTH (Cancelar Cajón, Cancelar Horno o Cancelar Ambos). |
108 |
| 3. Oprima OFF. |
108 |
| Dorar alimentos viejos, no frescos |
108 |
| Calentar platos y tazones vacíos |
108 |
| Sacar el mayor provecho de su aparato |
108 |
| Sacar el mayor provecho de su aparato |
108 |
| Guía para cocinar con la parrilla |
108 |
| Hervir agua |
108 |
| Ajustes recomendados |
108 |
| Tabla 3: Guía para cocinar |
109 |
| Consejos para el elemento puente (algunos modelos) |
109 |
| Guía de selección de los utensilios de cocinar |
109 |
| Características de los utensilios |
109 |
| Comprobar lo plano de sus ollas |
109 |
| Consejos para los utensilios de cocina |
109 |
| Ollas especiales |
110 |
| Sacar el mayor provecho de su horno |
110 |
| Guía para cocinar con su horno |
110 |
| Posición de rejillas |
110 |
| Figura 15: Posiciones de rejillas |
110 |
| Cocinar con múltiples rejillas |
110 |
| Colocación de moldes |
110 |
| Figura 16: Colocación de moldes |
110 |
| Moldes para hornear |
110 |
| Precalentar el horno |
111 |
| El termómetro (algunos modelos) |
111 |
| Modos de cocinar del horno |
111 |
| Hornear, fermentar y calentar |
111 |
| Hornear por convección |
112 |
| Conversión automática al modo de convección |
112 |
| Tabla 4: Tabla del horneado por convección |
113 |
| Asar |
113 |
| Tabla 5: Tabla para asar |
114 |
| Asar por convección (algunos modelos) |
114 |
| Tabla 6: Tabla para asar por convección |
115 |
| Tostar por convección |
115 |
| Tabla 7: Tabla para tostar por convección |
115 |
| Deshidratar (algunos modelos) |
116 |
| Tabla 8: Tabla para deshidratar |
117 |
| Sacar el mayor provecho de su cajón calentador |
117 |
| Consejos generales |
117 |
| Tabla 9: Tabla para el cajón calentador |
117 |
| Limpieza y Mantenimiento |
118 |
| Cuidado y Limpieza |
118 |
| Cuidado y Limpieza - la Parrilla |
118 |
| Precauciones para una larga vida y una buena apariencia de la superficie |
118 |
| Cuidarla antes de usarla |
119 |
| Técnicas de limpieza diaria |
119 |
| 1. Limpie la superficie cuando esté totalmente fría con la crema de limpieza para parrillas. Excepción: quite azúcar seca, jarab... |
119 |
| 2. Limpie las salpicaduras con una esponja limpia, húmeda o con una toalla de papel. Enjuague y seque. Use vinagre si la mancha permanece; enjuague. |
119 |
| 3. Aplique una pequeña cantidad de la crema de limpieza para la parrilla de cerámica. Cuando esté seca, saque brillo a la superficie con una toalla limpia de papel o un trapo. |
119 |
| Usar el raspador con navaja de rasurar |
119 |
| Figura 17: Raspador |
119 |
| Limpiar las perillas de control |
119 |
| 1. Jale y saque ambas perillas. Límpielas con un trapo caliente, jabonoso, enjuague y seque. No los remoje. |
119 |
| 2. Para reemplazarla, coloque la perilla directamente sobre el eje. |
119 |
| No use los siguientes limpiadores |
119 |
| Tabla 10: Tabla de cuidado para la parrilla |
120 |
| Cuidado y Limpieza - Horno |
120 |
| Autolimpiar el horno |
120 |
| Preparar el horno para la autolimpieza |
121 |
| 1. Saque todos los utensilios y moldes. |
121 |
| 2. Saque las rejillas del horno. Si se dejan las rejillas en el horno durante el ciclo de la autolimpieza, perderán su acabado b... |
121 |
| 3. Limpie restos de alimentos suaves y grasa con toallas de papel antes de iniciar la autolimpieza. Un exceso de grasa causará llamas y humo dentro del horno durante la autolimpieza. |
121 |
| Figura 18: Indicaciones para la limpieza |
121 |
| 4. Revise la ilustración arriba. Algunas áreas del horno deben ser limpiadas a mano antes de iniciar el ciclo. Use una esponja j... |
121 |
| 5. Asegúrese que las lámparas interiores del horno estén apagadas y que los focos y las cubiertas de lentes estén en sus lugares. No debe operar el horno sin que los focos y las cubiertas estén en sus lugares. |
121 |
| Poner el modo de autolimpieza |
121 |
| 1. Oprima COOKING MODE (Modo de Cocinar). |
121 |
| 2. Gire la perilla hasta que aparezca el modo SELF CLEAN. Oprima START. |
121 |
| 3. El tiempo de limpieza por default es 4 horas. Para cambiar el tiempo de limpieza, gire la perilla para cambiar el número de horas. De otro modo, siga con el paso 4. |
121 |
| 3 |
121 |
| 4. Oprima START. SELF CLEAN parpadea. Oprima START. |
122 |
| 5. REMOVE RACKS aparece en la pantalla como recordatorio para quitar las rejillas del horno. |
122 |
| REMOVE RACKS |
122 |
| 6. Oprima START nuevamente para iniciar la autolimpieza. |
122 |
| Retardar el arranque de la autolimpieza |
122 |
| 1. Oprima COOKING MODE. |
122 |
| 2. Gire la perilla hasta que aparezca el modo SELF CLEAN. Oprima START. |
122 |
| 3. El tiempo de limpieza por default es 4 horas. Para cambiar el tiempo de lim- pieza, gire la perilla para cambiar el número de horas. De otro modo, siga con el paso 4. |
122 |
| 4. Oprima START. |
122 |
| 5. Gire la perilla hasta que aparezca el modo START CLEAN. Oprima Start. |
122 |
| 3: 00 |
122 |
| 6. SELF CLEAN END (Fin de Autolimpieza) aparece en la pantalla. |
122 |
| 5: 45 |
122 |
| 7. Gire la perilla para ingresar la hora del día cuando quiere terminar la autolimpieza: Fije las horas, oprima time, fije los minutos. |
122 |
| 8. Oprima START. La pantalla le va a recordar de quitar las rejillas. |
122 |
| 9. Oprima Start. La pantalla muestra DELAYED CLEAN (Limpieza Retardada). La autolimpieza se iniciará automáticamente a la hora correcta. |
122 |
| Después de la autolimpieza |
122 |
| 1. Al final del tiempo programado de limpieza, el horno se apagará automáticamente. SELF CLEAN END aparece en la pantalla. Oprima OFF para borrarlo. |
122 |
| 2. El modo de autolimpieza puede producir cenizas que se asentarán dentro del horno. Cuando esto sucede, quite las cenizas con un trapo húmedo antes de usar el horno. |
122 |
| 3. Limpie los bordes de las rejillas con aceite comestible para permitir un deslizamiento correcto. Limpie el exceso del aceite. |
122 |
| Guía de limpieza |
123 |
| Tabla 11: Guía de limpieza |
123 |
| Cajones (Almacenamiento y Calentador) |
123 |
| Mantenimiento |
123 |
| Mantenimiento de horno |
123 |
| Quitar la puerta |
123 |
| 1. Asegúrese de leer la ADVERTENCIA anterior antes de tratar de quitar la puerta. |
123 |
| 2. Abra la puerta completamente. |
123 |
| 3. Voltee la palanca en la bisagra hacia usted. |
124 |
| Figura 19: Posiciones de las bisgras |
124 |
| 4. Cierre la puerta dejándola mitad abierta. |
124 |
| 5. Sosteniendo la puerta firmemente en ambos costados con ambas manos, jale la puerta y sáquela de las ranuras de las bisagras. Sostenga la puerta firmemente, ya que pesa mucho. |
124 |
| 6. Coloque la puerta en un lugar conveniente y estable para su limpieza. |
124 |
| Reemplazar la puerta del horno |
124 |
| 1. Sosteniendo la puerta firmemente con ambas manos, coloque las bisagras en las ranuras. |
124 |
| 2. Abra la puerta completamente para exponer las bisagras y las ranuras. Empuje la palanca (una en cada bisagra) lejos de sí mismo (dé vuelta hacia la estufa). |
124 |
| 3. Después de regresar los soportes con bisagra a su posición, asegúrese de cerrar y abrir la puerta lentamente para estar seguro que esté colocada bien y que funcione correctamente. |
124 |
| 4. La puerta debe estar recta, no torcida o chueca. |
124 |
| Reemplazar una lámpara del horno |
125 |
| 1. Lea la ADVERTENCIA de arriba. |
125 |
| 2. Apague la corriente en la principal fuente de alimentación (caja de fusibles o interruptor). |
125 |
| 3. Desatornille el lente y sáquelo. |
125 |
| 4. Saque el foco de su casquillo, dándole vueltas. |
125 |
| 5. Reemplace el foco por uno nuevo. Use un foco de 40 Watt aprobado para aparatos electrodomésticos. Evite tocar el foco con los dedos, ya que la grasa de las manos puede dañar el foco cuando éste se calienta. |
125 |
| 6. Vuelva a atornillar el lente. |
125 |
| 7. Prenda la corriente en la principal fuente de alimentación (caja de fusibles o interruptor). |
125 |
| Servicio |
125 |
| Autoayuda |
125 |
| La parrilla |
125 |
| Tabla 12: Tabla para resolver problemas con la parrilla |
125 |
| El horno |
126 |
| Tabla 13: Tabla para resolver problemas con el horno |
126 |
| Garantía |
127 |
| Información general |
127 |
| Garantía limitada estándar |
127 |
| Otras condiciones de las garantías limitadas |
127 |
| Cómo obtener servicio de garantía |
127 |
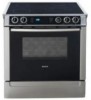
 1
1 4
4 5
5 6
6 7
7 8
8 9
9 10
10 11
11 12
12 13
13 14
14

