Bosch HIB82651UC Installation Instructions - Page 12
Connecting the air extractor only for, ducted operation, Mounting the recirculation model only for,
 |
View all Bosch HIB82651UC manuals
Add to My Manuals
Save this manual to your list of manuals |
Page 12 highlights
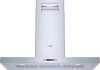
Connecting the air extractor (only for ducted operation) Note: If an aluminum pipe is used, smooth the connection area beforehand. 1. Attach exhaust air pipe and seal. 2. Check whether the back-pressure flap works. Mounting the recirculation model (only for circulating-air mode) 1. Use 2 screws to screw the housing for the recirculation module to the ceiling bracket. Connect Electrical Supply 9 WARNING RISK OF ELECTRIC SHOCK Before wiring the appliance, interrupt the main electrical circuit at the electrical control cabinet. A circuit with 120 VAC, 15 or 20 Ampere is required. Grounding notes: this appliance is equipped with a distributor box with 3 cables. Use the green-yellow cable for grounding the appliance. Connect the green-yellow cable to the grounding cable on the house connection to prevent electric sthock. Do not under any circumstances damage or remove the green-yellow cable. Non-adherence can cause deadly injuries or electric shock. 2. Measure the distance (x) between the lower edge of the housing for the recirculation module and the lower edge of the back-pressure flap. 1. Remove the left cable passage and the cover of the motor controller. Fasten the connecting piece for the installation pipe (listed in cULUS) to the cable passage. $ % Y 3. Shorten the exhaust air pipe to the length measured. 4. Push the exhaust air pipe onto the bottom of the recirculation module. 5. Position the recirculation module with exhaust air pipe over the air extraction duct of the extractor hood. 6. Use aluminum tape (NOT insulating tape) to seal the fastening of the exhaust air pipe on the recirculation module and on the air extraction duct of the extractor hood. A Cable passage B Cover of the motor controller 2. Connect 1/2" (12.7 mm) installation pipe to motor controller. $ % & A Installation pipe B Power connection C Cable connector listed in UL 12
-
 1
1 -
2
-
3
-
4
-
5
-
6
-
 7
7 -
 8
8 -
 9
9 -
 10
10 -
 11
11 -
 12
12 -
 13
13 -
 14
14 -
 15
15 -
 16
16 -
 17
17 -
18
-
19
-
20
-
21
-
22
-
23
-
24
-
25
-
26
-
27
-
28
-
29
-
30
-
31
-
32
-
33
-
34
-
35
-
36
-
37
-
38
-
39
-
40
 |
 |
