Bosch MUM4405UC Use & Care Manual - Page 2
Caution
 |
View all Bosch MUM4405UC manuals
Add to My Manuals
Save this manual to your list of manuals |
Page 2 highlights
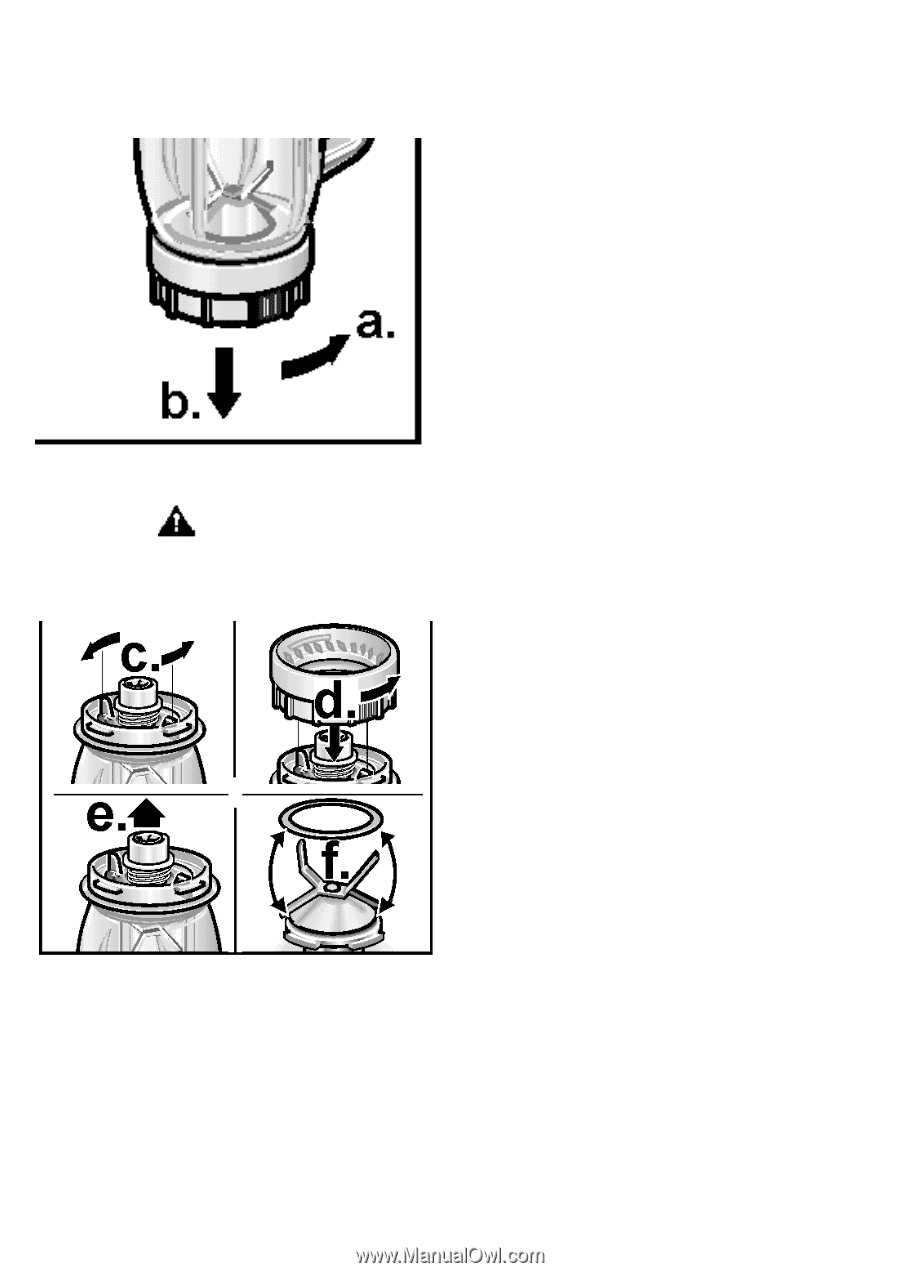
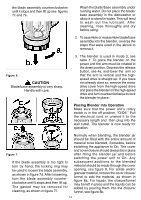
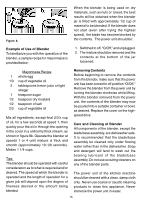
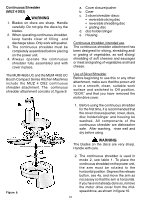
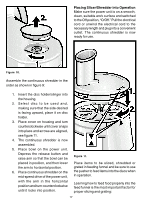
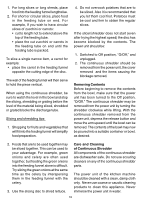
the blade assembly counterclockwise until it stops and then lift up see figures 7c and 7e. Wash the blade/base assembly under running water. Do not place the blade/ base assembly in the dishwasher or allow it to stand in water. This will tend to wash out the lubricant. After cleaning, rinse thoroughly and dry before using. 2. To assemble or reassemble blade/base assembly into the blender, reverse the steps that were used in the above to remove it. Figure 6. CAUTION Blade/base assembly is very sharp. Handle with care. 3. The blender is used in mode 3, see table 1. To place the blender on the power unit the arm must be rotated to the down position. Depress the release button, see 4a, and lower the arm so that the arm is vertical and the highspeed drive is straight up. If you have not already done so, remove the motor drive cover from the high-speed drive and place the blender on the high-speed drive and turn counterclockwise to lock the blender in place. Placing Blender into Operation Make sure that the power unit's rotary switch is in the off position, "O/Off." Pull the electrical cord or unwind it to the necessary length and then plug into the wall outlet. The blender is now ready for operation. Figure 7. If the blade assembly is too tight to turn by hand, the locking ring may be used to loosen the blade assembly, as shown in figure 7d. After loosening, turn the blade assembly counterclockwise until it stops and then lift up. The gasket may be removed for cleaning, as shown in figure 7f. Normally when blending, the blender jar should be filled with the entire amount of material to be blended, if possible, before switching the appliance to On. The cover and cover closure should always be in place after filling the blender jar and before switching the power unit to On. Any subsequent additions to the blended material should be made through the cover opening, see figure 8. For solids and/or granular material, remove the cover closure/ funnel to add the material, as shown in figure 8a. For liquids, the closure/funnel may be left in place and the liquids can be added by pouring them into the closure/ funnel, see figure 8b. 14
-
 1
1 -
 2
2 -
 3
3 -
 4
4 -
 5
5 -
 6
6 -
 7
7 -
 8
8 -
9
-
10
-
11
-
12
 |
 |