Bose L1 Compact Multilingual Owners Guide - Page 11
Extending the Loudspeaker Array, Connecting power to the system
 |
View all Bose L1 Compact manuals
Add to My Manuals
Save this manual to your list of manuals |
Page 11 highlights
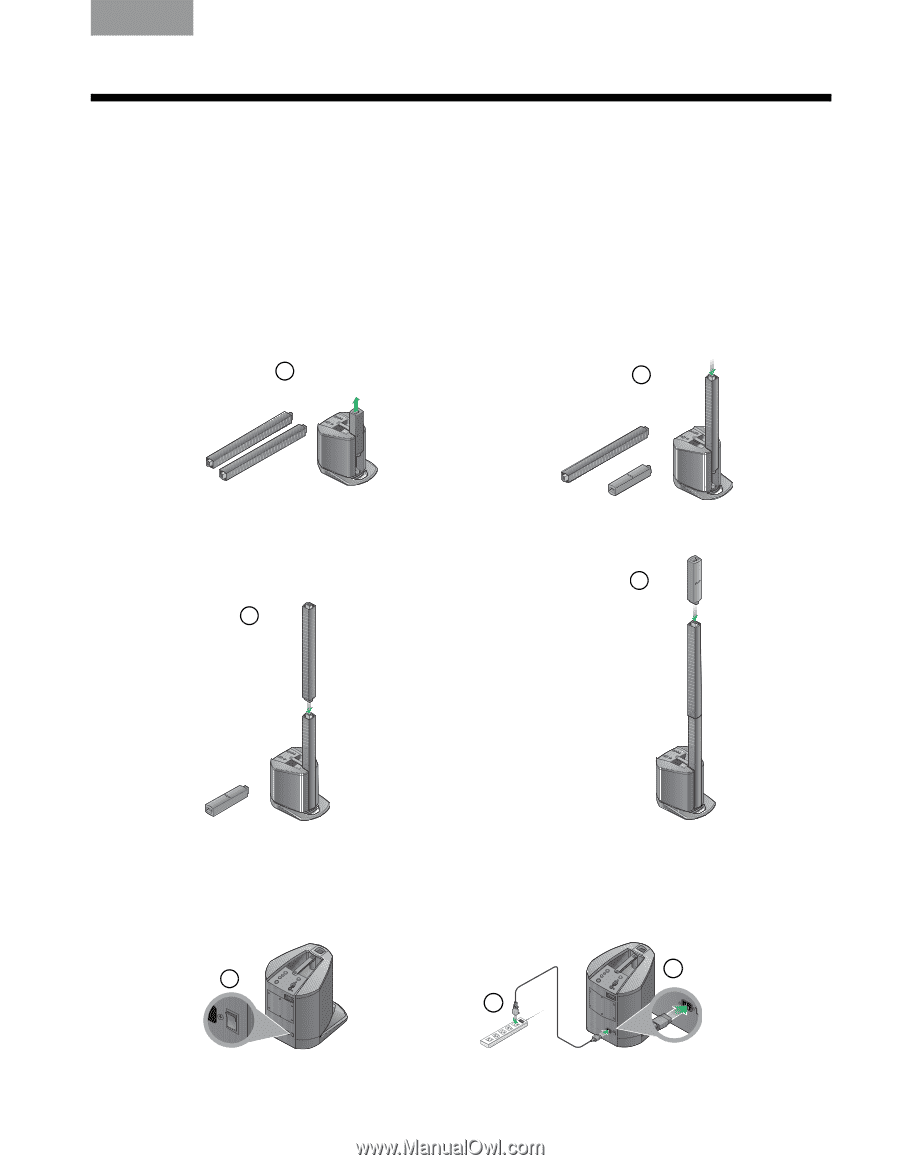
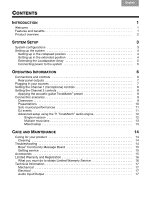
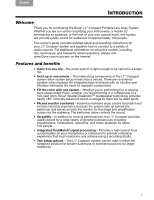
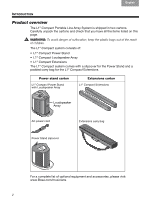
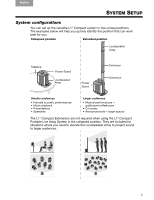
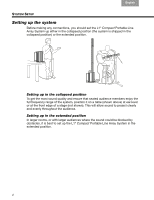
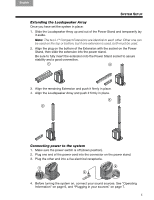
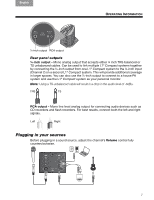
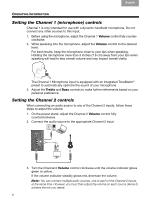
English TAB TAB TAB 4, 11 TAB 5, 12 TAB 2, 9, 16 TAB 1, 8, 15 SYSTEM SETUP Extending the Loudspeaker Array Once you have set the system in place: 1. Slide the Loudspeaker Array up and out of the Power Stand and temporarily lay it aside. Note: The two L1® Compact Extensions are identical to each other. Either one can be used on the top or bottom, but if one extension is used, both must be used. 2. Align the plug on the bottom of the Extension with the socket on the Power Stand, then slide the extension into the power stand. Be sure to fully insert the extension into the Power Stand socket to assure stability and a good connection. 1 2 3. Align the remaining Extension and push it firmly in place. 4. Align the Loudspeaker Array and push it firmly in place. 4 3 Connecting power to the system 1. Make sure the power switch is off (down position). 2. Plug one end of the power cord into the connector on the power stand. 3. Plug the other end into a live electrical receptacle. 2 1 3 4. Before turning the system on, connect your sound sources. See "Operating Information" on page 6, and "Plugging in your sources" on page 7. 5
-
 1
1 -
2
-
3
-
4
-
5
-
 6
6 -
 7
7 -
 8
8 -
 9
9 -
 10
10 -
 11
11 -
 12
12 -
 13
13 -
 14
14 -
 15
15 -
 16
16 -
17
-
18
-
19
-
20
-
21
-
22
-
23
-
24
-
25
-
26
-
27
-
28
-
29
-
30
-
31
-
32
-
33
-
34
-
35
-
36
-
37
-
38
-
39
-
40
-
41
-
42
-
43
-
44
-
45
-
46
-
47
-
48
-
49
-
50
-
51
-
52
-
53
-
54
-
55
-
56
-
57
-
58
-
59
-
60
-
61
-
62
-
63
-
64
-
65
-
66
-
67
-
68
-
69
-
70
-
71
-
72
-
73
-
74
-
75
-
76
-
77
-
78
-
79
-
80
-
81
-
82
-
83
-
84
 |
 |