Bose Model 100 Bose® model 100 speakers - Owner's guide - Page 3
akers.
 |
View all Bose Model 100 manuals
Add to My Manuals
Save this manual to your list of manuals |
Page 3 highlights
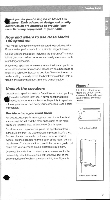
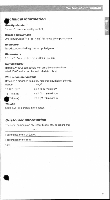
spa ligakers. nk you for purchasing Bose' Model 100 Their advanced design and quality construction are intended to provide longterm listening enjoyment in your home. How and where to use Bose Model 100 speakers Your Model 100 speakers are engineered to provide quality Bose speaker performance from a simple, elegant design. Unique Bose technologies, including the Star-Drive?" 4.5-inch full-range driver, deliver performance usually associated with much larger speakers. Place these speakers wherever you want full stereo performance without sacrificing space. Place them on a bookcase or shelf, in a vertical or horizontal position. To mount them on a wall or ceiling, carefully follow the bracket installation instructions in the appendix (page 38) of this owner's guide. Unpack the speakers Unpack each speaker carefully. Save the carton and packing ill- erials for possible later use. If either speaker appears aged, do not operate either one. Repack both speakers in the original carton and notify your authorized Bose dealer immediately. Figure 1 Attach the self-adhesive eet to the bottom of the speakers if they will stand in a horizontal or vertical position. Decide where you want them For best acoustic performance, place one of your identical speakers on the left and the other on the right of the room, facing the listening area, at least 5 feet (1.5 m) apart. For video sound reproduction, place the speakers at least 9 inches (23 cm) from the video screen to prevent interference. For rear channel use in a home theater surround sound system, put the speakers near the back of the room, behind the viewers. (You may want to consult the owner's guide that came with your surround sound electronic equipment.) Once you have decided to stand your speakers vertically or horizontally, attach the supplied self-adhesive feet to the bottom surface of each for greater stability (see Figure 1). Self-adhesive feet e Self-adhesive feet
-
 1
1 -
 2
2 -
 3
3 -
 4
4 -
 5
5 -
 6
6 -
 7
7 -
 8
8 -
 9
9 -
10
 |
 |