Bose SoundTouch 520 Home Theater Owners Guide - Page 5

Contents - system setup

Page 5 highlights

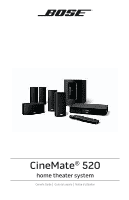
Contents Introduction About your CineMate® 520 home theater system 7 System Features...7 Introducing SoundTouch™ from Bose 7 Unpacking the system...8 Placement guidelines...9 Sample system placement 9 Setting Up the Acoustimass® Module Attaching the rubber feet to the Acoustimass module 10 Connecting the Acoustimass module to power 11 Setting Up the Speakers Connecting the front speakers 12 Connecting the rear speakers 13 Wall mounting the speakers 13 Setting Up the Console Connecting the console to your TV's HDMI ARC connector 14 TVs without an HDMI ARC connector 15 Use a secondary connection in the following configurations 15 Connecting the console to other sources 15 Connecting to non-HDMI compatible sources 16 Audio-only sources...16 Connecting the console to power 16 Starting Up the System Installing the remote control's batteries 17 Powering on the system...17 Finishing Setup Checking for sound...18 Changing the language on the console 18 Running the ADAPTiQ® audio calibration 19 English - 5

  • 1
  • 2
  • 3
  • 4
  • 5
  • 6
  • 7
  • 8
  • 9
  • 10
  • 11
  • 12
  • 13
  • 14
  • 15
  • 16
  • 17
  • 18
  • 19
  • 20
  • 21
  • 22
  • 23
  • 24
  • 25
  • 26
  • 27
  • 28
  • 29
  • 30
  • 31
  • 32
  • 33
  • 34

English - 5
Contents
Introduction
About your CineMate
®
520 home theater system
.........................................................
7
System Features
...........................................................................................................
7
Introducing SoundTouch™ from Bose
®
....................................................................
7
Unpacking the system
.........................................................................................................
8
Placement guidelines
..........................................................................................................
9
Sample system placement
.........................................................................................
9
Setting Up the Acoustimass
®
Module
Attaching the rubber feet to the Acoustimass module
................................................
10
Connecting the Acoustimass module to power
.............................................................
11
Setting Up the Speakers
Connecting the front speakers
..........................................................................................
12
Connecting the rear speakers
............................................................................................
13
Wall mounting the speakers
..............................................................................................
13
Setting Up the Console
Connecting the console to your TV’s HDMI ARC connector
..........................................
14
TVs without an HDMI ARC connector
...............................................................................
15
Use a secondary connection in the following configurations
..............................
15
Connecting the console to other sources
........................................................................
15
Connecting to non-HDMI compatible sources
................................................................
16
Audio-only sources
......................................................................................................
16
Connecting the console to power
......................................................................................
16
Starting Up the System
Installing the remote control’s batteries
.........................................................................
17
Powering on the system
......................................................................................................
17
Finishing Setup
Checking for sound
...............................................................................................................
18
Changing the language on the console
............................................................................
18
Running the ADAPTiQ
®
audio calibration
.........................................................................
19