Bose Studiocraft Owner's Guide - Page 2
Loudspeakers, Bose®
 |
View all Bose Studiocraft manuals
Add to My Manuals
Save this manual to your list of manuals |
Page 2 highlights
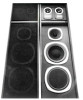
StudiocraftLoudspeakers byBose® A New Standard of Value and Performance. Instruction Sheet Introduction. Congratulations on yourpurchase of the Studiocrafr loudspeaker sy Their unique design, innovative e neering, and quality construction will providemany years ofsatisfaction andlisteningpleasure. Yourloudspeaker systemis the culminationof many years of Boseresearch and dedication to the art of bringing superb musicalreproductioninto the home. Unpacking Instructions. Unpack carefully. If any components are found to be damaged or missing, contact your dealer immediately. When you have finished installing the loudspeakers, we recommend that you save the cartons and packing material for possible use later. When unpacking and positioning the loudspeakers, grasp only the wooden cabinet; do not grasp any portion of the speaker covered by the protective grille cloth. • Loudspeaker Installation. The rear panels of the loudspeakers o screw terminals marked ÷" (positive) and "neg -" (negative). These terminals correspond to the positive and negative terminals on your amplifier/receiver. Run the wires from the speakers to the ampli- fier/receiver, making sure you run from positive on the speakers to positive on the receiver and the same with negative.* Use 18 gauge wire for runs under 20 feet and 16 gauge for longer runs. AMPLIFIER or RECEIVER LEFT CHANNEL RIGHT CHANNEL OUTPUT OUTPUT cos PO ' To help with this, all Win is either color coded fuse one color iOrpositive endone for negative) or one side is ribbed for easy identification. Care and Maintenance. The enclosure of the Studiocraft loudsillier system is covered with a oWle walnut-grained vinyl finish and may be cleaned by using a soft damp cloth. The grille cloth requires no maintenance but may be carefully vacuumed, if necessary.
-
 1
1 -
 2
2 -
 3
3
 |
 |
