Boss Audio 648UA User Manual in English - Page 4
PDF created with FinePrint pdfFactory trial version - system
 |
View all Boss Audio 648UA manuals
Add to My Manuals
Save this manual to your list of manuals |
Page 4 highlights
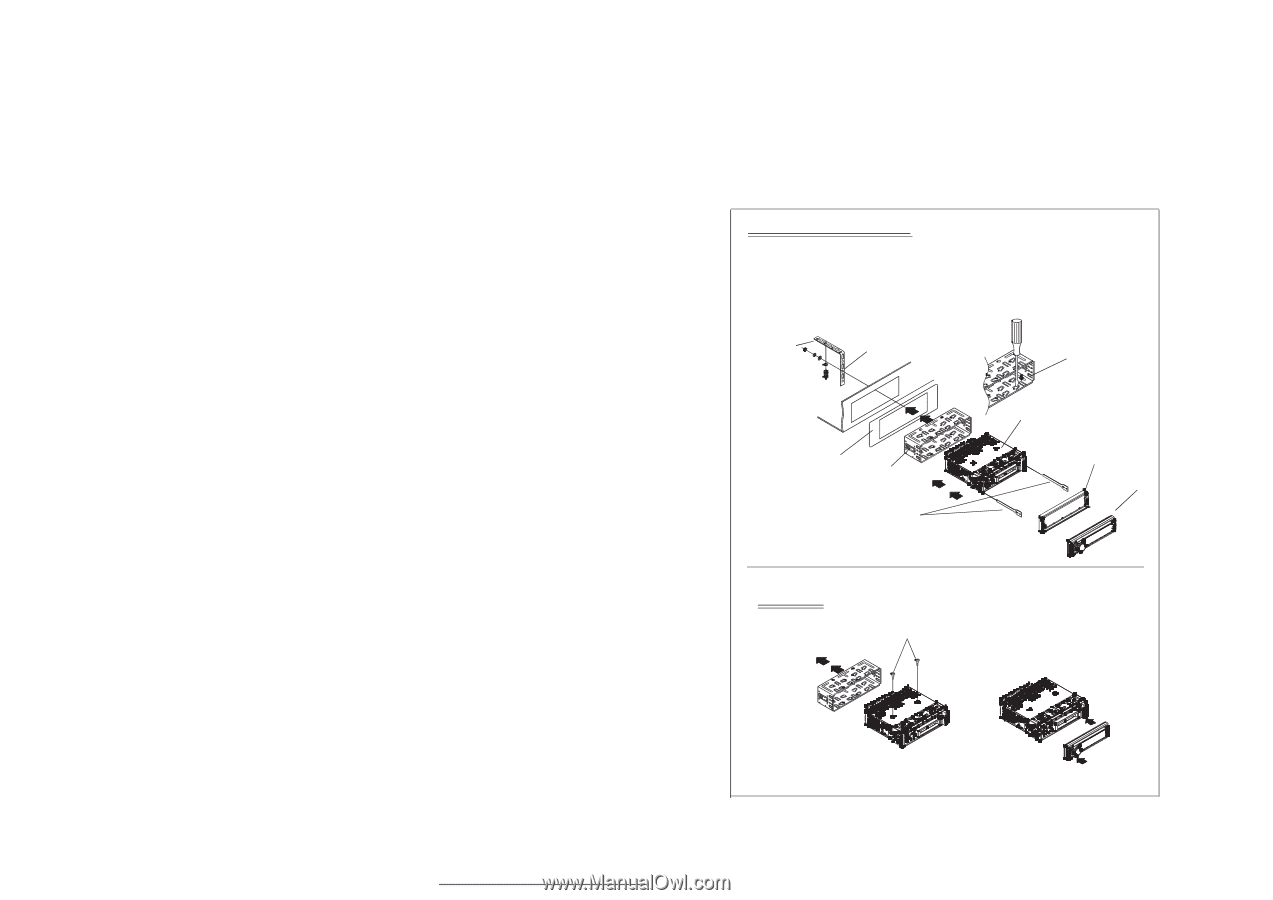
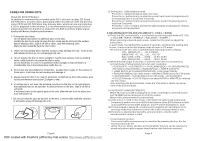
2) AF [ALTERNATIVE FREQUENCIES] When AF switching mode is selected and the state of AF switching mode is displayed by AF segment in display. Segment off: AF switching mode off. Segment on: AF switching mode on, and has RDS information. Segment flashing: AF switching mode on, but RDS information is not received yet. When AF switching mode is selected, the radio checks the signal strength of AF all the time. The interval of checking time of each AFs depends on the signal strength of current station, from a few minute for strong station to a few seconds for weak station. Every time that new AF is stronger than current station, it switches over to that frequency for very short time, and NEW FREQUENCY is displayed for 1-2 seconds. Because the mute time of AF switching or checking time is very short, it is almost inaudible in case of normal program. During FM mode, when AF is on, SEEK, (SCAN), AUTO-MEMORY function can only receive and save RDS program. 3) TA SEEK/TA ALARM: TA SEEK mode: when newly tuned station does not receive TP information for 5 seconds, the radio retunes to next station which has a different PI to the last station, but has the TP information. When TP information gets lost at the current station for retune time which is set by RETUNE SHORT(60 seconds) or RETUNE LONG(90 seconds), the radio starts to retune to next same PI station. When same PI station does not receive in 1 cyclic search, the radio retunes to next station with TP information. TA ALARM mode: when this mode is selected, any automatic retune mode is not activated. Only double beep sound(ALARM) will be heard. When newly tuned station does not have TP information for 5 seconds, beeps are sounded. When TP information gets lost at the current station for retune time, the beep sound will be heard. When newly tuned station has no RDS signal, PI SEEK is suppressed . 4) PI SOUND/ PI MUTE: PI SOUND mode: if a car cruises between buildings that could cause reflecting signals, a phenomenon may occur, due to different PI codes being received from the same AF source. when different PI sounds (DIP) are heard occassionally, this will happen for less than 1 second. PI MUTE mode: under above same situation, a mute sound will be heard for less than1second. 5) RETUNE L / RETUNE S: The initial time of automatic TA search or PI SEARCH mode is selected. When PI information is not received for retune interval , the radio starts to retune to next same PI station. When same PI station does not receive 1 cyclic search, the radio goes to last station and waits for 4-5 minutes until PI code is received. RETUNE L mode: selected as 90 seconds. RETUNE S mode: selected as 60 seconds. 20. SD CARD SLOT When you need to play the file in the SD card, insert the SD card into the SD card slot. The system will change into the SD mode automatically, and then play the first file in the SD. Note: When SD card and USB stick are both inserted into their slot or socket, the system will change into the playback mode of the latter one. INSTALLATION METHOD This is an anti-theft installation method. The main unit wears a METAL MOUNTING SLEEVE. Please connect the wiring, eg, the Power supply, the Speakers and the Antenna according to the requirements of this Instruction Manual, then install the metal mounting sleeve into the car as per the diagram illustrated below. METAL SUPPO RT STRAP To raise the anti-skip capability of the unit, please ensure the metal support strap is connected firmly to the car chassis. To properly fix the metal mounting sleeve, bend the tabs of the sleeve against the DASH BOARD with a screwdriver. DASHBOARD METAL MOUNTING SLEEVE To remove the CD player out of the mounting sleeve, insert the two supplied keys into the left and right side slots of the chassis at the same time. UNIT CHASSIS PLASTIC TRIM RING FRONT PANEL NOTE Re move the two screws that protect the CD player during transportation before operating the player. Before installing and operating the CD player, remove the metal mounting sleeve illustrated by the arrows. To attach the removable faceplate, insert the right side of the faceplate into the right of the CD player chassis first. Then push the left side of the faceplate into the chassis until you hear it "click". Page 4 PDF created with FinePrint pdfFactory trial version http://www.pdffactory.com Page 7
-
 1
1 -
 2
2 -
 3
3 -
 4
4 -
 5
5
 |
 |