Boss Audio 750BRGB User Manual - Page 4
Installation
 |
View all Boss Audio 750BRGB manuals
Add to My Manuals
Save this manual to your list of manuals |
Page 4 highlights
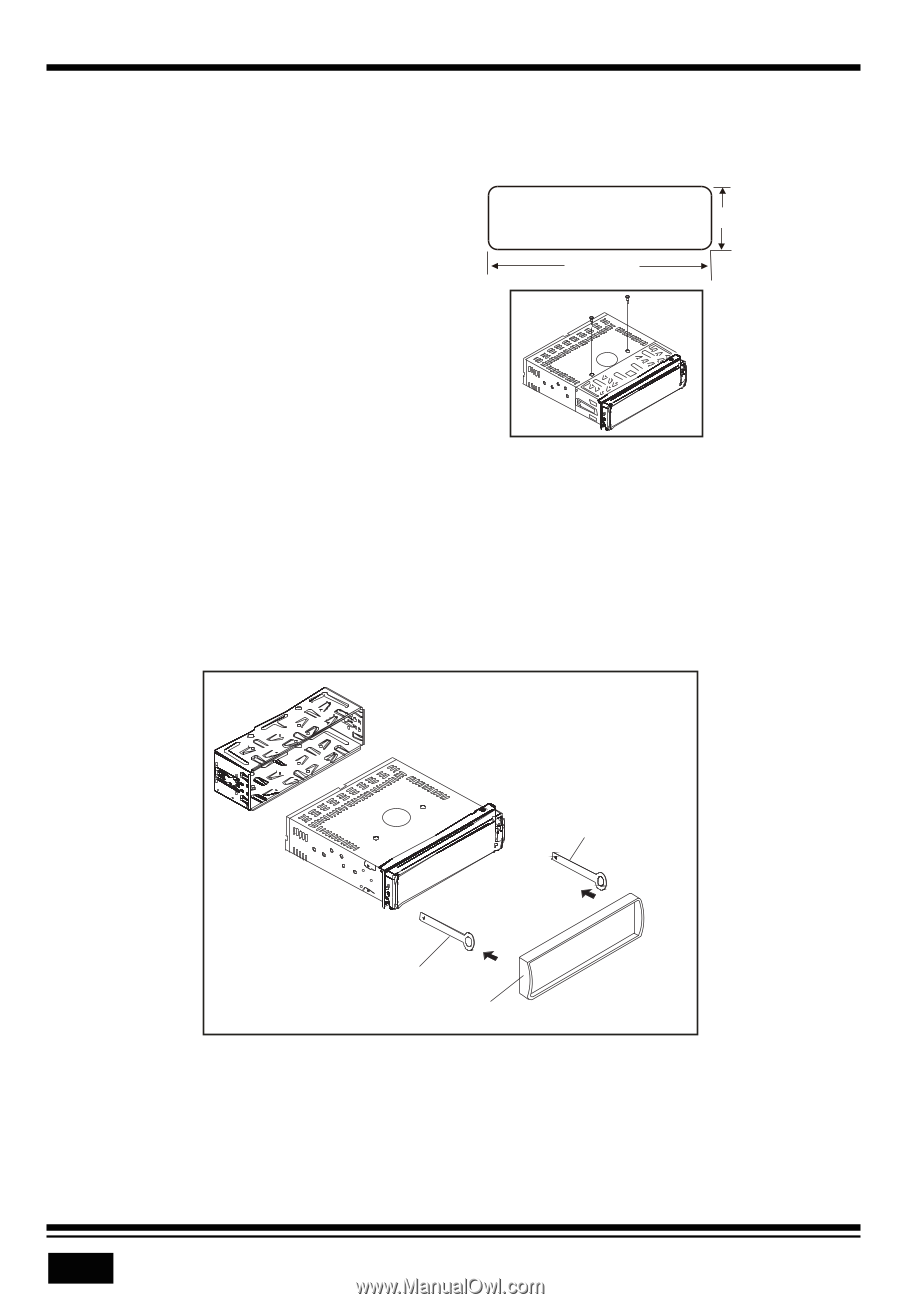
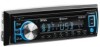
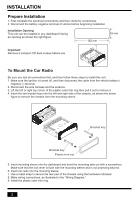
INSTALLATION Prepare Installation 1. First complete the electrical connections and then check for correctness. 2. Disconnect the battery negative terminal of vehicle before beginning installation. Installation Opening This unit can be installed in any dashboard Having an opening as shown the right figure. 182 mm 53 mm Important: Remove 2 transport CD deck screws before use. To Mount the Car Radio Be sure you test all connections first, and then follow these steps to install this unit. 1. Make sure the ignition is turned off, and then disconnect the cable from the vehicle battery's negative (-) terminal. 2. Disconnect the wire harness and the antenna. 3. Lift the left or right top corner of the plastic outer trim ring then pull it out to remove it. 4. Insert the two bracket keys into the left and right side of the chassis, as shown the below figure to remove the chassis from the mounting sleeve. Bracket key Bracket key Plastic trim out 5. Insert mounting sleeve into the dashboard and bend the mounting tabs out with a screwdriver. Make sure that the lock lever is flush with the mounting sleeve and is not projecting beyond. 6. Insert car radio into the mounting sleeve. 7. Use a metal strap to secure the rear part of the chassis using the hardware indicated. 8. Make wiring connections, as illustrated in the "Wiring Diagram." 9. Install the plastic outer trim ring. 2
-
 1
1 -
 2
2 -
 3
3 -
 4
4 -
 5
5 -
 6
6 -
 7
7 -
 8
8 -
 9
9 -
 10
10 -
11
-
12
-
13
-
14
-
15
-
16
 |
 |