Brother International BE-1204C Cap Frame Device Instruction Manual - English - Page 16
注意 - 4 head embroidery machine
 |
View all Brother International BE-1204C manuals
Add to My Manuals
Save this manual to your list of manuals |
Page 16 highlights
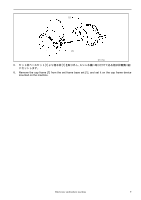
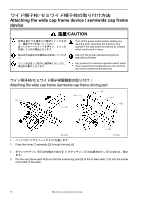
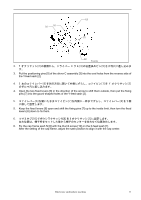
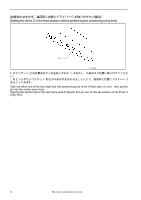
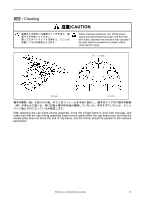
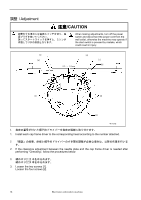
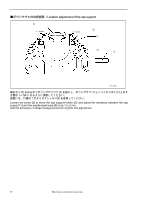
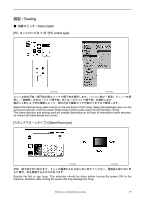
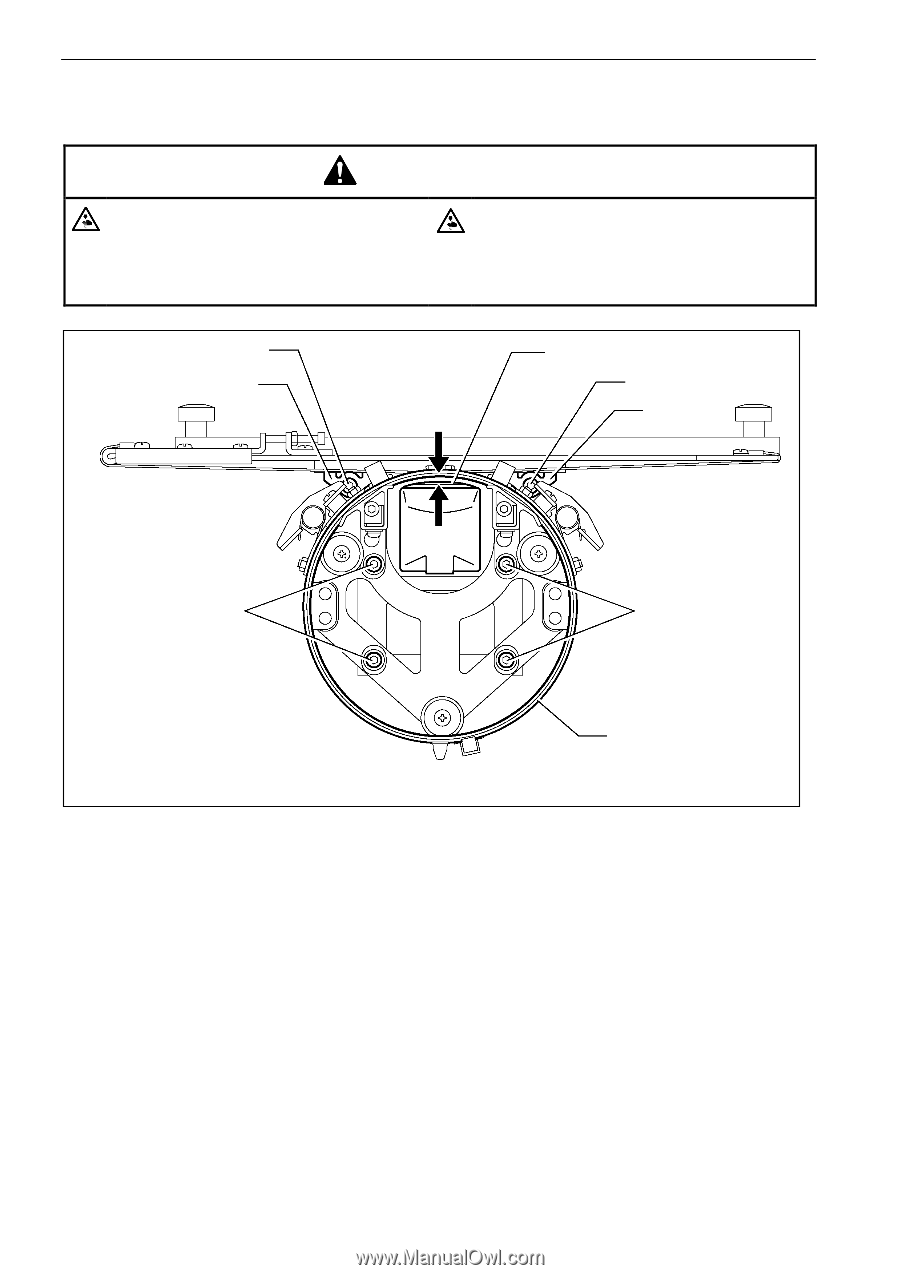
調整 / Adjustment 注意/CAUTION When making adjustments, turn off the power switch and disconnect the power cord from the wall outlet, otherwise the machine may operate if the start switch is pressed by mistake, which could result in injury. [1] [6] 0.5 ~ 1.0mm [4] [1] [6] [2] [2] [3] W1428Q 1 1. Install each cap frame driver to the corresponding head according to the number attached. 2 2. If the clearance adjustment between the needle plate and the cap frame driver is needed after performing "Checking", follow the procedures below: 3 1]2 2]4 3. Loosen the two screws [1]. Loosen the four screws [2]. 14 Electronic embroidery machine
-
 1
1 -
2
-
3
-
4
-
5
-
6
-
7
-
8
-
9
-
10
-
 11
11 -
 12
12 -
 13
13 -
 14
14 -
 15
15 -
 16
16 -
 17
17 -
 18
18 -
 19
19 -
 20
20 -
 21
21 -
22
-
23
-
24
-
25
-
26
-
27
-
28
 |
 |
14
Electronic embroidery machine
調整
/ Adjustment
注意
注意
注意
注意
/CAUTION
調整をする場合には電源スイッチを切り、電
源プラグを抜いてください。
誤ってスタートスイッチを押すと、ミシンが
作動してけがの原因となります。
When making adjustments, turn off the power
switch and disconnect the power cord from the
wall outlet, otherwise the machine may operate if
the start switch is pressed by mistake, which
could result in injury.
W1428Q
1.
指定の番号が付いた帽子枠ドライバーを指定の頭部に取り付けます。
1.
Install each cap frame driver to the corresponding head according to the number attached.
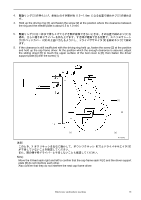
2.
「確認」の結果、針板と帽子枠ドライバーのすき間の調整が必要な場合は、以降の作業を行いま
す。
2.
If the clearance adjustment between the needle plate and the cap frame driver is needed after
performing "Checking", follow the procedures below:
3.
締めネジ
[1]2
本をゆるめます。
締めネジ
[2]4
本をゆるめます。
3.
Loosen the two screws [1].
Loosen the four screws [2].
0.5
~
1.0mm
[1]
[6]
[4]
[1]
[2]
[2]
[3]
[6]