Brother International BM-917A Instruction Manual - English and Spanish - Page 7
Replacing, presser, Additional, description
 |
View all Brother International BM-917A manuals
Add to My Manuals
Save this manual to your list of manuals |
Page 7 highlights
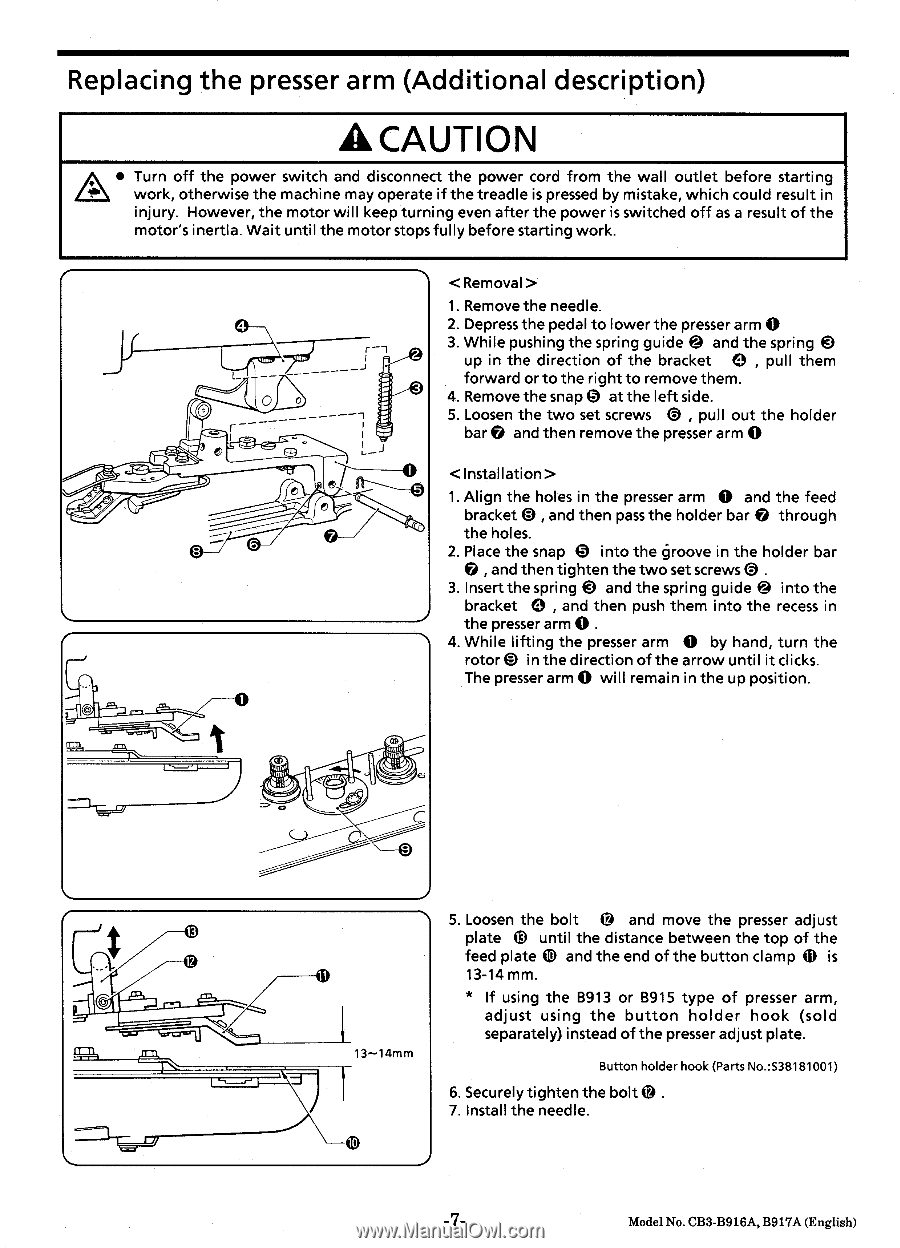
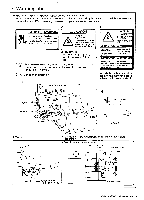
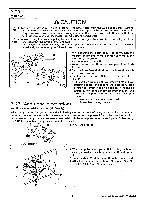
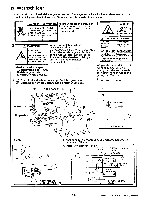
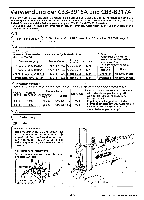
Replacing the presser arm (Additional description) A CAUTION A • Turn off the power switch and disconnect the power cord from the wall outlet before starting work, otherwise the machine may operate if the treadle is pressed by mistake, which could result in injury. However, the motor will keep turning even after the power is switched off as a result of the motor's inertia. Wait until the motor stops fully before starting work. 1. Remove the needle. 2. Depress the pedal to lower the presser arm 0 -Jr 3. While pushing the spring guide @ and the spring 0 up in the direction of the bracket 0 , pull them forward or to the right to remove them. ----- 0 0 O 4. Remove the snap 0 at the left side. 5. Loosen the two set screws 0 , pull out the holder o bar and then remove the presser arm 0 L- 1. Align the holes in the presser arm 0 and the feed bracket 0 , and then pass the holder bar 0 through the holes. 2. Place the snap 0 into the groove in the holder bar O , and then tighten the two set screws 0 . 3. Insert the spring and the spring guide @ into the bracket 0 , and then push them into the recess in the presser arm 0 . 4. While lifting the presser arm 0 by hand, turn the rotor 0 in the direction of the arrow until it clicks. The presser arm 0 will remain in the up position. Q9 13.14mm 5. Loosen the bolt @ and move the presser adjust plate fi)D until the distance between the top of the feed plate 0 and the end of the button clamp m is 13-14 mm. * If using the B913 or B915 type of presser arm, adjust using the button holder hook (sold separately) instead of the presser adjust plate. Button holder hook (Parts No.:S38181001) 6. Securely tighten the bolt 0 . 7. Install the needle. 1 -7- Model No. CB3-B916A,B917A (English)
-
 1
1 -
 2
2 -
 3
3 -
 4
4 -
 5
5 -
 6
6 -
 7
7 -
 8
8 -
 9
9 -
 10
10 -
 11
11 -
 12
12 -
13
-
14
-
15
-
16
-
17
-
18
-
19
-
20
-
21
-
22
-
23
-
24
-
25
-
26
-
27
-
28
 |
 |