Brother International DCP 385C Software Users Manual - English - Page 62
Using the Scan key (For USB cable users), Scan to E-mail, Black Start, Color Start
 |
UPC - 012502620457
View all Brother International DCP 385C manuals
Add to My Manuals
Save this manual to your list of manuals |
Page 62 highlights
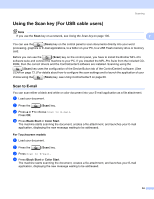
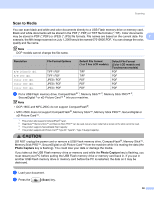
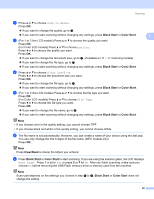
Scanning Using the Scan key (For USB cable users) 2 Note If you use the Scan key on a network, see Using the Scan key on page 100. 2 You can use the (Scan) key on the control panel to scan documents directly into your word processing, graphics or E-mail applications, to a folder on your PC, to a USB Flash memory drive or memory card. Before you can use the (Scan) key on the control panel, you have to install the Brother MFL-Pro software suite and connect the machine to your PC. If you installed the MFL-Pro Suite from the included CD- ROM, then the correct drivers and the ControlCenter3 software are installed. Scanning using the (Scan) key uses the configuration of the Device Button tab of the ControlCenter3 software. (See SCAN on page 72.) For details about how to configure the scan settings and to launch the application of your choice using the (Scan) key, see Using ControlCenter3 on page 69. Scan to E-mail 2 You can scan either a black and white or color document into your E-mail application as a file attachment. a Load your document. b Press the (Scan) key. c Press a or b to choose Scan to E-mail. Press OK. d Press Black Start or Color Start. The machine starts scanning the document, creates a file attachment, and launches your E-mail application, displaying the new message waiting to be addressed. For Touchscreen models 2 a Load your document. b Press the (Scan) key. c Press Scan to E-mail. d Press Black Start or Color Start. The machine starts scanning the document, creates a file attachment, and launches your E-mail application, displaying the new message waiting to be addressed. 54
-
 1
1 -
2
-
3
-
4
-
5
-
6
-
7
-
8
-
9
-
10
-
11
-
12
-
13
-
14
-
15
-
16
-
17
-
18
-
19
-
20
-
21
-
22
-
23
-
24
-
25
-
26
-
27
-
28
-
29
-
30
-
31
-
32
-
33
-
34
-
35
-
36
-
37
-
38
-
39
-
40
-
41
-
42
-
43
-
44
-
45
-
46
-
47
-
48
-
49
-
50
-
51
-
52
-
53
-
54
-
55
-
56
-
 57
57 -
 58
58 -
 59
59 -
 60
60 -
 61
61 -
 62
62 -
 63
63 -
 64
64 -
 65
65 -
 66
66 -
 67
67 -
68
-
69
-
70
-
71
-
72
-
73
-
74
-
75
-
76
-
77
-
78
-
79
-
80
-
81
-
82
-
83
-
84
-
85
-
86
-
87
-
88
-
89
-
90
-
91
-
92
-
93
-
94
-
95
-
96
-
97
-
98
-
99
-
100
-
101
-
102
-
103
-
104
-
105
-
106
-
107
-
108
-
109
-
110
-
111
-
112
-
113
-
114
-
115
-
116
-
117
-
118
-
119
-
120
-
121
-
122
-
123
-
124
-
125
-
126
-
127
-
128
-
129
-
130
-
131
-
132
-
133
-
134
-
135
-
136
-
137
-
138
-
139
-
140
-
141
-
142
-
143
-
144
-
145
-
146
-
147
-
148
-
149
-
150
-
151
-
152
-
153
-
154
-
155
-
156
-
157
-
158
-
159
-
160
-
161
-
162
-
163
-
164
-
165
-
166
-
167
-
168
-
169
-
170
-
171
-
172
-
173
-
174
-
175
-
176
-
177
-
178
-
179
-
180
-
181
-
182
-
183
-
184
-
185
-
186
-
187
-
188
-
189
-
190
-
191
-
192
-
193
-
194
-
195
-
196
-
197
-
198
-
199
-
200
-
201
-
202
-
203
-
204
-
205
-
206
-
207
-
208
-
209
-
210
-
211
-
212
-
213
-
214
-
215
-
216
-
217
-
218
-
219
-
220
-
221
-
222
-
223
-
224
-
225
-
226
-
227
-
228
-
229
-
230
-
231
-
232
-
233
-
234
-
235
-
236
-
237
-
238
-
239
-
240
-
241
-
242
-
243
-
244
-
245
-
246
-
247
-
248
-
249
-
250
-
251
-
252
-
253
-
254
-
255
-
256
 |
 |