Brother International HL-2170W Network Users Manual - English - Page 99
For Windows® 2000/XP and Windows Server® 2003, Add Standard TCP/IP Printer Port Wizard - drivers windows 7 64 bit
 |
UPC - 012502619468
View all Brother International HL-2170W manuals
Add to My Manuals
Save this manual to your list of manuals |
Page 99 highlights
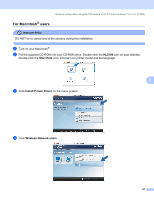
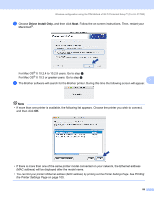
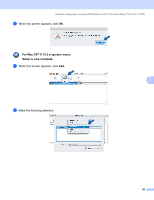
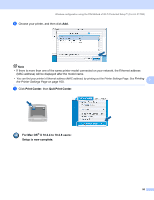
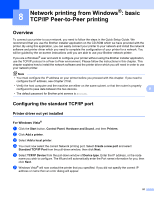
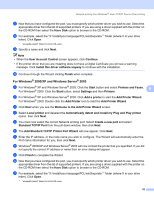
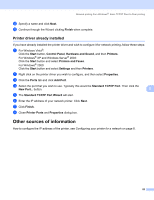
Network printing from Windows®: basic TCP/IP Peer-to-Peer printing g Now that you have configured the port, you must specify which printer driver you wish to use. Select the appropriate driver from the list of supported printers. If you are using a driver supplied with the printer on the CD-ROM then select the Have Disk option to browse to the CD-ROM. h For example, select the "X:\\install\your language\PCL\win2kxpvista 1" folder (where X is your drive letter). Click Open. 1 "winxpx64vista64" folder for 64-bit OS users i Specify a name and click Next. Note • When the User Account Control screen appears, click Continue. • If the printer driver that you are installing does not have a Digital Certificate you will see a warning message. Click Install this driver software anyway to continue with the installation. j Continue through the Wizard clicking Finish when complete. For Windows® 2000/XP and Windows Server® 2003 8 a For Windows® XP and Windows Server® 2003: Click the Start button and select Printers and Faxes. 8 For Windows® 2000: Click the Start button, select Settings and then Printers. b For Windows® XP and Windows Server® 2003: Click Add a printer to start the Add Printer Wizard. For Windows® 2000: Double click the Add Printer icon to start the Add Printer Wizard. c Click Next when you see the Welcome to the Add Printer Wizard screen. d Select Local printer and deselect the Automatically detect and install my Plug and Play printer option, then click Next. e You must now select the correct Network printing port. Select Create a new port and select Standard TCP/IP Port from the pull-down window, then click Next. f The Add Standard TCP/IP Printer Port Wizard will now appear. Click Next. g Enter the IP address, or the node name you wish to configure. The Wizard will automatically enter the Port name information for you, then click Next. h Windows® 2000/XP and Windows Server® 2003 will now contact the printer that you specified. If you did not specify the correct IP address or name then an error dialog will appear. i Click Finish to complete the Wizard. j Now that you have configured the port, you must specify which printer driver you wish to use. Select the appropriate driver from the list of supported printers. If you are using a driver supplied with the printer on the CD-ROM then select the Have Disk option to browse to the CD-ROM. k For example, select the "X:\\install\your language\PCL\win2kxpvista 1" folder (where X is your drive letter). Click Open. 1 "winxpx64vista64" folder for 64-bit OS users 92
-
 1
1 -
2
-
3
-
4
-
5
-
6
-
7
-
8
-
9
-
10
-
11
-
12
-
13
-
14
-
15
-
16
-
17
-
18
-
19
-
20
-
21
-
22
-
23
-
24
-
25
-
26
-
27
-
28
-
29
-
30
-
31
-
32
-
33
-
34
-
35
-
36
-
37
-
38
-
39
-
40
-
41
-
42
-
43
-
44
-
45
-
46
-
47
-
48
-
49
-
50
-
51
-
52
-
53
-
54
-
55
-
56
-
57
-
58
-
59
-
60
-
61
-
62
-
63
-
64
-
65
-
66
-
67
-
68
-
69
-
70
-
71
-
72
-
73
-
74
-
75
-
76
-
77
-
78
-
79
-
80
-
81
-
82
-
83
-
84
-
85
-
86
-
87
-
88
-
89
-
90
-
91
-
92
-
93
-
 94
94 -
 95
95 -
 96
96 -
 97
97 -
 98
98 -
 99
99 -
 100
100 -
 101
101 -
 102
102 -
 103
103 -
 104
104 -
105
-
106
-
107
-
108
-
109
-
110
-
111
-
112
-
113
-
114
-
115
-
116
-
117
-
118
-
119
-
120
-
121
-
122
-
123
-
124
-
125
-
126
-
127
-
128
-
129
-
130
-
131
-
132
-
133
-
134
-
135
-
136
-
137
 |
 |