Brother International HL-5370DWT Quick Setup Guide - English - Page 30
Wireless Network users, Wireless Setup and Driver Install, Recommended, Automatic install Advanced
 |
UPC - 012502622680
View all Brother International HL-5370DWT manuals
Add to My Manuals
Save this manual to your list of manuals |
Page 30 highlights
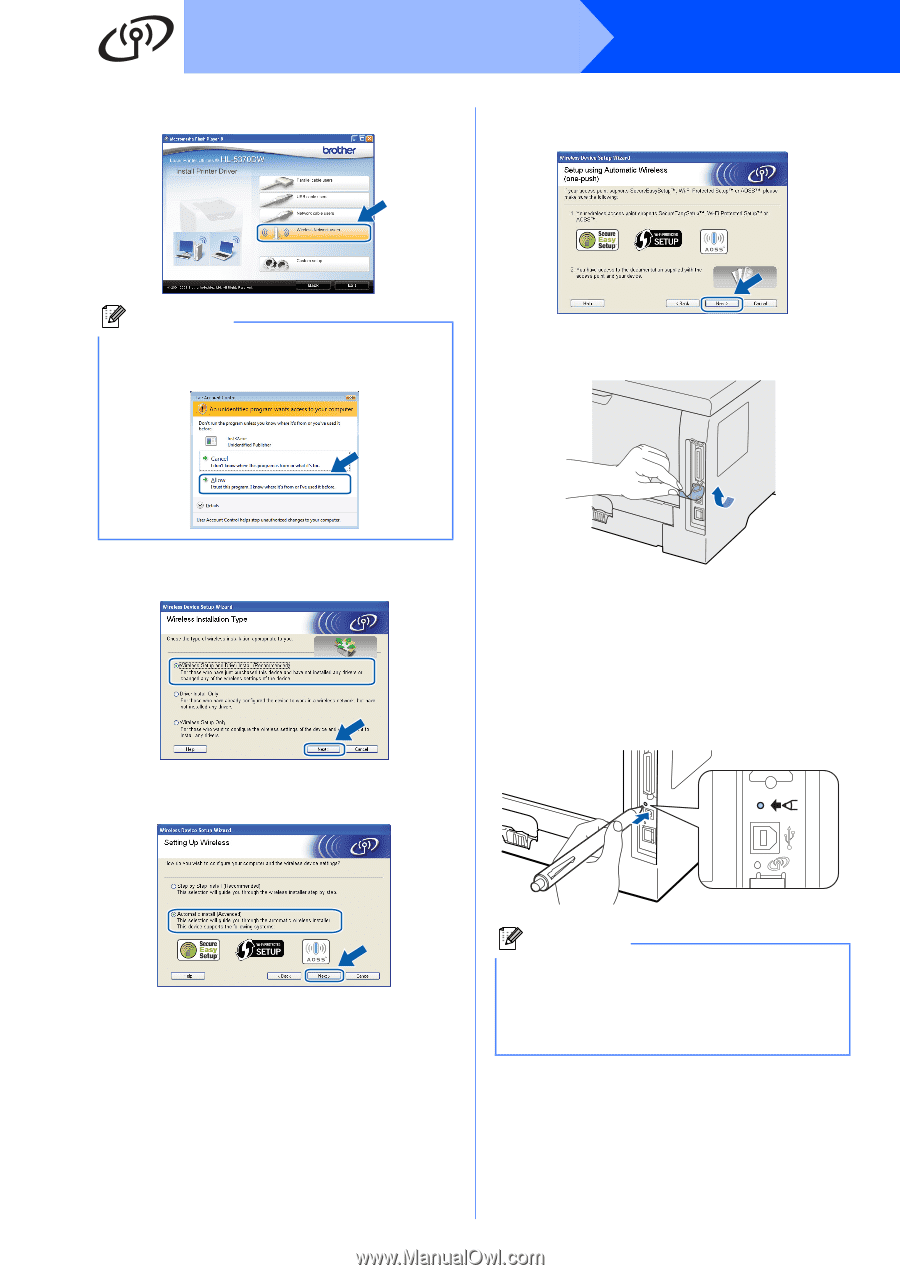
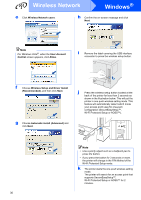
Wireless Network Windows® e Click Wireless Network users. h Confirm the on-screen message and click Next. Note For Windows Vista®, when the User Account Control screen appears, click Allow. i Remove the label covering the USB interface connector to press the wireless setup button. f Choose Wireless Setup and Driver Install (Recommended), and then click Next. g Choose Automatic install (Advanced) and click Next. j Press the wireless setup button located at the back of the printer for less than 2 seconds as shown in the illustration below. This will put the printer in one-push wireless setting mode. This feature will automatically detect which mode your access point uses for one-push configuration (SecureEasySetup™, Wi-Fi Protected Setup or AOSS™). Note • Use a pointy object such as a ballpoint pen to press the button. • If you press the button for 3 seconds or more, the printer will change to the PIN Method of the Wi-Fi Protected Setup mode. k The printer starts the one-push wireless setting mode. The printer will search for an access point that supports SecureEasySetup™, Wi-Fi Protected Setup or AOSS™ for 2 minutes. 30
-
 1
1 -
2
-
3
-
4
-
5
-
6
-
7
-
8
-
9
-
10
-
11
-
12
-
13
-
14
-
15
-
16
-
17
-
18
-
19
-
20
-
21
-
22
-
23
-
24
-
 25
25 -
 26
26 -
 27
27 -
 28
28 -
 29
29 -
 30
30 -
 31
31 -
 32
32 -
 33
33 -
 34
34 -
 35
35 -
36
-
37
-
38
-
39
-
40
-
41
-
42
-
43
-
44
-
45
-
46
-
47
-
48
-
49
-
50
-
51
-
52
-
53
-
54
-
55
 |
 |