Brother International HL-5470DW Quick Setup Guide - English - Page 20
Setup using the Installer CD-ROM and temporarily using a USB, cable Windows, Setup the wireless,
 |
View all Brother International HL-5470DW manuals
Add to My Manuals
Save this manual to your list of manuals |
Page 20 highlights
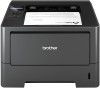
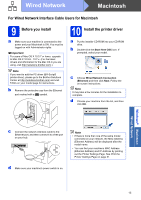
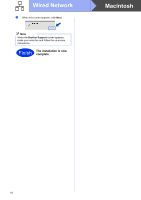
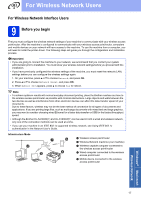
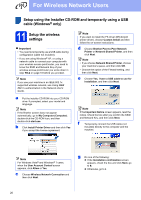
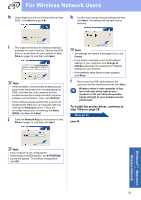
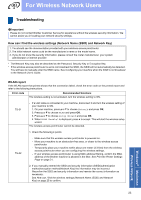
For Wireless Network Users Setup using the Installer CD-ROM and temporarily using a USB cable (Windows® only) 11 Setup the wireless settings Important • You need to temporarily use a USB cable during configuration (cable not included). • If you are using Windows® XP, or using a network cable to connect your computer with your wireless access point/router, you need to know the SSID and Network Key of your wireless access point/router you wrote down in step 10-a on page 18 before you proceed. Note If you use your machine in an IEEE 802.1x supported wireless network, see Using IEEE 802.1x authentication in the Network User's Guide. a Put the installer CD-ROM into your CD-ROM drive. If prompted, select your model and language. Note If the Brother screen does not appear automatically, go to My Computer (Computer), double-click the CD-ROM icon, and then double-click start.exe. b Click Install Printer Driver and then click Yes if you accept the license agreement. Note If you want to install the PS driver (BR-Script3 printer driver), choose Custom Install and then follow the on-screen instructions. d Choose Brother Peer-to-Peer Network Printer or Network Shared Printer, and then click Next. Note • If you choose Network Shared Printer, choose your machine's queue, and then click OK. • Choose the option of the Firewall setting, and then click Next. e Choose Yes, I have a USB cable to use for installation, and then click Next. Note If the Important Notice screen appears, read the notice. Check the box after you confirm the SSID and Network Key, and then click Next. f Temporarily connect the USB cable (not included) directly to the computer and the machine. Note For Windows Vista® and Windows® 7 users, when the User Account Control screen appears, click Allow or Yes. c Choose Wireless Network Connection and then click Next. g Do one of the following: If the Installation confirmation screen appears, check the box and click Next, go to h. Otherwise, go to i. 20
-
 1
1 -
2
-
3
-
4
-
5
-
6
-
7
-
8
-
9
-
10
-
11
-
12
-
13
-
14
-
 15
15 -
 16
16 -
 17
17 -
 18
18 -
 19
19 -
 20
20 -
 21
21 -
 22
22 -
 23
23 -
 24
24 -
 25
25 -
26
-
27
-
28
-
29
-
30
-
31
-
32
-
33
-
34
 |
 |