Brother International HL-L5200DWT Quick Setup Guide - Page 1
Brother International HL-L5200DWT Manual
 |
View all Brother International HL-L5200DWT manuals
Add to My Manuals
Save this manual to your list of manuals |
Page 1 highlights
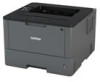
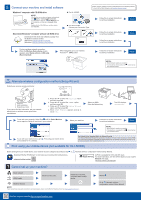
HL‑L5000D / HL‑L5100DN / HL‑L5200DW / HL‑L5200DWT / HL‑L6200DW / HL‑L6200DWT Quick Setup Guide Read the Product Safety Guide first, then read this Quick Setup Guide for the correct installation procedure. Not all models are available in all countries. The latest manuals are available at the Brother Solutions Center: solutions.brother.com/manuals. D01GT0001-00 USA/CAN Version C Watch our Video FAQs for help with setting up your Brother machine: solutions.brother.com/videos. Unpack the machine and check the components Drum Unit and Toner Cartridge Assembly (pre‑installed) Installation CD‑ROM AC Power Cord Quick Setup Guide Product Safety Guide Reference Guide (only for certain models) NOTE: • Manuals in Spanish for this model are available on the Brother Solutions Center. (USA only): solutions.brother.com/manuals Los manuales en español de este modelo están disponibles en el Brother Solutions Center. (Solamente en los Estados Unidos): solutions.brother.com/manuals • The available connection interfaces vary depending on the model. • You must purchase the correct interface cable for the interface you want to use. USB cable We recommend using a USB 2.0 cable (Type A/B) that is no more than 6 feet (2 meters) long. Network cable (For HL‑L5100DN / HL‑L5200DW(T) / HL‑L6200DW(T)) Use a straight-through Category 5 (or greater) twisted-pair cable. Parallel cable (For HL‑L5000D) Use the parallel cable provided with the machine. • The illustrations in this Quick Setup Guide show the HL‑L6200DW. 1 Remove the packing materials and install the drum unit and toner cartridge assembly Discard the silica gel pack. 2 Load paper in the paper tray Adjust the paper guides. Remove the orange part. 3 Connect the power cord and turn on the machine Back Front 4 Select your language (if needed) 1. Press ▼ or ▲ to select [General Setup], and then press OK. 2. Press OK to select [Local Language]. 3. Press ▼ or ▲ to select your language, and then press OK. 4. Press Cancel.
-
 1
1 -
 2
2
 |
 |