Brother International Innov-ís 40 Accessory Catalog - Page 14
Quality quilting
 |
View all Brother International Innov-ís 40 manuals
Add to My Manuals
Save this manual to your list of manuals |
Page 14 highlights
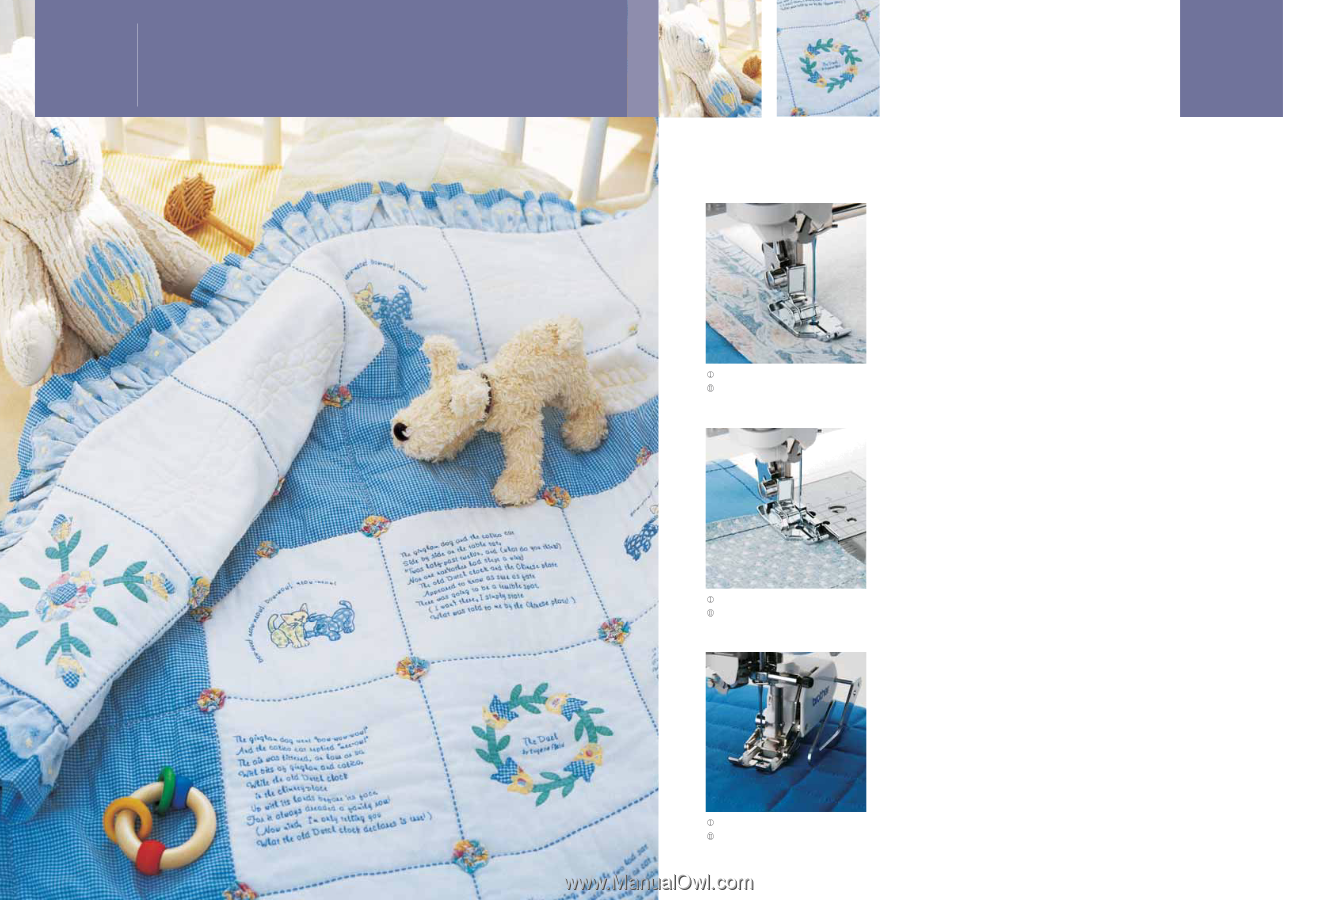
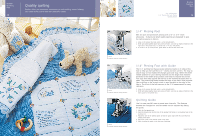
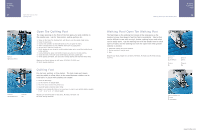
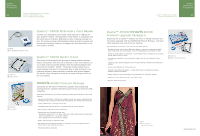
Brother Quilting Feet 25 Quality quilting Brother offers you innovative accessories to make quilting easier, helping you create more precise and more beautiful results. Baby Quilt created by Janice Ferguson and Suzanne Sawko 1/4" Piecing Foot 1/4" Piecing Foot with Guide Quilting Guide Brother Quilting Feet 26 SA125 All Brother home-use sewing machines SA185 All Brother home-use sewing machines SA132 All Brother home-use sewing machines 1/4" Piecing Foot Best for quilt and patchwork piecing with 1/4" or 1/8'' seam allowance. Its back and small needle opening are designed to give the right pressure on fabrics. 1. Snap on the presser foot and select a center straight stitch. 2. With right sides together place two pieces of fabric, and line up edges of fabrics to the right side of the presser foot, to create even 1/4" (6.5 mm) seams. 3. To create 1/8" (3.2 mm) seams, guide fabric on the left side of the foot. 1/4" Piecing Foot with Guide The 1/4" quilting foot has accurate reference marks on 3 sides of the foot to help you form perfect 1/4'" seams and turn corners. The easy to attach snap-on foot makes the change quick and easy. Select the center needle position for your sewing machine and the single hole matches perfectly to the needle drop position and helps to expand the presser foot area that rests against the fabrics as the centered straight stitch is sewn. The positioning blade follows the edge of the fabric and prevents fabric shifting as the straight stitch is sewn parallel to the edge of the fabric. The front of the foot narrows to the 1/4"measurement for easy reference. 1. Snap on the presser foot and select a center straight stitch. 2. With right sides together place two pieces of fabric, and line up edges of fabrics to the fabric guide of the presser foot. Quilting Guide Use it to sew parallel rows at preset even intervals. The distance between the straight bar and the needle can be adjusted by sliding the guide. 1. Stitch the first straight row. 2. Insert the straight bar into the hole of the presser foot holder, or a mounting hole on the walking foot. 3. Adjust the stem of the quilting guide so that the guide aligns with the seam that has already been sewn. 4. Adjust the guide to the desired width of the seam. 5. Stitch, keeping the guide in the first row of stitching. www.brother.com
-
 1
1 -
2
-
3
-
4
-
5
-
6
-
7
-
8
-
 9
9 -
 10
10 -
 11
11 -
 12
12 -
 13
13 -
 14
14 -
 15
15 -
 16
16 -
 17
17 -
 18
18 -
 19
19 -
20
-
21
-
22
-
23
-
24
-
25
-
26
-
27
-
28
-
29
-
30
-
31
-
32
-
33
-
34
-
35
-
36
-
37
-
38
-
39
-
40
-
41
 |
 |