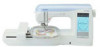
Brother International Innov-is 1500D/1500 Users Manual - English - Page 61
Overcasting Using the Side Cutter
 |
View all Brother International Innov-is 1500D/1500 manuals
Add to My Manuals
Save this manual to your list of manuals |
Page 61 highlights
SEWING THE STITCHES ■ Overcasting Using the Side Cutter By using the side cutter, you can do overcasting while cutting the fabric. CAUTION • Make sure to only select one of the stitches listed below. Using another stitch may cause the needle to hit the presser foot and break, possibly causing injury. Memo Thread the needle manually when using the side cutter, or only attach the side cutter after threading the needle using the needle threader. Stitch Stitch name With side cutter With side cutter With side cutter With side cutter With side cutter Presser foot Applications Straight stitch while cutting fabrics Stitch width [mm (inch.)] Auto. Manual 0.0 0.0 - 2.5 (0) (0 - 3/32) Stitch length [mm (inch.)] Auto. Manual 2.5 0.2 - 5.0 (3/32) (1/64 - 3/16) Zigzag stitch while cutting fabrics 3.5 (1/8) 3.5 - 5.0 1.4 (1/8 - 3/16) (1/16) 0.0 - 4.0 (0 - 3/16) Overcasting stitch while cutting fabrics 3.5 (1/8) 3.5 - 5.0 2.0 1.0 - 4.0 (1/8 - 3/16) (1/16) (1/16 - 3/16) Overcasting stitch while cutting fabrics 5.0 (3/16) 3.5 - 5.0 (1/8 - 3/16) 2.5 1.0 - 4.0 (3/32) (1/16 - 3/16) Overcasting stitch while cutting fabrics 5.0 (3/16) 3.5 - 5.0 (1/8 - 3/16) 2.5 1.0 - 4.0 (3/32) (1/16 - 3/16) Twin needle NO NO NO NO NO a Follow the steps on page 33 to remove the presser foot. b Position the fork on the side cutter's operating lever onto the needle clamp screw. b c Position the side cutter so that the side cutter pin is aligned with the notch in the presser foot holder, and then lower the presser foot. ba a a Needle clamp screw b Operating lever Memo Make sure that the fork of the operating lever is set onto the needle clamp screw firmly. a Notch in presser foot holder b Pin → The side cutter is attached. 60
-
 1
1 -
2
-
3
-
4
-
5
-
6
-
7
-
8
-
9
-
10
-
11
-
12
-
13
-
14
-
15
-
16
-
17
-
18
-
19
-
20
-
21
-
22
-
23
-
24
-
25
-
26
-
27
-
28
-
29
-
30
-
31
-
32
-
33
-
34
-
35
-
36
-
37
-
38
-
39
-
40
-
41
-
42
-
43
-
44
-
45
-
46
-
47
-
48
-
49
-
50
-
51
-
52
-
53
-
54
-
55
-
 56
56 -
 57
57 -
 58
58 -
 59
59 -
 60
60 -
 61
61 -
 62
62 -
 63
63 -
 64
64 -
 65
65 -
 66
66 -
67
-
68
-
69
-
70
-
71
-
72
-
73
-
74
-
75
-
76
-
77
-
78
-
79
-
80
-
81
-
82
-
83
-
84
-
85
-
86
-
87
-
88
-
89
-
90
-
91
-
92
-
93
-
94
-
95
-
96
-
97
-
98
-
99
-
100
-
101
-
102
-
103
-
104
-
105
-
106
-
107
-
108
-
109
-
110
-
111
-
112
-
113
-
114
-
115
-
116
-
117
-
118
-
119
-
120
-
121
-
122
-
123
-
124
-
125
-
126
-
127
-
128
-
129
-
130
-
131
-
132
-
133
-
134
-
135
-
136
-
137
-
138
-
139
-
140
-
141
-
142
-
143
-
144
-
145
-
146
-
147
-
148
-
149
-
150
-
151
-
152
-
153
-
154
-
155
-
156
-
157
-
158
-
159
-
160
-
161
-
162
-
163
-
164
-
165
-
166
-
167
-
168
-
169
-
170
-
171
-
172
-
173
-
174
-
175
-
176
-
177
-
178
-
179
-
180
-
181
-
182
-
183
-
184
-
185
-
186
-
187
-
188
-
189
-
190
-
191
-
192
-
193
-
194
-
195
-
196
-
197
-
198
-
199
-
200
-
201
 |
 |
