Brother International Innov-is BQ1350 Operation Manual - Page 89
Quilting
 |
View all Brother International Innov-is BQ1350 manuals
Add to My Manuals
Save this manual to your list of manuals |
Page 89 highlights
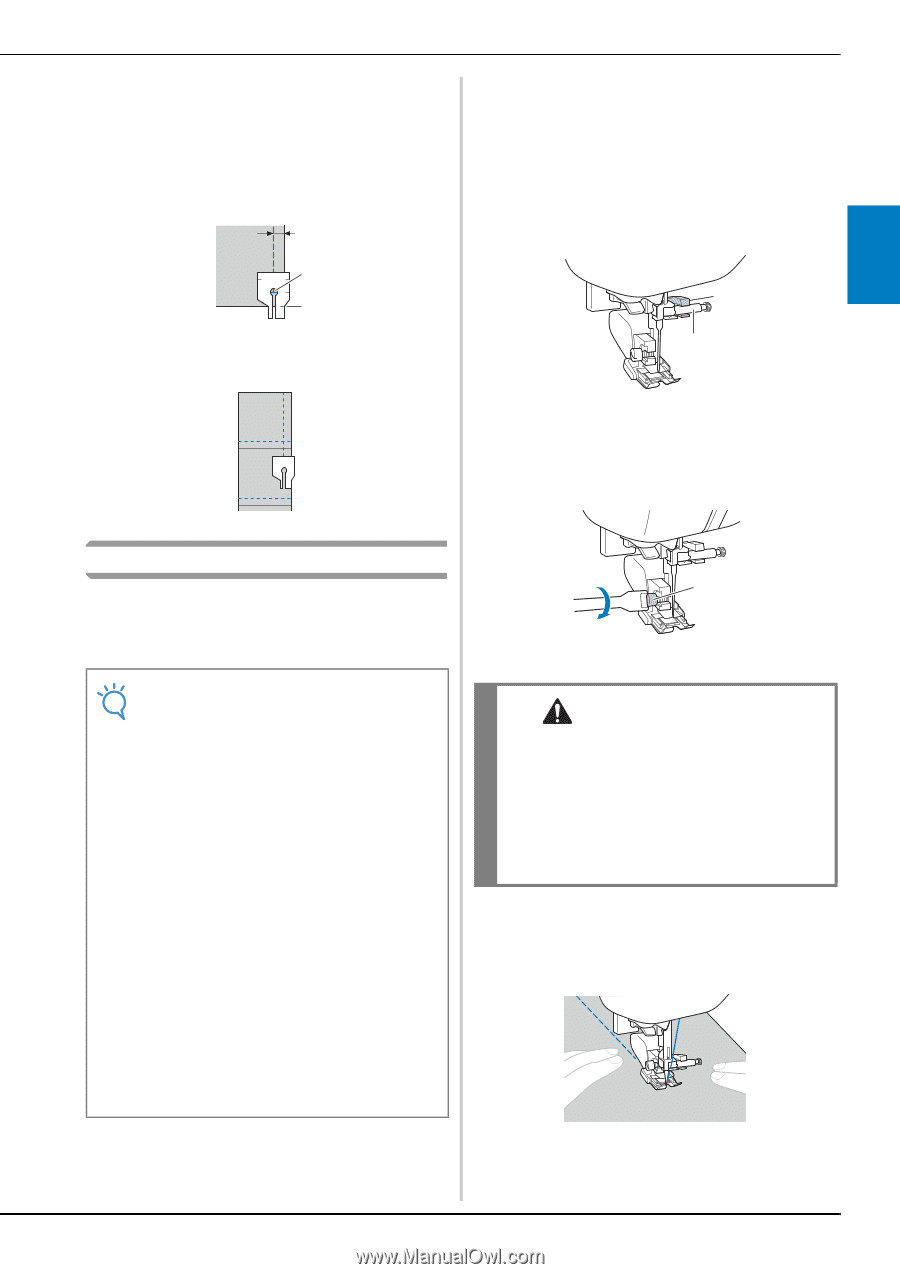
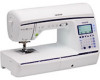
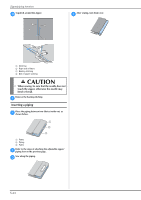
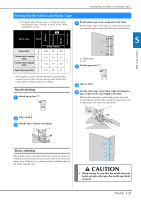
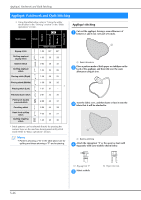
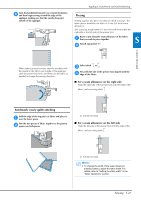
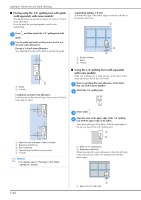
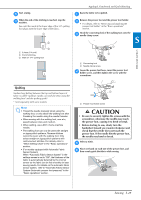
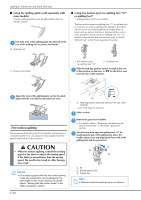
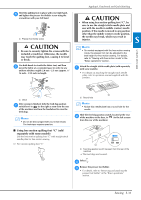
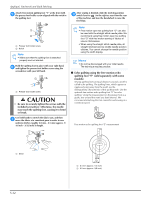
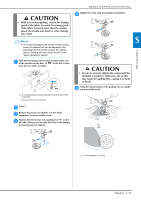
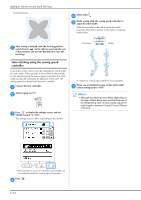
Appliqué, Patchwork and Quilt Stitching Start sewing. e When the end of the stitching is reached, stop the f machine. Sew until the mark at the lower edge of the 1/4" quilting foot aligns with the lower edge of the fabric. 1 2 3 1 6.4mm (1/4 inch) 2 End of stitching 3 Mark on 1/4" quilting foot Baste the fabric to be quilted. a Remove the presser foot and the presser foot holder. b • For details, refer to "Removing and attaching the presser foot holder" in the "Basic operations" section. Hook the connecting fork of the walking foot onto the c needle clamp screw. a b S UTILITY STITCHES 1 Connecting fork 2 Needle clamp screw Lower the presser foot lever, insert the presser foot d holder screw, and then tighten the screw with the screwdriver. Quilting Sandwiching batting between the top and bottom layers of fabric is called "quilting". Quilts can easily be sewn using the walking foot* and the quilting guide*. * Sold separately with some models. Note • Thread the needle manually when using the walking foot, or only attach the walking foot after threading the needle using the needle threader. • When sewing with the walking foot, sew at a speed between slow and medium. • When quilting, use a 90/14 home machine needle. • The walking foot can only be used with straight or zigzag stitch patterns. Reverse stitches cannot be sewn with the walking foot. Only select straight or zigzag stitch patterns with reinforcement stitches. For details, refer to "Stitch Setting Chart" in the "Basic operations" section. • (For models equipped with Automatic Fabric Sensor System) When "Automatic Fabric Sensor System" in the settings screen is set to "ON", the thickness of the fabric is automatically detected by the internal sensor so the fabric can be fed smoothly for best sewing results. For details on the automatic fabric sensor system, refer to "Automatic Fabric Sensor System (Automatic presser foot pressure)" in the "Basic operations" section. a 1 Presser foot holder screw CAUTION • Be sure to securely tighten the screws with the screwdriver, otherwise the needle may touch the presser foot, causing it to bend or break. • Before starting to sew, slowly turn the handwheel toward you (counterclockwise) and check that the needle does not touch the presser foot. If the needle hits the presser foot, the needle may bend or break. Select a stitch. e Place one hand on each side of the presser foot, and f then evenly guide the fabric while sewing. Sewing S-29
-
 1
1 -
2
-
3
-
4
-
5
-
6
-
7
-
8
-
9
-
10
-
11
-
12
-
13
-
14
-
15
-
16
-
17
-
18
-
19
-
20
-
21
-
22
-
23
-
24
-
25
-
26
-
27
-
28
-
29
-
30
-
31
-
32
-
33
-
34
-
35
-
36
-
37
-
38
-
39
-
40
-
41
-
42
-
43
-
44
-
45
-
46
-
47
-
48
-
49
-
50
-
51
-
52
-
53
-
54
-
55
-
56
-
57
-
58
-
59
-
60
-
61
-
62
-
63
-
64
-
65
-
66
-
67
-
68
-
69
-
70
-
71
-
72
-
73
-
74
-
75
-
76
-
77
-
78
-
79
-
80
-
81
-
82
-
83
-
 84
84 -
 85
85 -
 86
86 -
 87
87 -
 88
88 -
 89
89 -
 90
90 -
 91
91 -
 92
92 -
 93
93 -
 94
94 -
95
-
96
-
97
-
98
-
99
-
100
-
101
-
102
-
103
-
104
-
105
-
106
-
107
-
108
-
109
-
110
-
111
-
112
-
113
-
114
-
115
-
116
-
117
-
118
-
119
-
120
-
121
-
122
-
123
-
124
-
125
-
126
-
127
-
128
-
129
-
130
-
131
-
132
-
133
-
134
-
135
-
136
-
137
-
138
-
139
-
140
-
141
-
142
-
143
-
144
 |
 |