Brother International MFC 240C Quick Setup Guide - English - Page 15
Choosing a Receive Mode, 13 Sending in the Product Registration and Test Sheet (USA only) - scanner drivers
 |
UPC - 012502615682
View all Brother International MFC 240C manuals
Add to My Manuals
Save this manual to your list of manuals |
Page 15 highlights
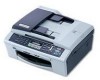
Setting Up the Machine 12 Choosing a Receive Mode There are four possible receive modes: Fax Only, Fax/Tel, Manual and External TAD. Are you connecting an external telephone or external telephone answering device to the machine? Yes Do you use a Distinctive Ring subscriber service? No Yes Are you using the voice message function of an external telephone answering device? No Go to Distinctive Ring in the chapter 7 of the User's Guide. No Do you want the machine to answer fax and telephone calls automatically? Yes Do you want to use the machine for Fax only? Fax Only Yes Your machine automatically answers every call as a fax. No Fax/Tel Your machine controls the line and automatically answers every call. If the call is not a fax, the phone will ring for you to pick up the call. No Manual You control the phone line and must answer every call yourself. Yes External TAD Your external telephone answering device (TAD) automatically answers every call. Voice messages are stored on the external TAD. Fax messages are printed. 1 Press Menu. 2 Press 0. 3 Press 1. 4 Press a or b to choose the mode. 5 Press OK. 6 Press Stop/Exit. For details, see Receive mode Settings in Chapter 6 of the User's Guide. 13 Sending in the Product Registration and Test Sheet (USA only) 1 Fill out the Product Registration and Test Sheet. 2 Put the sheet face down in the ADF (Automatic Document Feeder) or the scanner glass. 3 Make sure (Fax) is illuminated in Green. 4 Enter the toll-free fax number: 1-877-268-9575. 5 Press Black Start. Note You will receive a confirmation fax of your Product Registration. You can also register your product online using the On-Line Registration link from the installation CDROM or visit http://www.brother.com/registration. Now go to Go to Supplied CD-ROM 'MFL-Pro Suite' on the next page to install the drivers. 13
-
 1
1 -
2
-
3
-
4
-
5
-
6
-
7
-
8
-
9
-
 10
10 -
 11
11 -
 12
12 -
 13
13 -
 14
14 -
 15
15 -
 16
16 -
 17
17 -
 18
18 -
 19
19 -
 20
20 -
21
-
22
-
23
-
24
-
25
-
26
 |
 |