Brother International T-8422C Basic Instruction Manual - English
Brother International T-8422C Manual
 |
View all Brother International T-8422C manuals
Add to My Manuals
Save this manual to your list of manuals |
Brother International T-8422C manual content summary:
- Brother International T-8422C | Basic Instruction Manual - English - Page 1
before using the machine. Please keep this manual within easy reach for quick reference. This basic operation manual describes basic operations including sewing machine operations. For cleaning, standard adjustments and more details, please refer to the instruction manual contained in the Document - Brother International T-8422C | Basic Instruction Manual - English - Page 2
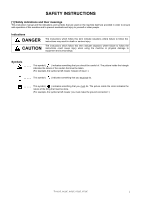
very much for buying a BROTHER sewing machine. Before using your new machine, please read the safety instructions below and the explanations given in the instruction manual. With industrial sewing machines, it is normal to carry out work while positioned directly in front of moving parts such as the - Brother International T-8422C | Basic Instruction Manual - English - Page 3
their meanings This instruction manual and the indications and symbols that are used on the machine itself are provided in order to ensure safe operation of this machine and to prevent accidents the symbol at left means "you must make the ground connection".) T-8421C, 8422C, 8452C, 8722C, 8752C i - Brother International T-8422C | Basic Instruction Manual - English - Page 4
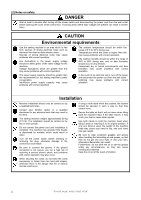
problems with correct operation. Installation Machine installation should only be carried out by a qualified technician. Contact your Brother dealer or a qualified electrician for any electrical work that may need to be done. The sewing machine of children. ii T-8421C, 8422C, 8452C, 8722C, 8752C - Brother International T-8422C | Basic Instruction Manual - English - Page 5
of the reach of children. Use only the proper replacement parts as specified by Brother. Maintenance and inspection Maintenance and inspection of the sewing machine should only be carried out by a qualified technician. Ask your Brother dealer or a qualified electrician to carry out any maintenance - Brother International T-8422C | Basic Instruction Manual - English - Page 6
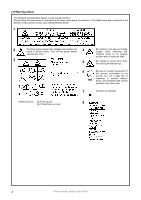
labels The following warning labels appear on the sewing machine. Please follow the instructions on the labels at all times when using the machine. If the labels have been removed or are difficult to read, please contact your nearest Brother dealer. 1 2 Touching areas where high voltages are - Brother International T-8422C | Basic Instruction Manual - English - Page 7
Oil pan Control box Transformer box (100V/400V system only) 2166B Oil tank 2506B T-8421C, 8422C, 8452C, 8722C, 8752C v - Brother International T-8422C | Basic Instruction Manual - English - Page 8
FUNCTIONS FOR OPTIMUM SEWING 1 2. NAMES OF MAJOR PARTS 2 3. INSTALLATION guide 25 5. USING THE G50 OPERATION PANEL (BASIC OPERATIONS 26 5-1. Names and functions 26 5-2. Sewing start and end backtack stitches ......... 28 6. SEWING 29 6-1. Sewing 29 6-2. Backtacking 30 T-8421C, 8422C - Brother International T-8422C | Basic Instruction Manual - English - Page 9
> INSTRUCTION MANUAL CD 8-5. Setting the maximum sewing speed The sewing speed can be adjusted using the MAX key. Actuator switch 2511B Condensed stitching INSTRUCTION MANUAL CD 9-3. Sewing condensed irregular curves can also be handled with ease. 2513B T-8421C, 8422C, 8452C, 8722C, 8752C 1 - Brother International T-8422C | Basic Instruction Manual - English - Page 10
2. NAMES OF MAJOR PARTS 2. NAMES OF MAJOR PARTS G50 operation panel (advanced function LCD) G10 operation panel ( cover 2168B (2) Thread wiper (T-8422C, 8452C, 8722C, 8752C) (4) Quick reverse (Actuator switch) (6) Control box (8) Power switch (10) Reverse lever (12) Machine pulley (14) Cotton stand - Brother International T-8422C | Basic Instruction Manual - English - Page 11
your Brother dealer or a qualified electrician for any electrical work that may need to be done. The sewing machine weighs sewing machine. The sewing machine should be plugged directly into an AC wall outlet. Operation problems may result if extension cords are used. Carrying the machine The machine - Brother International T-8422C | Basic Instruction Manual - English - Page 12
be strong enough to hold the weight and with-stand the vibration of the sewing machine. Drill holes as indicated in the illustration below. Cotton stand hole Cord hole washers [3 pcs] (5) Washers [3 pcs] 2. Connecting rod (6) Connecting rod (7) Nut 4127M 4 T-8421C, 8422C, 8452C, 8722C, 8752C - Brother International T-8422C | Basic Instruction Manual - English - Page 13
3. INSTALLATION 3. Oil pan (1) Head cushions (left) [2 pcs] (2) Head cushions (right) [2 pcs] (3) Oil pan (4) Oiler 2874M 4. Rubber cushions (1) Rubber cushions [2 pcs] (2) Nails [4 pcs] 5. Knee lifter complying bar (3) Knee lifter complying bar 2875M T-8421C, 8422C, 8452C, 8722C, 8752C 5 - Brother International T-8422C | Basic Instruction Manual - English - Page 14
the table hole. If the head rest (3) is not pushed in as far as it will go, the machine head will not be sufficiently stable when it is tilted back. 2171B 7. Operation panel (1) Operation panel (2) Screws so that the cotton stand (1) does not move. 2878M 6 T-8421C, 8422C, 8452C, 8722C, 8752C - Brother International T-8422C | Basic Instruction Manual - English - Page 15
lifter plate (1) to a position where it is easy to use. 2173B 1. Turn the machine pulley so that the feed dog is below the top of the needle plate. 2. Lower the presser foot (5) , securely tighten the nut (9). Within 13 mm 2882M T-8421C, 8422C, 8452C, 8722C, 8752C 7 - Brother International T-8422C | Basic Instruction Manual - English - Page 16
machine should always be lubricated and the oil supply replenished before it is used for the first time, and also after long periods of non-use. Use only the lubricating oil specified by Brother more oil. 2356B 8 T-8421C, 8422C, 8452C, 8722C, 8752C - Brother International T-8422C | Basic Instruction Manual - English - Page 17
apply oil for semi dry types. 3. INSTALLATION Rotary hook race (left and right) 2200B 2174B T-8421C, 8422C, 8452C, 8722C, 8752C 2887M 9 - Brother International T-8422C | Basic Instruction Manual - English - Page 18
result in severe injury. CAUTION Contact your Brother dealer or a qualified electrician for any problems with correct operation may also occur. 3-4-1. Opening the control box cover (1) Screw (2) Cover 3-4-2. Connecting the cords 4137M 1. Sewing machine cords 2175B 10 T-8421C, 8422C - Brother International T-8422C | Basic Instruction Manual - English - Page 19
out from the control box should be secured to the cord holder (2) using the repeat cable tie (1), otherwise vibration from the sewing machine may cause the cords to become disconnected, which can cause problems with the operation of the control box. 4141M T-8421C, 8422C, 8452C, 8722C, 8752C 11 - Brother International T-8422C | Basic Instruction Manual - English - Page 20
outlet. NOTE: Take care when tapping in the staples (3) to make sure that they do not pierce the cords. Do not use extension cords, otherwise machine operation problems may result. Leg Control box Green and yellow wire (ground wire) 4144M 12 T-8421C - Brother International T-8422C | Basic Instruction Manual - English - Page 21
outlet. NOTE: Take care when tapping in the staples (5) to make sure that they do not pierce the cords. Do not use extension cords, otherwise machine operation problems may result. 2178B T-8421C, 8422C, 8452C, 8722C, 8752C 13 - Brother International T-8422C | Basic Instruction Manual - English - Page 22
outlet. NOTE: Take care when tapping in the staples (7) to make sure that they do not pierce the cords. Do not use extension cords, otherwise machine operation problems may result. Green and yellow wire (ground wire) 2380B 14 T-8421C - Brother International T-8422C | Basic Instruction Manual - English - Page 23
is gently pressed to position (B). NOTE: If the sewing machine does not operate even when the treadle (3) is depressed, check the position of the safety switch. (Refer to "13-1. Safety switch position" in the instruction manual CD.) 2. Then check that it sews at high speed when the treadle (3) is - Brother International T-8422C | Basic Instruction Manual - English - Page 24
3-6. Adjusting the treadle operation 4259M If the machine starts running at low speed when your foot is simply resting on the backward depression sensitivity will change, so readjust if necessary. 4260M 16 T-8421C, 8422C, 8452C, 8722C, 8752C - Brother International T-8422C | Basic Instruction Manual - English - Page 25
4. PREPARATION BEFORE SEWING 4. PREPARATION BEFORE SEWING 4-1. Installing the needle CAUTION Turn off the power switch before installing the needle. The machine may operate if the treadle is depressed by mistake, which could result in injury. 1. Turn the machine pulley to - Brother International T-8422C | Basic Instruction Manual - English - Page 26
4. PREPARATION BEFORE SEWING 4-2. Removing the bobbin CAUTION Turn off the power switch before removing the bobbin. The machine may operate if the treadle is depressed by mistake, which could result then remove the bobbin case (3). 3. Remove the bobbin. 2464B 18 T-8421C, 8422C, 8452C, 8722C, 8752C - Brother International T-8422C | Basic Instruction Manual - English - Page 27
SEWING 4-3. Winding the lower thread CAUTION Do not touch any of the moving parts or press any objects against the machine while winding the lower thread, as this may result in personal injury or damage to the machine 80 % of the bobbin capacity. 2123M 2124M T-8421C, 8422C, 8452C, 8722C, 8752C 19 - Brother International T-8422C | Basic Instruction Manual - English - Page 28
4. PREPARATION BEFORE SEWING 4-4. Installing the bobbin CAUTION Turn off the power switch before installing the bobbin. The machine may operate if the treadle is depressed by mistake, which could bobbins (1) made of light alloy as specified by BROTHER. 2466B 20 T-8421C, 8422C, 8452C, 8722C, 8752C - Brother International T-8422C | Basic Instruction Manual - English - Page 29
4. PREPARATION BEFORE SEWING 2902M 1. Insert the bobbin (1) into the bobbin case (2) so that the winding direction at times such as during thread trimming. Use bobbins (1) made of light alloy as specified by BROTHER. 2468B T-8421C, 8422C, 8452C, 8722C, 8752C 21 - Brother International T-8422C | Basic Instruction Manual - English - Page 30
could result in injury. ・ Turn the machine pulley and raise the thread take-up (1) before threading the upper thread. This will make threading easier and it will prevent the thread from coming out at the sewing start. ・ Thread the left-side thread first. 22 T-8421C, 8422C, 8452C, 8722C, 8752C - Brother International T-8422C | Basic Instruction Manual - English - Page 31
and T-8452C-405> Center Pass the thread through. (Refer to page 54 of the instruction manual CD) 4. PREPARATION BEFORE SEWING If the tension the tab (3). Specifications indicated by the * mark include arm thread guide D (4) and felt (5). When using polyester thread, install these components - Brother International T-8422C | Basic Instruction Manual - English - Page 32
4. PREPARATION BEFORE SEWING 4-6. Adjusting the stitch length Locked Unlocked 1. the stitch length will be. (The numbers on the dial are for use as a guide. The length of the finished stitches may vary depending on the type and thickness of thread. 2470B 24 T-8421C, 8422C, 8452C, 8722C, 8752C - Brother International T-8422C | Basic Instruction Manual - English - Page 33
machine may result. 4-9-1. To stop the needle bars (right and left) Operate the stop lever after the needle has penetrated the material and has stopped moving. Do not sew 3129M Press the push lever of sewing angle and stitch length. [Example] For a sewing angle - Brother International T-8422C | Basic Instruction Manual - English - Page 34
) in the A, B, C and D stitch number displays is sewn continuously. After the sewing machine sews a full cycle of stitches set by A, B, C and D, the thread is trimmed E stitch number display is sewn, and then the sewing machine stops automatically. 4164M 26 T-8421C, 8422C, 8452C, 8722C, 8752C - Brother International T-8422C | Basic Instruction Manual - English - Page 35
have been sewn. 4171M (14) Half stitch key When the sewing machine is stopped, the needle bar can be moved up and down by counter. (Refer to "5-6. Using the lower thread counter" in the instruction manual CD.) 4170M (17) RESET key This key is used to return , 8422C, 8452C, 8722C, 8752C 27 - Brother International T-8422C | Basic Instruction Manual - English - Page 36
of start backtack stitches is complete, end backtacking will not be carried out. • If the indicator of the thread trimming lock key is illuminated, the sewing machine will stop in the needle up position without thread trimming being carried out. 2160M 28 T-8421C, 8422C, 8452C, 8722C, 8752C - Brother International T-8422C | Basic Instruction Manual - English - Page 37
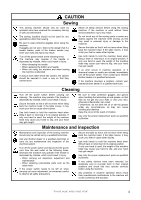
replacing the bobbin and needle y When not using the machine and when leaving the machine unattended Do not touch any of the moving parts or press any objects against the machine while sewing, as this may result in personal injury or damage to the machine. Secure the table so that it will not move - Brother International T-8422C | Basic Instruction Manual - English - Page 38
6-2. Backtacking 2916M When the actuator switch (1) or the reverse lever (2) is pressed during sewing, the feed direction will be reversed. When it is released, the feed direction will return . Select the position (A or B) that is easier to use. 2918M 30 T-8421C, 8422C, 8452C, 8722C, 8752C - Brother International T-8422C | Basic Instruction Manual - English - Page 39
MEMO T-8421C, 8422C, 8452C, 8722C, 8752C - Brother International T-8422C | Basic Instruction Manual - English - Page 40
in PDF format. ・ Basic Operation Manual ・ Instruction Manual ・ Parts Book Recommended system configuration for using the Document CD OS: Browser version: Windows® XP Service Pack 2, Windows Vista®, Windows® 7 Microsoft® Internet Explorer 6 Service Pack 1 or higher Screen resolution: 1024
-
 1
1 -
 2
2 -
 3
3 -
 4
4 -
 5
5 -
 6
6 -
 7
7 -
8
-
9
-
10
-
11
-
12
-
13
-
14
-
15
-
16
-
17
-
18
-
19
-
20
-
21
-
22
-
23
-
24
-
25
-
26
-
27
-
28
-
29
-
30
-
31
-
32
-
33
-
34
-
35
-
36
-
37
-
38
-
39
-
40
 |
 |

T-8421C, 8422C
T-8452C, 8722C
T-8752C
TWIN NEEDLE DIRECT DRIVE LOCK STITCHER
Please read this manual before using the machine.
Please keep this manual within easy reach for quick reference.
This
basic
operation
manual
describes
basic
operations including sewing machine operations.
For cleaning, standard adjustments and more details,
please refer to the instruction manual contained in
the Document CD.
Basic Operation Manual