Browning BAR LongTrac Owners Manual - Page 17
Trigger Group Reinstallation
 |
View all Browning BAR LongTrac manuals
Add to My Manuals
Save this manual to your list of manuals |
Page 17 highlights
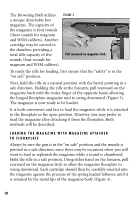
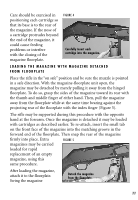
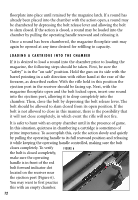
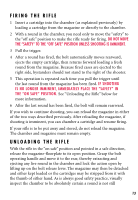
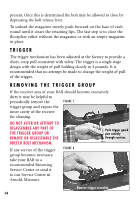
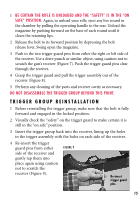
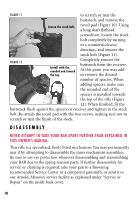
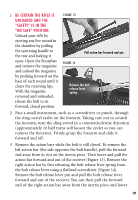
1 BE CERTAIN THE RIFLE IS UNLOADED AND THE "SAFETY" IS IN THE "ON SAFE" POSITION. Again, to unload your rifle, eject any live round in the chamber by pulling the operating handle to the rear. Unload the magazine by pushing forward on the base of each round until it clears the retaining lips. 2 Release the bolt to its forward position by depressing the bolt release lever. Swing open the magazine. 3 Push in the two trigger guard pins from either the right or left side of the receiver. Use a drive punch or similar object, using caution not to scratch the gun's receiver (Figure 7). Push the trigger guard pins clear through the receiver. 4 Grasp the trigger guard and pull the trigger assembly out of the receiver (Figure 8). 5 Perform any cleaning of the parts and receiver cavity as necessary. DO NOT DISASSEMBLE THE TRIGGER GROUP BEYOND THIS POINT. TRIGGER GROUP REINSTALLATION 1 Before reinstalling the trigger group, make sure that the bolt is fully forward and engaged in the locked position. 2 Visually check the "safety" on the trigger guard to make certain it is still in the "on safe" position. 3 Insert the trigger group back into the receiver, lining up the holes in the trigger assembly with the holes on each side of the receiver. 4 Re-insert the trigger guard pins from either side of the receiver and gently tap them into place again using caution not to scratch the receiver (Figure 9). FIGURE 9 Re-insert trigger guard pins. 15
-
 1
1 -
2
-
3
-
4
-
5
-
6
-
7
-
8
-
9
-
10
-
11
-
 12
12 -
 13
13 -
 14
14 -
 15
15 -
 16
16 -
 17
17 -
 18
18 -
 19
19 -
 20
20 -
 21
21 -
 22
22 -
23
-
24
-
25
-
26
-
27
 |
 |
