Bushnell 118326 User Manual - Page 6
Setting the Date and Time/Date Stamp Feature, Auto Off Power Save
 |
View all Bushnell 118326 manuals
Add to My Manuals
Save this manual to your list of manuals |
Page 6 highlights
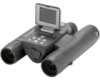
BASIC SETUP Setting the Date and Time/Date Stamp Feature You may want to go into the main options menu and set the correct date and time before beginning to take photos (or turn off the date stamp feature, as the default setting is "on"). To set date and time: 1. Raise the LCD display and press the ON/OFF (B) button. 2. Press MENU (C). Press the Minus key (D) 7 times to highlight "Clock Set", and press the Enter button (D). 3. Now set the Year, Month, Date, Hour (24 hr format), and Minute, using the Plus/Minus keys to make changes, and the Right key (D) to move to the next field. 4. Once the date & time are set, press the Enter button. 5. Press the Minus arrow key once to highlight "Date Stamp", press Enter, then highlight your preference using the Plus/Minus keys: Month-Day-Year format, Year-Month-Day format, or OFF (the date will not be stamped on your photos). 6. Press Enter, then press the Minus key twice to highlight "Exit" , then press Enter again to exit the menu options and return to the "live" preview display. Auto Off (Power Save) By default, the SyncFocus will automatically turn off if no buttons or controls have been pressed for two minutes. This helps save power and extend battery life when the camera is accidently left on. However, when you are first learning to use the camera you may want power to remain on (until you press ON/OFF) as you get familiar with the features and controls. To do this, enter the main menu as described above in "Setting the Date...", highlight "Auto Off", press Enter, and select "Cancel". Press Enter, then exit the menu as described above. 6
-
 1
1 -
 2
2 -
 3
3 -
 4
4 -
 5
5 -
 6
6 -
 7
7 -
 8
8 -
 9
9 -
 10
10 -
 11
11 -
 12
12 -
13
-
14
-
15
-
16
-
17
-
18
-
19
-
20
-
21
 |
 |
