Canon 0435B008 Startup Guide
Canon 0435B008 Manual
 |
View all Canon 0435B008 manuals
Add to My Manuals
Save this manual to your list of manuals |
Canon 0435B008 manual content summary:
- Canon 0435B008 | Startup Guide - Page 1
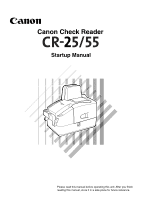
Canon Check Reader Startup Manual Please read this manual before operating this unit. After you finish reading this manual, store it in a safe place for future reference. - Canon 0435B008 | Startup Guide - Page 2
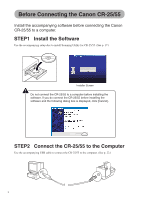
Before Connecting the Canon CR-25/55 Install the accompanying software before connecting the Canon CR-25/55 to a computer. STEP1 Install the Software Use the accompanying setup disc to install Scanning Utility for CR-25/55. (See p. 17.) Installer Screen Do not connect the CR-25/55 to a computer - Canon 0435B008 | Startup Guide - Page 3
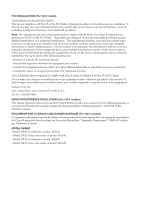
instructions, manual. If such changes or modifications should be made, you could be required to stop operation of the equipment. Canon U.S.A. Inc. One Canon CR-25 is identical to model M11061. - Model CR-25 is the sales name of model M11061. - Model CR-55 is identical to model M11056. - Model CR-55 - Canon 0435B008 | Startup Guide - Page 4
THIS AGREEMENT, DO NOT OPEN THE SEALED DISK PACKAGE AND PROMPTLY RETURN THE CANON SCANNER, THE DISK PACKAGE CONTAINING SCANNER DRIVER SOFTWARE PROGRAMS AND/OR SCANNER UTILITY SOFTWARE PROGRAM PROPRIETARY TO CANON OR ITS LICENSOR (THE "SOFTWARE") AND THE ACCOMPANYING DOCUMENTATION AND OTHER ITEMS TO - Canon 0435B008 | Startup Guide - Page 5
MATERIAL. Technical Assistance If after reading this manual you still need assistance or you need service please contact your local authorized Canon dealer, service representative or the *Canon Service Support Center. You can contact the *Canon Service Support Center at 1-800-423-2366 Monday through - Canon 0435B008 | Startup Guide - Page 6
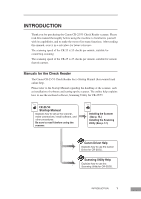
scanning speed of the CR-25 is 25 checks per minute, suitable for remote deposit capture. Manuals for the Check Reader The Canon CR-25/55 Check Reader has a Startup Manual (this manual) and online help. Please refer to the Startup Manual regarding the handling of the scanner, such as installation - Canon 0435B008 | Startup Guide - Page 7
The follwing symbols are used in this manual to explain procedures, restrictions, handling precautions, and instructions that should be observed for safety. WARNING Indicates a warning concerning operations that may lead to death or injury to persons if not performed correctly. To - Canon 0435B008 | Startup Guide - Page 8
Contents INTRODUCTION ...1 Manuals for the Check Reader 1 Symbols Used in This Manual 2 Before Using the Scanner 4 Important Safety Instructions 4 Installation Location ...4 Power ...5 Moving the Scanner ...5 Handling ...6 Disposal ...7 Features of the CR-25/55 8 Checking the Packing List 9 - Canon 0435B008 | Startup Guide - Page 9
must be placed in such a spot, hang a heavy curtain, or similar object to shade the scanner. • Avoid dusty locations. Dust can get inside the scanner and cause problems. • Avoid warm or humid locations, such as in the vicinity of a water faucet, water heater, or humidifier, and avoid locations - Canon 0435B008 | Startup Guide - Page 10
• If you have any questions about the AC adapter, contact your local authorized Canon dealer or service representative for further information. Moving the Scanner • The scanner weighs approximately 4.4 lb (2 kg). When moving the scanner, always hold it with both hands to avoid dropping it. If held - Canon 0435B008 | Startup Guide - Page 11
unplug the power cord. Contact your local authorized Canon dealer or service representative to have the scanner serviced. • Do not drop, kick, or otherwise strike the scanner. If the scanner does somehow become damaged, immediately turn the scanner OFF and unplug the power cord. Contact your local - Canon 0435B008 | Startup Guide - Page 12
or electrical shock. If such foreign matter does get inside of the scanner, unplug the power cord immediately, and then contact your local authorized Canon dealer or service representative for assistance. • Do not install the scanner in a dusty or humid location. Doing so creates a risk of fire or - Canon 0435B008 | Startup Guide - Page 13
CR-25/55 The Canon CR-25/55 Check Reader is a scanner with magnetic head that can read checks and other documents that are printed with MICR (Magnetic Ink Character Recognition) compatible fonts and is capable of OCR (Optical Character Recognition). The main features of the CR-25/55 Support - Canon 0435B008 | Startup Guide - Page 14
local authorized Canon dealer or service representative. CR-25/55 Scanner SCtaartnuop nMaCnhuealck Reader reaPdleinagsethriseamdatnhuisaml, satnourealitbienfoaresaofpeepralatcinegfothrisfuutunriet. Areffteerreynocue.finish Startup Manual (This Manual) AC Adapter Power Cord CR-25/55 Setup Disc - Canon 0435B008 | Startup Guide - Page 15
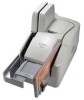
Removing the Protective Packing Tape Remove all of the protective packing tape before using the scanner. 1 Remove the protective tape (indicated by the ▼) from the scanner. 2 While lowering the OPEN lever, open the reading unit. Reading Unit 10 Before Using the Scanner - Canon 0435B008 | Startup Guide - Page 16
3 Remove the protective tape (indicated by the ▼) from the reading unit. 4 Gently close the reading unit until it clicks into place. Before Using the Scanner 11 - Canon 0435B008 | Startup Guide - Page 17
. (See p. 38.) Document Feed Tray Pull out to load documents. (See p. 37.) Maintenance Cover Open this cover to clear paper jams or clean the scanner. (See p. 48 and p. 58.) Paper Thickness Adjustment Dial Adjust the gap between the separation roller and feeding roller to the thickness of the paper - Canon 0435B008 | Startup Guide - Page 18
p. 51.) Separation Roller Separates a stack of documents into single sheets one by one. (See p. 43.) Feeding Roller Feeds the document. (See p. 43.) Before Using the Scanner 13 - Canon 0435B008 | Startup Guide - Page 19
■ Rear View Reading Unit (Access Hatch) Open to clear paper jams or clean the scanner. (See p. 48 and p. 58.) Connectors/ Power Switch ■ Connectors/Power Switch Power Switch Turns the scanner power ON or OFF. (See p. 23 and p. 25.) Power Connector Connect the included AC adapter plug. (See p. 21 - Canon 0435B008 | Startup Guide - Page 20
Installing the Scanner Installation Requirements To use the CR-25/55, your computer must satisfy the following system requirements most recent version of the USB 2.0 driver provided by Microsoft. Contact your local authorized Canon dealer or service representative for more detailed information. • Not - Canon 0435B008 | Startup Guide - Page 21
first time, be sure to install the accompanying application software before connecting the CR-25/55 to the computer. The procedure for installing the scanner is outlined below. 1. Install Scanning Utility for CR-25/55. (See "Installing the Scanning Utility," on p. 17.) 2. Connect the power cord to - Canon 0435B008 | Startup Guide - Page 22
Utility Scanning Utility for CR-25/55 is dedicated application software for the CR-25/55. After installing the scanning utility, the installer proceeds to install the CR-25/55 device driver. 1 Turn ON your ROM drive), and then click the [OK] button. The installer starts. Installing the Scanner 17 - Canon 0435B008 | Startup Guide - Page 23
6 Follow the instructions that appear on the screen to install the software. 1. Select the installation language, and then click [OK]. 2. Read the Welcome License Agreement text, and then click [Yes]. 4. Read the Choose Destination Location text, and then click [Next]. 18 Installing the Scanner - Canon 0435B008 | Startup Guide - Page 24
5. Installation of the scanning utility starts. 6. After the scanning utility is installed, installation of the Canon driver starts. 7. This completes the installation. Installing the Scanner 19 - Canon 0435B008 | Startup Guide - Page 25
7 After installation is complete, click the [Finish] button to exit the installer. Note Installing the scanning utility will put the [Scanning Utility for CR-25_55] icon on your Windows Start menu. (See "Using the Scanning Utility," on p. 30.) 20 Installing the Scanner - Canon 0435B008 | Startup Guide - Page 26
Perform the following steps to connect the power cord. WARNING • Make sure to use the power cord and AC adapter provided with the scanner. • Make sure the scanner is turned OFF when performing this operation. 1 Connect the bundled power cord a to the AC adapter. 2 Connect the AC adapter power cord - Canon 0435B008 | Startup Guide - Page 27
than 5 m. • When using a USB extension card that supports Hi-Speed USB 2.0, be sure to choose one verified for use with the scanner. (See p. 15.) 1 Connect the type A plug to the scanner. 2 Connect the type B plug to the computer. CR-25/55 Computer Hi-Speed USB 2.0 compatible cable Type B Plug - Canon 0435B008 | Startup Guide - Page 28
is ON, immediately turn the scanner OFF and disconnect the power cord from the power outlet. Contact your local authorized Contact your local authorized Canon dealer, service representative or the *Canon Service Support Center (see p. iii.) to have the scanner serviced. * : For US customers only - Canon 0435B008 | Startup Guide - Page 29
• Windows XP Note • The installation finished message is not displayed in Windows 2000. • If your operating system is Windows XP, a message appears after the device driver is installed. • The CR-25/55 will be registered as "CANON CR-25/55 USB" in the Imaging Device directory. 24 Installing the - Canon 0435B008 | Startup Guide - Page 30
though the power is ON, immediately turn the scanner OFF and disconnect the power cord from the power outlet. Contact your local authorized Canon dealer, service representative or the *Canon Service Support Center (see p. iii.) to have the scanner serviced. * : For US customers only. Installing the - Canon 0435B008 | Startup Guide - Page 31
ink cartridge so that you can use the imprinter to print text on scanned documents. The ink cartridge is not included with the scanner. Purchase an ink cartridge separately, as shown below. Manufacturer: Hewlett Packard Model numbers: C6602B (blue) C6602G (green) C6602R (red) Installation Procedure - Canon 0435B008 | Startup Guide - Page 32
tape covering the ink jet nozzle. IMPORTANT Do not touch the ink jet nozzle or contacts after peeling off the tag and tape. Installing the Scanner 27 - Canon 0435B008 | Startup Guide - Page 33
lever locks the ink cartridge into the correct position. Ink Cartridge Lock Lever If the cartridge does not load properly, see p. 29. 28 Installing the Scanner - Canon 0435B008 | Startup Guide - Page 34
correct position b. 8 Gently close the imprinter cover. Ink Cartridge Holes Ink Cartridge Pins 9 Gently close the maintenance cover until it clicks into place. Installing the Scanner 29 - Canon 0435B008 | Startup Guide - Page 35
utility. To access the scanning utility help, start the scanning utility, click [Help] on the menu bar, and then select [Help]. 1 Turn the scanner power ON. 2 Turn ON your computer. Windows starts. 3 Click the [Start] button, point to [Programs] (when using Windows XP, point to [All Programs - Canon 0435B008 | Startup Guide - Page 36
4 On the [File] menu, click [Scanner Setting], and then specify the scanning parameters. Note For details about how to configure scanning parameters, click the [Help] button in the settings dialog box to view the Canon driver help. 5 Execute the scan operation from the [File] menu. Scanning Utility - Canon 0435B008 | Startup Guide - Page 37
6 After scanning is complete, select [Exit] on the [File] menu to quit the scanning utility. 32 Scanning Utility Software - Canon 0435B008 | Startup Guide - Page 38
Utility Follow the procedure described below to uninstall the scanning utility. IMPORTANT You must uninstall Scanning Utility for CR-25/55 and Canon Driver for CR-25/55 separately. 1 Log on as a user with Administrator privileges. 2 Click the [Start] button, point to [Settings], and then click - Canon 0435B008 | Startup Guide - Page 39
3 Double-click the [Add/Remove Programs] icon. The [Add/Remove Programs Properties] (for Windows XP, [Add or Remove Programs]) dialog box is displayed. Note If you are using Windows XP, double-click the [Add or Remove Programs] icon. 4 Select the application that you want to delete from the list in - Canon 0435B008 | Startup Guide - Page 40
5 Click the [Yes] button to start the uninstaller. [Scanning Utility for CR-25/55] is selected. [Canon Driver for CR-25/55] is selected. Uninstallation starts. 6 After the uninstall is complete, click the [OK] button to exit the uninstaller. Scanning Utility Software 35 - Canon 0435B008 | Startup Guide - Page 41
Documents Document Types This scanner can scan documents of the following sizes: Length Height Height: 2.0" to 4.2" (50 mm to 106 mm) Length: 3.2" to 9.0" (80 mm to 228 fed documents. If misdetection of double feeds occurs often, turn off Double Feed Detection. (See p. 46). 36 Using the Scanner - Canon 0435B008 | Startup Guide - Page 42
may be needed depending on your environment (humidity, temperature, etc.) and the documents you are scanning (checks, etc.). Perform the adjustment only if necessary. • Scanning the following types of documents may cause a documents, load no more than 10 sheets at one time. Using the Scanner 37 - Canon 0435B008 | Startup Guide - Page 43
beyond the length of the loaded documents. IMPORTANT If the eject stopper is not pulled out far enough, a feeding error may occur. 38 Using the Scanner - Canon 0435B008 | Startup Guide - Page 44
the thickness of documents scanned with the CR-25/55 and the paper thickness setting, double feeds or feeding errors may occur. After installing the CR-25/55 or before scanning documents of a different You can also refer to the scanning utility help in the [Help] menu. Using the Scanner 39 - Canon 0435B008 | Startup Guide - Page 45
feed properly (they double-feed or no sheets are fed), see "Calibrating Paper Thickness," on page 42 to adjust for paper thickness. 40 Using the Scanner - Canon 0435B008 | Startup Guide - Page 46
6 Exit the scanning utility. Using the Scanner 41 - Canon 0435B008 | Startup Guide - Page 47
the size, thickness, and weight of your document meets the conditions of this scanner. See "Documents," on page 36. • Your unit has been carefully adjusted (humidity, temperature, etc.) and the documents you are scanning (checks, etc.). Perform the adjustment only if necessary. 1 Hook your finger - Canon 0435B008 | Startup Guide - Page 48
3 Load two checks or check-stock paper together. Separation Roller Feeding Roller Paper Thickness Adjustment Dial 4 Slide the two sheets through between the feeding roller (left) until both sheets two pieces easily slide through the gap. 5 Gently remove one of the sheets. Using the Scanner 43 - Canon 0435B008 | Startup Guide - Page 49
, or the *Canon Service Support Center. * : For US customers only. 9 Place a marking label on the unit pointing to the adjustment dial as illustrated below. This will serve as a reference point for future adjustments if required. Marking labels for thickness adjustment dial 44 Using the Scanner - Canon 0435B008 | Startup Guide - Page 50
.) 1.7" (43.5 mm) 1.9" (47 mm) 2.0" (50.5 mm) from document from document from document bottom edge bottom edge bottom edge 3 Gently close the imprinter cover. Using the Scanner 45 - Canon 0435B008 | Startup Guide - Page 51
or more documents are fed at the same time (double feed) while scanning continuously. When the scanner detects a double feed, it stops scanning. IMPORTANT • The following types of document may be the [Help] button in the settings dialog box to view the Canon driver help. 46 Using the Scanner - Canon 0435B008 | Startup Guide - Page 52
, and then wipe the dirt away. Then use a dry, soft cloth to wipe away any remaining moisture. Cleaning the Inside of the Scanner Dust or paper particles inside the scanner can cause lines in scanned images. Use compressed air for regular cleaning of dust and paper particles from inside the - Canon 0435B008 | Startup Guide - Page 53
If the scanned images have extraneous marks, or if the scanned documents become dirty after scanning, then the sensor glass or rollers inside the scanner may be dirty. Clean them periodically. 1 Hook your finger around the open lever and open the maintenance cover. 2 While lowering the open lever - Canon 0435B008 | Startup Guide - Page 54
3 Dampen a cloth with water, wring the cloth out thoroughly, and then wipe the dirt off of the rollers while rotating them. There are 18 rollers located in the positions illustrated below. (Rollers m and n comprise two rollers each, an upper roller and a lower roller.) Note • Move roller e in the - Canon 0435B008 | Startup Guide - Page 55
cause marks on the images and could cause feeding errors. If there are scratches on the sensor glass, contact your local authorized Canon dealer or service representative. 5 Gently close the reading unit until it clicks into place. 6 Gently close the maintenance cover until it clicks into place. 50 - Canon 0435B008 | Startup Guide - Page 56
Cleaning the Magnetic Head If the magnetic head is dirty, MICR characters cannot be scanned correctly. Periodically clean the magnetic head with a commercially available audio head cleaner. 1 Hook your finger around the open lever and open the maintenance cover. 2 Clean the magnetic head with a - Canon 0435B008 | Startup Guide - Page 57
your documents are stained and smudged from printing even after you clean the ink absorber, you should replace the ink absorber. Contact your local authorized Canon dealer or service representative. 52 Regular Maintenance - Canon 0435B008 | Startup Guide - Page 58
3 Open the imprinter cover. 4 Squeeze in both sizes of the print position adjustment lever and move the print cartridge carriage to its lowest position. IMPORTANT When removing the ink cartridge, always make sure that the carriage is lowered to its lowest position. You cannot remove the ink - Canon 0435B008 | Startup Guide - Page 59
6 Use a dry cotton swab to wipe off any ink on the ink jet nozzle. 7 Reinstall the ink cartridge. (See "Installing the Ink Cartridge," on p. 26.) 8 Gently close the imprinter cover. 9 Gently close the maintenance cover until it clicks into place. 54 Regular Maintenance - Canon 0435B008 | Startup Guide - Page 60
the imprinter cover. 3 Squeeze in both sides of the print position adjustment lever and move the print cartridge carriage to its lowest position. Regular Maintenance 55 - Canon 0435B008 | Startup Guide - Page 61
IMPORTANT When removing the ink cartridge, always make sure that the carriage is lowered to its lowest position. You cannot remove the ink cartridge without lowering the carriage to its lowest position. 4 Push back the ink cartridge lock lever in the direction of the arrow in the illustration below, - Canon 0435B008 | Startup Guide - Page 62
your local authorized Canon dealer, service representative, or the *Canon Service Support Center. You can contact the *Canon Service Support Center at 1-800-423-2366 Monday through Friday 8:00 A.M to 8:00 P.M. Eastern Standard Time for assistance. * : For US customers only. Troubleshooting 57 - Canon 0435B008 | Startup Guide - Page 63
. IMPORTANT Do not attempt to pull the jammed paper upwards or backwards against the feeding direction. Doing so can damage the internal parts of the scanner. CAUTION When removing jammed paper, take care not to cut your hand on the edge of the paper. 1 Turn OFF the - Canon 0435B008 | Startup Guide - Page 64
any other area: Pull the paper forward and clear the jam from the nearest opening. 5 Gently close the reading unit until it clicks into place. Troubleshooting 59 - Canon 0435B008 | Startup Guide - Page 65
close the maintenance cover until it clicks into place. If additional assistance is required, contact your local authorized Canon dealer or service representative. The Scanner Does Not Turn ON Check the following: • Is the power switch in the ON position? (See p. 23.) • Is the power cord connected - Canon 0435B008 | Startup Guide - Page 66
USB interfaces. Contact your local authorized Canon dealer or service representative for more information. (See p. 15.) Cause The scanner does not support the USB cable. Remedy Use the USB cable provided with the scanner. (See p. 22.) Cause The scanner does not support the USB hub. Remedy Remove - Canon 0435B008 | Startup Guide - Page 67
on p. 48.) If the rollers are worn, then they should be replaced. Contact your local authorized Canon Dealer, service representative, or the *Canon Service Support Center. * : For US customers only. For instructions on clearing a paper jam, see "Clearing a Paper Jam," on p. 58. 62 Troubleshooting - Canon 0435B008 | Startup Guide - Page 68
to install the scanner driver, see "Installing the Scanning Utility," on p. 17. For details on how to install the application software, refer to the application software instruction manual.) Cause Remedy Attempting to use a function of the CR-25/55 that is not supported by the application software - Canon 0435B008 | Startup Guide - Page 69
Specifications Type Desktop sheet-through scanner Scanning Document Specifications Height: 2.0" to 4.2" ( 100 x 100 dpi/200 x 100 dpi Scanning Speed CR-25 : 25 pages/minute (American checks) CR-55 : 55 pages/minute (American checks) Interface Hi-Speed USB 2.0 Other Functions Double feed - Canon 0435B008 | Startup Guide - Page 70
AC Adapter (100 - 240V) Model Input Output Power Supply Weight MG1-3607 AC 100-240V 50/60Hz 65VA-82VA DC16V 1.8A 0.5 W max. (separate AC adapter) Approximately 0.7 lb (0.3 kg ) (including power cord) Specifications are subject to change without notice. External Dimensions Units: inches (units - Canon 0435B008 | Startup Guide - Page 71
30 Scanning utility Scanning utility 17, 33 Canon driver 33 Scanner Installation Procedure 16 Specifications 64 AC adapter 65 External dimensions 65 Separation roller 13 T Troubleshooting 57 U USB connector 14 Using the scanner Documents 36 Paper Thickness 42 Placing Documents 37 - Canon 0435B008 | Startup Guide - Page 72
INC. 1248, SHIMOKAGEMORI, CHICHIBU-SHI, SAITAMA 369-1892, JAPAN CANON U.S.A. INC. ONE CANON PLAZA, LAKE SUCCESS, N.Y. 11042, U.S.A. CANON CANADA INC. 6390 DIXIE ROAD, MISSISSAUGA, ONTARIO L5T 1P7, CANADA CANON EUROPA N.V. BOVENKERKERWEG 59-61, P.O.BOX 2262, 1180 EG AMSTELVEEN, THE NETHERLANDS
-
 1
1 -
 2
2 -
 3
3 -
 4
4 -
 5
5 -
 6
6 -
 7
7 -
8
-
9
-
10
-
11
-
12
-
13
-
14
-
15
-
16
-
17
-
18
-
19
-
20
-
21
-
22
-
23
-
24
-
25
-
26
-
27
-
28
-
29
-
30
-
31
-
32
-
33
-
34
-
35
-
36
-
37
-
38
-
39
-
40
-
41
-
42
-
43
-
44
-
45
-
46
-
47
-
48
-
49
-
50
-
51
-
52
-
53
-
54
-
55
-
56
-
57
-
58
-
59
-
60
-
61
-
62
-
63
-
64
-
65
-
66
-
67
-
68
-
69
-
70
-
71
-
72
 |
 |

Startup Manual
Please read this manual before operating this unit. After you finish
reading this manual, store it in a safe place for future reference.
Canon Check Reader