Canon 3518B002 LV-7370 User Manual
Canon 3518B002 - LV 8300 WXGA LCD Projector Manual
 |
UPC - 013803108170
View all Canon 3518B002 manuals
Add to My Manuals
Save this manual to your list of manuals |
Canon 3518B002 manual content summary:
- Canon 3518B002 | LV-7370 User Manual - Page 1
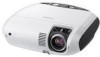
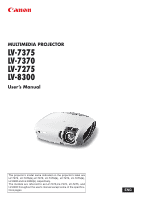
MULTIMEDIA PROJECTOR LV-7375 LV-7370 LV-7275 LV-8300 User's Manual The projector's model name indicated on the projector's label are LV-7375, LV-7375(E),LV-7370, LV-7370(E), LV-7275, LV-7275(E), LV-8300 and LV-8300(E) respectively. The models are referred to as LV-7375,LV-7370, LV-7275, and LV-8300 - Canon 3518B002 | LV-7370 User Manual - Page 2
manual carefully before using your Canon LV-7375/LV-7370/LV-7275/LV-8300 projector and keep the manual handy for future reference. Your serial number is located on the bottom of your projector USER-SERVICEABLE PARTS INSIDE. REFER SERVICING TO QUALIFIED SERVICE PERSONNEL. This symbol warns the user - Canon 3518B002 | LV-7370 User Manual - Page 3
Multimedia Projector, Model : LV-7375, LV-7370, LV-7275, and LV off and on, the user is encouraged to try the projector must be used with this equipment in instructions. If such changes or modifications should be made, you could be required to stop operation of the equipment. Canon U.S.A., Inc. One Canon - Canon 3518B002 | LV-7370 User Manual - Page 4
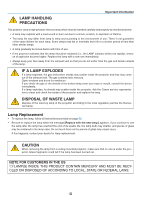
happens, contact your dealer for lamp replacement. CAUTION When removing the lamp from a ceiling-mounted projector, make sure that no one is under the projector. Glass fragments could fall if the lamp has been burned out. NOTE FOR CUSTOMERS IN THE US Hg LAMP(S) INSIDE THIS PRODUCT CONTAIN MERCURY - Canon 3518B002 | LV-7370 User Manual - Page 5
at 95°F to 104°F / 35°C to 40°C) Place the projector in a horizontal position The tilt angle of the projector should not exceed 10 degrees, nor should the projector be installed in any way other than the desktop and ceiling mount, otherwise lamp life could decrease dramatically. 10˚ Fire and Shock - Canon 3518B002 | LV-7370 User Manual - Page 6
instructions described in this user's manual. - If the projector has been dropped or the cabinet has been damaged. - If the projector exhibits a distinct change in performance, indicating a need for service can become heated while the projector is turned on. • Do not use the tilt-foot for purposes - Canon 3518B002 | LV-7370 User Manual - Page 7
approximately 5500 feet/1600 meters or higher can shorten the life of optical components such as the lamp. About Copyright of original projected pictures: Please note that using this projector for the purpose of commercial gain or the attraction of public attention in a venue such as a coffee - Canon 3518B002 | LV-7370 User Manual - Page 8
Remote Control 9 2. Installation and Connections 10 ❶ Setting Up the Screen and the Projector 11 Selecting a Location (LV-7375/LV-7370/LV-7275 11 Throw Distance and Screen Size 11 Selecting a Location (LV-8300 12 Throw Distance and Screen Size 12 ❷ Making Connections...14 Enabling the - Canon 3518B002 | LV-7370 User Manual - Page 9
the Unauthorized Use of the Projector [Password 38 ❺ Network and Alert Mail Settings by Using an HTTP Browser 41 5. Using On-Screen Menu 45 ❶ Using the Menus... and the Lens 68 ❸ Replacing the Lamp...69 7. Appendix ...72 ❶ Troubleshooting...72 ❷ Specifications...75 ❸ Cabinet Dimensions 77 ❹ Pin - Canon 3518B002 | LV-7370 User Manual - Page 10
need to ship your projector. Projector Lens cover Soft case AC power cord (4.5 m / 14.8') VGA cable (1.8 m / 5.9') [7N520068] Remote control Batteries (AAA2) GuidSetaQrtuick InfoIrmmpaotirotannt Quick Start Guide Important Information CD-ROM User's manual Warranty DVI to VGA adapter - Canon 3518B002 | LV-7370 User Manual - Page 11
allows the projector to detect its tilt and correct vertical distortion automatically. (page 33) • Supporting up to UXGA resolution High resolution display - up to UXGA compatible, XGA (LV-7375/LV-7370/LV-7275) / WXGA (LV-8300) native resolution. • Five picture preset modes for user adjustable - Canon 3518B002 | LV-7370 User Manual - Page 12
is to take your time and do everything right the first time. Take a few minutes now to review the user's manual. This may save you time later on. At the beginning of each section of the manual you'll find an overview. If the section doesn't apply, you can skip it. • Macintosh, Mac OS - Canon 3518B002 | LV-7370 User Manual - Page 13
supports the MicroSaver ® Security System. Built-in Security Slot ( )* Ventilation (inlet) / Filter Cover (See page 67) Do not block this vent. Troubles block this vent. Troubles or fire can result. Rear Foot Spacer (black rubber) A spacer is provided for leveling the projector. To fine-adjust - Canon 3518B002 | LV-7370 User Manual - Page 14
→ Computer 1 → ... 6. AUTO PC Button Use this button to adjust an analog RGB source for an optimal picture. See page 34. 3. STATUS Indicator If this light blinks red rapidly, it indicates that an error has occurred, the lamp cover is not attached properly or the projector has overheated. If this - Canon 3518B002 | LV-7370 User Manual - Page 15
page 14, 16, 18, 19, 21. 9. SERVICE PORT (D-Sub 9 Pin) Use this port to connect a computer or control sys- 4. MONITOR OUT Connector [ ] (Mini D-Sub 15 Pin) tem. You can use this connector to loop your computer im- This enables you to control the projector using se- age to an external monitor - Canon 3518B002 | LV-7370 User Manual - Page 16
When the main power is on, you can use this button to turn your projector on. NOTE: To turn on the projector, press and hold the POWER button for about 1 second. You can use this button to turn your projector off. NOTE: To turn off the projector, press this button twice. 3. INFO. Button Provides the - Canon 3518B002 | LV-7370 User Manual - Page 17
BACK button on the cabinet. See page 5. 13. VOL (+) (-) Button Press (+) to increase the volume and (-) to decrease it. See page 34. 14. D. ZOOM (+) (-) Button Use this button to adjust the image size up to 400%. The image is magnified about the center of the screen. See page 37. 15. FREEZE - Canon 3518B002 | LV-7370 User Manual - Page 18
new and old batteries together, or use different types of batteries together. • Dispose of used batteries according to your local regulations. Operating Range for Wireless Remote Control Horizontal range 7m/22 feet 30° 30° Remote sensor on projector cabinet Remote control Vertical range 7m/22 - Canon 3518B002 | LV-7370 User Manual - Page 19
video and audio sources. 1 2 3 To the wall outlet. Your projector is simple to set up and use. But before you get started, you must first: ① Set up a screen and the projector. See page 11, 12. ② Connect your computer or audio-video equipment to the projector. See pages 14, 16, 17, 18, 19, 20, 21 - Canon 3518B002 | LV-7370 User Manual - Page 20
❶ Setting Up the Screen and the Projector Selecting a Location (LV-7375/LV-7370/LV-7275) The further your projector is from the screen or wall, the larger the image. The minimum size the image can be is approximately 21" measured diagonally when the projector is roughly 0.8 m (2.6') from the wall or - Canon 3518B002 | LV-7370 User Manual - Page 21
the type of the projected image. • The Zoom lever adjusts the image size (diagonal) +/- 30%. NOTE: This projector can be hung from the ceiling (Ceiling mounted) with it turned up side down. When a translucent screen is used, the projector can project an image from behind the screen (Rear). When the - Canon 3518B002 | LV-7370 User Manual - Page 22
your projector on the ceiling must be done by a qualified technician. Contact your dealer for more information. • Do not attempt to install the projector yourself. • Only use your projector on a solid, level surface. If the projector falls to the ground, you can be injured and the projector severely - Canon 3518B002 | LV-7370 User Manual - Page 23
Signals supported by Plug & Play (DDC2) Model LV-7375/LV-7370/LV-7275 LV-8300 ANALOG IN-1 analog Yes Yes INPUT DIGITAL IN / ANALOG IN-2 analog digital No Yes Yes Yes ANALOG IN-1 AUDIO IN VGA cable (supplied) To mini D-Sub 15-pin connector on the projector. It is recommended that you use - Canon 3518B002 | LV-7370 User Manual - Page 24
cable without a built-in resistor. Using an audio cable with a built-in resistor turns down the sound. NOTE: An image may not be displayed correctly when a Video or S-Video source is played back via a commercially available scan converter. This is because the projector will process a video signal as - Canon 3518B002 | LV-7370 User Manual - Page 25
PC and the projector using a DVI cable (not supplied) before turning on your PC or projector. Turn on the projector first and select and dual types of DVI cable can be used. • The DVI (DIGITAL) connector accepts VGA (640x480), SVGA (800x600), 1152x864, XGA (1024x768), WXGA (1280x800 @ up to 60Hz - Canon 3518B002 | LV-7370 User Manual - Page 26
. Failure to do so may cause damage to the connector of the projector. • Select the input name for its appropriate input connector after turning on the projector. Input connector Use the INPUT button on the projector cabinet or the remote control to select the appropriate input from the menu - Canon 3518B002 | LV-7370 User Manual - Page 27
: • The signal from the DIGITAL IN/ANALOG IN-2 connector cannot be output from the MONITOR OUT connector. • When audio equipment is connected, the projector speaker is disabled. • Use an audio cable without a built-in resistor. Using an audio cable with a built-in resistor turns down the sound. 18 - Canon 3518B002 | LV-7370 User Manual - Page 28
. Input connector Use the INPUT button on the projector cabinet or the remote control to select the appropriate input from the menu. ANALOG IN-1 Computer 1 DIGITAL IN / ANALOG IN-2 Computer 2 (Analog) NOTE: Refer to your DVD player's owner's manual for more information about your DVD player - Canon 3518B002 | LV-7370 User Manual - Page 29
AUDIO OUT Audio cable (not supplied) • Select the input name for its appropriate input connector after turning on the projector. Input connector Use the INPUT button on the projector cabinet or the remote control to select the appropriate input from the menu. VIDEO IN VIDEO S-VIDEO IN S-VIDEO - Canon 3518B002 | LV-7370 User Manual - Page 30
IN / ANALOG IN-2 Use the INPUT button on the projector cabinet or the remote control to select the appropriate input from the menu. Computer 2 (Digital) NOTE: An image may not be displayed depending on the specifications of the audio video equipment being used. TIP: For users of audio video - Canon 3518B002 | LV-7370 User Manual - Page 31
provides a LAN connection using a LAN cable. Using a LAN cable allows you to specify the Network Settings and the Alert Mail Settings for the projector over a LAN. To use a LAN connection, you are required to assign an IP address to the projector on the [PROJECTOR NETWORK SETTINGS] screen of the - Canon 3518B002 | LV-7370 User Manual - Page 32
2. Installation and Connections Connecting the Supplied Power Cord Connect the supplied power cord to the projector. First connect the supplied power cord's two-pin plug to the AC IN of the projector, and then connect the other plug of the supplied power cord in the wall outlet. To wall outlet ← - Canon 3518B002 | LV-7370 User Manual - Page 33
about 1 second. The STATUS indicator goes off and the POWER indicator starts blinking. When the POWER indicator turns a steady green, and the projector is ready to use. POWER INFO. IMAGE INPUT AUTO PC ASPECT MENU BLANK TIP: When the STATUS indicator lights orange, it means that the [Key lock - Canon 3518B002 | LV-7370 User Manual - Page 34
some time and then the projector will display the image. CAUTION: The projector cannot be turned off for 60 seconds after the lamp is turned on and strip equipped with a switch and a breaker is used. Failing to do so could result in no power to the projector. (There will be no stand-by LED) Should - Canon 3518B002 | LV-7370 User Manual - Page 35
INFO. IMAGE INPUT AUTO PC ASPECT MENU BLANK BACK Detecting the Signal Automatically Press and hold the INPUT button for a minimum of 2 seconds, the projector will search for the next available input source. Each time you press and hold the INPUT button for a minimum of 2 seconds, the input - Canon 3518B002 | LV-7370 User Manual - Page 36
Projecting an Image (Basic Operation) Selecting Default Source You can set a source as the default source so that it will be displayed each time the projector is turned on. 1. Press the MENU button. The menu will be displayed. 2. Press the button twice to select [Setup] and press the button or the - Canon 3518B002 | LV-7370 User Manual - Page 37
3. Projecting an Image (Basic Operation) Adjusting the Picture Size and Position Use the adjustable tilt foot, the zoom lever or the focus ring to adjust the picture size and position. In this chapter drawings and cables are - Canon 3518B002 | LV-7370 User Manual - Page 38
the tilt-foot for purposes other than originally intended. Misuses such as using the tilt foot to carry or hang (from the wall or ceiling) the projector can cause damage to the projector. Adjustable Tilt Adjustable Tilt Foot Foot Lever 3 4 Adjusting the left and right tilt of an image [Rear foot - Canon 3518B002 | LV-7370 User Manual - Page 39
Zoom Use the ZOOM lever to adjust the image size on the screen. 3. Projecting an Image (Basic Operation) Focus Use the FOCUS ring to obtain the best focus. 30 - Canon 3518B002 | LV-7370 User Manual - Page 40
range can be made narrower, depending on a signal or its aspect ratio selection. NOTE: Turning off the projector will cause your manual keystone adjustments to return to "0". To save your manual keystone adjustments, first turn off [Auto keystone] and then turn on [Keystone save]. See page 57 - Canon 3518B002 | LV-7370 User Manual - Page 41
3. Projecting an Image (Basic Operation) Adjusting with the Remote Control 1. Press the MENU button. The menu will be displayed. 2. Press the button to select [Setup] and press the OK or button. 3. Press the button to select [Keystone adjustment] from the [General] tab. 4. Press the or button. - Canon 3518B002 | LV-7370 User Manual - Page 42
is parallel to the screen. The rear feet of the projector can be adjusted to level the projector. NOTE: • Auto and Manual Keystone correction angle could be less than 30 degrees depending on the signal and/or aspect ratios. • Using keystone correction can cause the image to be slightly blurred - Canon 3518B002 | LV-7370 User Manual - Page 43
) ❺ Automatically Optimizing on RGB Image Adjusting the Image Using Auto PC adjustment Optimizing an RGB image automatically. Press the cannot optimize the RGB signal, try to adjust Horizontal/Vertical Position Clock and Tracking manually. See page 52, 53. POWER INFO. ❻ Turning Up or Down Volume - Canon 3518B002 | LV-7370 User Manual - Page 44
orange light orange light CAUTION: Parts of the projector will become heated during operation. Use caution when picking up the projector immediately after it has been operating. CAUTION: • The projector cannot be turned off for 60 seconds after the lamp is turned on and while the POWER indicator - Canon 3518B002 | LV-7370 User Manual - Page 45
. NOTE: When placing the projector in the soft case, retract the tilt feet and the rear feet. Failure to do so may case damage to the projector. CAUTION: Use caution when putting the projector in the soft case immediately after the projector has been operating. The projector cabinet is hot. 36 - Canon 3518B002 | LV-7370 User Manual - Page 46
less than four times depending on the signal. To do so: 1. Press the D. ZOOM (+) button to magnify the picture. To move the magnified image, use the button. POWER INFO. IMAGE INPUT AUTO PC ASPECT MENU BLANK BACK VOL D.ZOOM FREEZE RD-439E POWER INFO. IMAGE INPUT AUTO PC ASPECT MENU - Canon 3518B002 | LV-7370 User Manual - Page 47
[Password] A password can be set for your projector to avoid operation by an unauthorized user using the Menu. When a password is set, turning on the projector will display the password input screen. Unless the correct password is entered, the projector cannot project an image. NOTE: The [Password - Canon 3518B002 | LV-7370 User Manual - Page 48
. The confirmation screen will be displayed. 8. Select [Yes] and press the OK button. The Password function has been enabled. To turn on the projector when Password is enabled: 1. Press the Main Power Switch to the On position (I). 2. Press and hold the POWER button for about 1 second. The - Canon 3518B002 | LV-7370 User Manual - Page 49
To disable the Password function: 1. Press the MENU button. The menu will be displayed. 2. Select [Setup] → [Installation] → [Password] and press the OK button. 4. Convenient Features The Off/On menu will be displayed. 3. Select [Off] and press the OK button. The Password Confirmation screen - Canon 3518B002 | LV-7370 User Manual - Page 50
and Alert Mail Settings by Using an HTTP Browser Overview Connecting the projector to a network allows the projector to send an alert mail that informs the user that the lamp has reached the end of its life or an error has occurred. The IP address and subnet mask of the projector can be set on the - Canon 3518B002 | LV-7370 User Manual - Page 51
is selected for [DHCP]. IP ADDRESS Set your IP address of the network connected to the projector when [DISABLE] is selected for [DHCP]. SUBNET MASK Set your subnet mask number of the network connected to the projector when [DISABLE] is selected for [DHCP]. DEFAULT GATEWAY Set your default gateway - Canon 3518B002 | LV-7370 User Manual - Page 52
An error message notification will be sent when the projector lamp has reached the end of its usable life or an error occurs in the projector. HOST NAME Type in the hostname of the network connected to the projector. Up to 60 alphanumeric characters can be used. If the host name is unknown, type in - Canon 3518B002 | LV-7370 User Manual - Page 53
At the time when error is found Test mail Lamp replacement Filter cleaning Message body Lamp cover error Cooling fan error Lamp error Temperature error 4. Convenient Features Message [Projector] Test mail [Projector] Projector information Alert mail configurations are as follows: Model name - Canon 3518B002 | LV-7370 User Manual - Page 54
cabinet to display the submenu window. 6. Adjust the level or turn the selected item on or off by using the or the projector cabinet. Changes are stored until adjusted again. buttons on the remote control 7. Repeat steps 2 -6 to adjust an additional item, or press the BACK button on - Canon 3518B002 | LV-7370 User Manual - Page 55
5. Using On- front. Available buttons Indicates currently available buttons on the projector cabinet or the remote control. Solid triangle Indicates further Indicates the Key Lock is enabled. Thermometer symbol Indicates the lamp is forcibly being cooled down because the internal temperature is - Canon 3518B002 | LV-7370 User Manual - Page 56
, Nederlands, Suomi, Norsk, Türkçe Color Color, Monochrome 45 sec Manual, 5 sec, 15 sec, 45 sec Blue Blue, Black, Canon logo 500(H) Off, 100(H), 200(H), 500(H), 1000(H) None None, Rear, Ceiling mounted, Rear, Ceiling mounted Off Off, On Off Off, On 19200bps 4800bps, 9600bps, 19200bps - Canon 3518B002 | LV-7370 User Manual - Page 57
Projector name MAC address Model Version Serial number Firmware version Data version Current signal All data Network settings Lamp counter Filter counter 5. Using , NTSC4.43, PAL, PAL-M, PAL-N, PAL60, SECAM LV-7375/ LV-7370/ LV-7275: Off Off, On LV-8300: On On Off, On On Off, On Off - Canon 3518B002 | LV-7370 User Manual - Page 58
Menu Descriptions & Functions [Input] 5. Using On-Screen Menu Computer 1 Selects the computer connected to your ANALOG IN-1 input connector. NOTE: • When the component input signal is connected to the ANALOG IN-1 connector, select [Computer 1]. • The projector will determine if the input signal is - Canon 3518B002 | LV-7370 User Manual - Page 59
& Functions [Adjustment] [Image] [Image mode] When selecting user adjustable [Image mode], the submenu will be displayed. You can customize each gamma or color. To do so, first select [Image mode] and press the OK button, then proceed using the following steps. [Detail settings] Selecting Reference - Canon 3518B002 | LV-7370 User Manual - Page 60
not available. Adjusting White Balance [Brightness RGB/Contrast RGB] This allows you to adjust the white balance. Brightness for each color (RGB) is used to adjust the black level of the screen; Contrast for each color (RGB) to adjust the white level of the screen. Adjusting Brightness, Contrast - Canon 3518B002 | LV-7370 User Manual - Page 61
and Phase [Clock/Tracking] This allows you to manually adjust [Clock] and [Tracking]. Clock Use this item to fine tune the computer image may be necessary when you connect your computer for the first time. Tracking Use this item to adjust the clock phase or to reduce video noise, dot interference - Canon 3518B002 | LV-7370 User Manual - Page 62
5. Using On-Screen Menu Adjusting Horizontal/Vertical Position [Horizontal position/Vertical position] Adjusts the image Overscaned by 10% NOTE: • The [0[%]] cannot be selected when VIDEO and S-VIDEO signals are used. • [Overscan] is not available when [True size] is selected for [Aspect]. 53 - Canon 3518B002 | LV-7370 User Manual - Page 63
1600 x 1200 Aspect Ratio 4:3 4:3 4:3 15:9 16:10 16:10 5:4 4:3 4:3 Auto Options 4:3 16:9 15:9 16:10 Wide zoom (LV-7375/LV-7370/ LV-7275) Letterbox (LV-8300) True size Function The projector will automatically determine the incoming signal and display it in its aspect ratio. (→ next page) The - Canon 3518B002 | LV-7370 User Manual - Page 64
5. Using On-Screen Menu Sample image when the appropriate aspect ratio is automatically determined LV-7375/LV-7370/LV-7275 [Computer signal] Aspect ratio the vista size "1.85:1" or cinema scope size "2.35:1" for movie film. • The term "squeeze" refers to the compressed image of which aspect ratio is - Canon 3518B002 | LV-7370 User Manual - Page 65
5. Using On-Screen Menu Adjusting the Vertical Position of Image [D.image shift] (not available on LV-8300) When [16:9], [15:9], or [ The low-pass filter is applied fully. NOTE: Selecting [Off] will give best image quality by way of higher bandwidth. Selecting [Less] will soften the image and selecting - Canon 3518B002 | LV-7370 User Manual - Page 66
[Setup] [General] 5. Using On-Screen Menu Enabling Auto Keystone [Auto keystone] This feature allows the projector to detect its tilt and . Correcting Vertical Keystone Distortion Manually [Keystone adjustment] You can correct vertical distortion manually. Saving Vertical Keystone Correction - Canon 3518B002 | LV-7370 User Manual - Page 67
this mode to increase the lamp life (LV-7375/LV-8300:approx. 75% Brightness/LV-7370/LV-7275: approx.80% Brightness). Steady Green light NOTE: • The lamp life remaining and lamp hours used can be checked in [Usage time]. Select [Information] → [Usage time]. See page 64. • The projector is always in - Canon 3518B002 | LV-7370 User Manual - Page 68
you to select how long the projector waits after the last touch of a button to turn off the menu. The preset choices are Manual, 5 sec, 15 sec, and 45 sec. Selecting a Color for Background [No signal screen] Use this feature to display a blue, black screen or the Canon logo screen when no signal is - Canon 3518B002 | LV-7370 User Manual - Page 69
Using On-Screen Menu Selecting Projector Orientation [Image flip H/V] This sets your image for your type of projection application. The options are: front projection, rear projection, ceiling mounted projection and rear ceiling mounted projection. None Rear, Ceiling mounted Rear Ceiling mounted - Canon 3518B002 | LV-7370 User Manual - Page 70
Using On-Screen Menu Selecting Communication Speed [Communication speed] This feature sets the baud rate of the SERVICE PORT (D-Sub 9 Pin). It supports manually projector. • Using the projector at altitudes less than approximately 5500 feet/1600 meters and setting to [High altitude] can cause the lamp - Canon 3518B002 | LV-7370 User Manual - Page 71
manually. Normally select [Auto] and the projector will automatically detect the video standard. In the case where the projector an XGA (1024 x 768) signal may not be recognized on LV-7375, LV-7370 or LV-7275. timer] You can use the Off Timer feature to turn off the projector automatically at a preset - Canon 3518B002 | LV-7370 User Manual - Page 72
Using On-Screen Menu Normal Power indicator: Orange light/STATUS indicator: Green light Power-saving......... Power indicator: Orange light/STATUS indicator: Off The following connectors, buttons or functions will not work during this mode. - SERVICE off the projector. We recommend using this - Canon 3518B002 | LV-7370 User Manual - Page 73
control. • When the remaining lamp time reaches 0%, the Remaining lamp time bar indicator changes from 0% to 100(H) in red and starts counting down. When the remaining lamp time reaches 0 hours, the projector will not turn on. Normal 3000 Lamp life(H) Quiet 4000 Replacement lamp LV-LP31 64 - Canon 3518B002 | LV-7370 User Manual - Page 74
[Input signal] 5. Using On-Screen Menu [Source index] [Vertical frequency] [Video type] [Sync polarity] [Wired LAN] [Horizontal frequency] [Input signal type] [Sync type] [Scan type] [Projector name] [Version] [MAC address] [Model] [Firmware version] [Serial number] [Data version] 65 - Canon 3518B002 | LV-7370 User Manual - Page 75
mode], [Remaining lamp time], [Lamp counter], [Filter counter], and [Network settings]. Clearing Networking Settings [Network settings] Returns [ . NOTE: The projector will turn off and go into standby mode when you continue to use the projector for another 100 hours after the lamp has reached the - Canon 3518B002 | LV-7370 User Manual - Page 76
section describes the simple maintenance procedures you should follow to clean the filter and replace the lamp. ❶ Cleaning or Replacing the Filter The air-filter sponge keeps dust and dirt from getting inside the projector and should be frequently cleaned. If the filter is dirty or clogged, your - Canon 3518B002 | LV-7370 User Manual - Page 77
filter comes in the same package with your replacement lamp. ❷ Cleaning the Cabinet and the Lens 1. Turn off the projector before cleaning. 2. Clean the cabinet periodically with a damp cloth. If heavily soiled, use a mild detergent. Never use strong detergents or solvents such as alcohol or thinner - Canon 3518B002 | LV-7370 User Manual - Page 78
into standby mode when you continue to use the projector for another 100 hours after the lamp has reached the end of its life. If this happens, be sure to replace the lamp. If you continue to use the lamp after the lamp reaches the end of its life, the lamp bulb may shatter, and pieces of glass may - Canon 3518B002 | LV-7370 User Manual - Page 79
left and right sides. (1) Use the tip of the flathead screwdriver to push and release one lock. (2) Do this for the other lock. (3)Slowly pull the lamp cover in the direction of the arrow and lift it. Lock (Push here) 2 3 6. Maintenance 1 2. Remove the lamp. (1) Loosen the two screws securing - Canon 3518B002 | LV-7370 User Manual - Page 80
the Main Power switch and turn on the projector. 6. Finally, select the menu → [Reset] → [Lamp counter] to reset the lamp usage hours. NOTE: When you continue to use the projector for another 100 hours after the lamp has reached the end of its life, the projector cannot turn on and the menu is not - Canon 3518B002 | LV-7370 User Manual - Page 81
7. Appendix ❶ Troubleshooting This section helps you resolve problems you may encounter while setting up or using the projector. STATUS Indicator LAMP Indicator Indicator Messages POWER Indicator POWER Indicator Blinking light Steady light Indicator Condition Off Green Orange Green Orange 0.5 - Canon 3518B002 | LV-7370 User Manual - Page 82
LV-7375 at altitudes approximately 5500 feet/1600 meters or lower. Using the projector at altitudes less than approximately 5500 feet/1600 meters and setting to [High altitude] can cause the lamp to overcool, causing the image to flicker. Switch [Fan mode] to [Auto] or [High]. See page 61. Image - Canon 3518B002 | LV-7370 User Manual - Page 83
's owner's manual. • Non-standard signal output from the computer If the output signal from a notebook PC is not an industry standard, the projected image may not be displayed correctly. Should this happen, deactivate the notebook PC's LCD screen when the projector display is in use. Each notebook - Canon 3518B002 | LV-7370 User Manual - Page 84
❷ Specifications This section provides technical information about the projector's performance. 7. Appendix Model Number LV-7375/LV-7370/LV-7275/LV-8300 Optical LCD Panel Resolution Lens Lamp Brightness*² Contrast Ratio*² Uniformity Image Size (Diagonal) Projection Distance Projection Angle - Canon 3518B002 | LV-7370 User Manual - Page 85
Weight Fan Noise Environmental Considerations 7. Appendix Orientation: Front / Rear / Ceiling mounted / Rear, Ceiling mounted 12.5"(W) x 13.2"(D) x 4.4"(H) 317 mm (W) x 336 mm (D) EN61000-3-3) Meets Low Voltage Directive (EN60950-1) The specifications are subject to change without notice. 76 - Canon 3518B002 | LV-7370 User Manual - Page 86
❸ Cabinet Dimensions 7. Appendix 336 (13.2") 115 (4.5") 317 (12.5") 80 (3.2") Lens center Lens center 55 (2.2") Unit: mm (inch) 77 - Canon 3518B002 | LV-7370 User Manual - Page 87
7. Appendix ❹ Pin Assignments of D-Sub ANALOG IN-1 Input Connector Mini D-Sub 15 Pin Connector 11 12 13 14 15 6 7 8 9 10 12 34 5 Signal Level Video signal : 0.7Vp-p (Analog) Sync signal : TTL level Pin No. 1 2 3 4 5 6 7 8 9 10 11 12 13 14 15 RGB Signal (Analog) Red Green or Sync on Green Blue - Canon 3518B002 | LV-7370 User Manual - Page 88
50Hz to 120Hz 7. Appendix VIDEO VGA Signal NTSC PAL PAL60 SECAM SVGA XGA WXGA SXGA SXGA+ WXGA+ UXGA MAC13 MAC16 MAC19 MAC21 MAC HDTV supported by digital signal. • An image with higher or lower resolution than the projector's native resolution (LV-7375/LV-7370/LV-7275: 1024 x 768 / LV-8300 - Canon 3518B002 | LV-7370 User Manual - Page 89
7. Appendix ❻ Relationship between Screen Size and Projection distance LV-7375/LV-7370/LV-7275 Screen size at 4:3 aspect ratio W×D(cm) 21" 43 × 32 25" 51 × 38 30" 61 × 46 40" 81 × 61 50" 102 × 76 60" 122 × 91 - Canon 3518B002 | LV-7370 User Manual - Page 90
LV-8300 Screen size at 16:10 aspect ratio W×D(cm) 21" 45 × 28 25" 54 × 34 30" 65 × 40 40" 86 × 54 50" 108 × 67 60" - Canon 3518B002 | LV-7370 User Manual - Page 91
on the equipment, a lower baud rate may be recommended for long cable runs. SERVICE PORT Connector (D-SUB 9P) To TxD of PC To RxD of PC To GND of To RTS of PC To CTS of PC NOTE 1: Pins 1, 4, 6 and 9 are no used. NOTE 2: Jumper "Request to Send" and "Clear to Send" together on both ends of the - Canon 3518B002 | LV-7370 User Manual - Page 92
Check List Before contacting your dealer or service personnel, check the following list to be sure repairs are needed, you may also refer to the "Troubleshooting" section in your user's manual. This checklist below will help us solve your problem more efficiently. * Print the following pages - Canon 3518B002 | LV-7370 User Manual - Page 93
In the space below please describe your problem in detail. 7. Appendix Information on application and environment where your projector is used Projector Model number: Serial No.: Date of purchase: Lamp operating time (hours): Lamp Mode: Normal Quiet Information on input signal: - Canon 3518B002 | LV-7370 User Manual - Page 94
Way, Ste. 400 Miami, FL 33126, U.S.A. EUROPE, AFRICA & MIDDLE EAST CANON EUROPA N.V. Bovenkerkerweg 59-61, 1185 XB Amstelveen, The Netherlands CANON FRANCE S.A.S 17, quai du President Paul Doumer, 92414 Courbevoie Cedex, France CANON UK LTD. Woodhatch Reigate Surrey RH2 8BF, United Kingdom
-
 1
1 -
 2
2 -
 3
3 -
 4
4 -
 5
5 -
 6
6 -
 7
7 -
8
-
9
-
10
-
11
-
12
-
13
-
14
-
15
-
16
-
17
-
18
-
19
-
20
-
21
-
22
-
23
-
24
-
25
-
26
-
27
-
28
-
29
-
30
-
31
-
32
-
33
-
34
-
35
-
36
-
37
-
38
-
39
-
40
-
41
-
42
-
43
-
44
-
45
-
46
-
47
-
48
-
49
-
50
-
51
-
52
-
53
-
54
-
55
-
56
-
57
-
58
-
59
-
60
-
61
-
62
-
63
-
64
-
65
-
66
-
67
-
68
-
69
-
70
-
71
-
72
-
73
-
74
-
75
-
76
-
77
-
78
-
79
-
80
-
81
-
82
-
83
-
84
-
85
-
86
-
87
-
88
-
89
-
90
-
91
-
92
-
93
-
94
 |
 |
MULTIMEDIA PROJECTOR
LV-7375
LV-7370
LV-7275
LV-8300
User’s Manual
The projector's model name indicated on the projector's label are
LV-7375, LV-7375(E),LV-7370, LV-7370(E), LV-7275, LV-7275(E),
LV-8300 and LV-8300(E) respectively.
The models are referred to as LV-7375,LV-7370, LV-7275, and
LV-8300 throughout the user's manual except some of the specifica-
tions pages.
ENG