Canon 7345 lv7345_manual.pdf
Canon 7345 - LV - LCD Projector Manual
 |
UPC - 013803009224
View all Canon 7345 manuals
Add to My Manuals
Save this manual to your list of manuals |
Canon 7345 manual content summary:
- Canon 7345 | lv7345_manual.pdf - Page 1
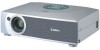
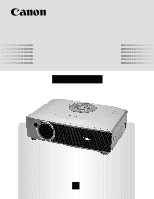
Multimedia Projector LV-7345 LV-7340 Owner's Manual E English - Canon 7345 | lv7345_manual.pdf - Page 2
operate improperly, read this manual again, check operations and cable connections and try the solutions in the "Trouble-shooting" section of the end of this booklet. If the problem still persists, contact the sales dealer where you purchased the projector or the service center. SAFETY PRECAUTIONS - Canon 7345 | lv7345_manual.pdf - Page 3
service personnel under the following conditions: a. When the power cord or plug is damaged or frayed. b. If liquid has been spilled into the projector. c. If the projector has been exposed to rain or water. d. If the projector does not operate normally by following the operating instructions - Canon 7345 | lv7345_manual.pdf - Page 4
any changes or modifications to the equipment unless otherwise specified in the instructions. If such changes or modifications should be made, you could be . AC POWER CORD REQUIREMENT The AC Power Cord supplied with this projector meets the requirement for use in the country you purchased it. - Canon 7345 | lv7345_manual.pdf - Page 5
PROJECTOR 7 AUTO PC ADJUSTMENT 24 SETTING-UP PROJECTOR 8 MANUAL PC ADJUSTMENT 25 CONNECTING AC POWER CORD 8 PICTURE IMAGE ADJUSTMENT 27 POSITIONING PROJECTOR OFF PROJECTOR 19 LAMP REPLACEMENT 39 ADJUSTING SCREEN ZOOM ADJUSTMENT 20 LAMP REPLACE COUNTER 39 20 TROUBLESHOOTING 40 - Canon 7345 | lv7345_manual.pdf - Page 6
(LCD) technology. x Compact Design This projector is projector has Multi-Scan System to conform to almost all computer output signals quickly. There is no need for troublesome manual projector may result in distorted image being displayed in a trapezoid shape. Keystone Correction solves this problem - Canon 7345 | lv7345_manual.pdf - Page 7
BACK TOP CONTROLS AND INDICATORS INFRARED REMOTE RECEIVER POWER CORD CONNECTOR BOTTOM LAMP COVER ADJUSTABLE FEET AND FEET LOCK LATCHES SPEAKER TERMINALS AND CONNECTORS AIR FILTER AIR INTAKE VENTS (Back and Bottom) This projector is equipped with Cooling Fans for protection from overheating. Pay - Canon 7345 | lv7345_manual.pdf - Page 8
into any other type of power system. Consult your authorized dealer or service station if you are not sure of the type of power supply being in use. Connect a projector with a peripheral equipment before turning a projector on. (Refer to pages 11 ~ 13 for connection.) CAUTION For safety, unplug - Canon 7345 | lv7345_manual.pdf - Page 9
flat projection surface. q The projector can be focused from 5.3'(1. Lift the front of a projector and pull Feet Lock Latches on the both sides of a projector. 2 Release Feet Lock To retract Adjustable Feet, lift the front of a projector and pull and undo Feet Lock Latches. Keystone distortion of - Canon 7345 | lv7345_manual.pdf - Page 10
cabinet, and it is not designed to protect an appliance from external forces. Do not transport a projector through a courier or transport services with this bag. The projector can be damaged. When handling a projector, do not drop, bump, subject it to strong forces or put other things on the cabinet - Canon 7345 | lv7345_manual.pdf - Page 11
RESET MCI RGB IN ANALOG CONTROL PORT AUDIO OUTPUT JACKS Connect an external audio amplifier to these jacks. (Refer to P12, 13.) RESET BUTTON This projector uses a micro processor to control this unit, and occasionally, this micro processor may malfunction and need to be reset. This can be done by - Canon 7345 | lv7345_manual.pdf - Page 12
ADAPTER (Not supplied) Set switches as shown in the table ON below depending on RESOLUTION MODE that you want to use before you turn on projector and OFF computer. ON DIP 123456 1 2 3 4 56 13" MODE (640 x 480) ON ON OFF OFF OFF OFF 16" MODE (832 x 624) OFF ON OFF ON - Canon 7345 | lv7345_manual.pdf - Page 13
OUT L RESET MCI RGB IN ANALOG CONTROL PORT AUDIO OUT AUDIO IN Terminals of the Projector Audio Cable (Stereo) ✽ NOTE : When connecting the cable, the power cords of both the projector and the external equipment should be disconnected from AC outlet. Audio Input External Audio Equipment - Canon 7345 | lv7345_manual.pdf - Page 14
1 minute, release LASER button and press it again. LASER KEYSTONE NO SHOW FREEZE AUTO PC ADJ. IMAGE P-TIMER POWER ON-OFF BUTTON Used to turn projector on or off. (P19) INPUT BUTTON Used to select input source. (P22, 30) POINT BUTTON Used to move a pointer on ONSCREEN MENU, adjust each item - Canon 7345 | lv7345_manual.pdf - Page 15
to adjust volume. (P21) D.ZOOM BUTTON Used to select DIGITAL ZOOM +/- mode and resize image. (P29) Operating Range Point Remote Control Unit toward projector (Receiver Window) whenever pressing any button. Maximum operating range for Remote Control Unit is about 16.4' (5m) and 60° in front and rear - Canon 7345 | lv7345_manual.pdf - Page 16
green while in Power Management mode. (P36) LAMP REPLACE LAMP WARNING TEMP. LAMP REPLACE INDICATOR Turns to yellow when the life of Projection Lamp draws to an end. (P39) LAMP INDICATOR Becomes dim when the projector is turned on. And bright when the projector is in stand-by mode. WARNING TEMP - Canon 7345 | lv7345_manual.pdf - Page 17
BEFORE OPERATION OPERATING ON-SCREEN MENU HOW TO OPERATE ON-SCREEN MENU You can control and adjust this projector through ON-SCREEN MENU. Refer to the following pages to operate each adjustment on ON-SCREEN MENU. 1 DISPLAY MENU Press MENU button to display ON- - Canon 7345 | lv7345_manual.pdf - Page 18
Press MENU BUTTON while connecting to PC input source. GUIDE WINDOW Shows selected item of ONSCREEN MENU. PC SYSTEM Wide / Digital zoom +/-] (Refer to P29) SETTING MENU Used to change settings of projector or reset Lamp Replace Counter. (Refer to P35, 36) INPUT MENU Used to select input source - Canon 7345 | lv7345_manual.pdf - Page 19
projector. (Refer to "CONNECTING TO PROJECTOR" on pages 11~13 for connecting that equipment.) 2 Connect the projector's AC Power Cord into an AC outlet. LAMP projector. LAMP Indicator lights bright and READY Indicator turns off. After projector turn a projector off and a projector on again. If - Canon 7345 | lv7345_manual.pdf - Page 20
BASIC OPERATION ADJUSTING SCREEN ZOOM ADJUSTMENT 1 Press ZOOM button on Top Control or ZOOM v/w button on Remote Control Unit. The message "Zoom" is displayed. 2 Press ZOOM v button or POINT UP button to make image larger, and press ZOOM w button or POINT DOWN button to make image smaller. Zoom - Canon 7345 | lv7345_manual.pdf - Page 21
BASIC OPERATION NO SHOW FUNCTION Press NO SHOW button on Remote Control Unit to black out the image. To restore to normal, press NO SHOW button again or press any other button. No show Message disappears after 4 seconds. PICTURE FREEZE FUNCTION Press FREEZE button on Remote Control Unit to - Canon 7345 | lv7345_manual.pdf - Page 22
from computer. Make sure the connection of computer and a projector is set correctly. (Refer to TROUBLESHOOTING on page 40.) PC SYSTEM MENU SYSTEM Menu icon Displays system being selected. SELECT COMPUTER SYSTEM MANUALLY This projector automatically selects PC system among those provided in this - Canon 7345 | lv7345_manual.pdf - Page 23
COMPUTER INPUT COMPATIBLE COMPUTER SPECIFICATIONS Basically this projector can accept the signal from all computers with the V, H-Frequency below mentioned and less than 140 MHz of Dot Clock. ON-SCREEN DISPLAY RESOLUTION VGA 1 - Canon 7345 | lv7345_manual.pdf - Page 24
Adjustment parameters from Auto PC Adjustment can be memorized in this projector. Once parameters are memorized, setting can be done just by selecting PC Adjustment function. When the image is not provided properly through this function, manual adjustments are required. (Refer to page 25, 26.) q Auto PC - Canon 7345 | lv7345_manual.pdf - Page 25
reproduce a proper image and the image may be recognized as a flickering picture, a non-synchronized picture, a non-centered picture or a skewed picture. This projector has a Manual PC Adjustment to enable you to precisely adjust several parameters to match with those special signal formats. This - Canon 7345 | lv7345_manual.pdf - Page 26
SET button at Display area icon and Display area dialog box appears. Display area Display area V Adjustment of vertical area displayed with this projector. Press POINT LEFT/RIGHT button(s) to decrease/increase value and then press SET button. Full screen Press POINT LEFT/RIGHT button(s) to switch - Canon 7345 | lv7345_manual.pdf - Page 27
red frame pointer to the level that you want to set and then press SET button. Standard Normal picture adjustment preset on this projector. High contrast Picture adjustment improved in reproduction of halftones. This adjustment is suitable for providing better image in brighter place. IMAGE SELECT - Canon 7345 | lv7345_manual.pdf - Page 28
level, move a red frame pointer to Store icon and press SET button. The message "OK?" will appear. Select [Yes] to store manual adjustment. To set this manual adjustment, select Custom by pressing IMAGE button or through IMAGE SELECT MENU (refer to P27). Other icons operates as follows. Reset - Canon 7345 | lv7345_manual.pdf - Page 29
selected on PC SYSTEM Menu (P22). q True and Digital zoom +/- cannot be selected when "RGB" is selected on PC SYSTEM Menu (P22). q This projector cannot display any resolution higher than 1280 X 1024. If your computer's screen resolution is higher than 1280 X 1024, reset the resolution to the lower - Canon 7345 | lv7345_manual.pdf - Page 30
. Source Select Menu will appear. 3 Move a pointer to the source that you want to select and then press SET button. Auto Video Projector automatically detects incoming Video signal, and adjusts itself to optimize its performance. • When both Y jack and S-VIDEO jack are connected, SVIDEO jack - Canon 7345 | lv7345_manual.pdf - Page 31
Video system, and adjusts itself to optimize its performance. When Video System is PAL-M or PAL-N, select system manually. PAL / SECAM / NTSC / NTSC4.43 / PAL-M / PAL-N If projector cannot reproduce proper video image, it is necessary to select a specific broadcast signal format among PAL, SECAM - Canon 7345 | lv7345_manual.pdf - Page 32
Control Unit. Standard Normal picture level preset on this projector. IMAGE button Standard Cinema Cinema Picture level adjusted for set and then press SET button. Standard Normal picture level preset on this projector. Cinema Picture level adjusted for the picture with fine tone. IMAGE SELECT - Canon 7345 | lv7345_manual.pdf - Page 33
VIDEO INPUT IMAGE LEVEL ADJUSTMENT 1 Press MENU button and ON-SCREEN MENU will appear. Press POINT LEFT/RIGHT button(s) to move a red frame pointer to IMAGE ADJUST Menu icon. 2 Press POINT DOWN button to move a red frame pointer to the item that you want to adjust and then press SET button. The - Canon 7345 | lv7345_manual.pdf - Page 34
"OK?" will appear. Select [Yes] to store manual adjustment. To set this manual adjustment, select Custom by pressing IMAGE button or through and then press SET button. Store icon PICTURE SCREEN ADJUSTMENT This projector has a picture screen resize function, which enables you to display the - Canon 7345 | lv7345_manual.pdf - Page 35
. Correct keystone distortion by pressing POINT UP/DOWN button(s). Refer to KEYSTONE ADJUSTMENT on page 20. Blue back When this function is "On," this projector will produce a blue image instead of the video noise on the screen when any input source is unplugged or turned off. When pressing SET - Canon 7345 | lv7345_manual.pdf - Page 36
and is not used for a certain period in order to reduce power consumption and maintain the Lamp-life. (This projector is shipped with this function ON.) Power Management function operates to turn Projection Lamp off when the input signal is interrupted and any button is not pressed over 5 minutes - Canon 7345 | lv7345_manual.pdf - Page 37
. Make sure that the mouse driver is properly installed in your computer. And make sure that the mouse port (or USB port) of a Personal Computer is activated. 1 Connect the mouse port (or USB port) of your computer to Control Port (or USB connector) of this projector with Control Cable (or USB - Canon 7345 | lv7345_manual.pdf - Page 38
fully inserted. CAUTION Do not operate the projector with Air Filter removed. Dust may accumulate on LCD Panel and Projection Mirror degrading picture quality above symptoms are noticed, contact your authorized dealer or service station for proper cleaning. CLEANING PROJECTION LENS Follow these - Canon 7345 | lv7345_manual.pdf - Page 39
Model No. of your projector : LV-7340 / LV-7345 q Replacement Lamp Type No. : LV-LP11 (610 293 2751) LAMP REPLACE COUNTER Be sure to reset Lamp Replace Counter when Lamp Assembly is replaced. When Lamp Replace Counter is reset, LAMP REPLACE Indicator stops lighting. 1 Turn projector on, press MENU - Canon 7345 | lv7345_manual.pdf - Page 40
APPENDIX TROUBLESHOOTING Before calling your dealer or service center for assistance, check the matters below once again. 1. Make sure you have connected a projector to your computer or video equipment as described in the section "CONNECTING THE PROJECTOR" on pages 11 ~ 13. 2. Check cable - Canon 7345 | lv7345_manual.pdf - Page 41
WARNING : High voltages are used to operate this projector. Do not attempt to open the cabinet. If the problem still persists after following all operating instructions, contact the sales dealer where you purchased the projector or the service center. Give the model number and explain the difficulty - Canon 7345 | lv7345_manual.pdf - Page 42
Projector Type Dimensions (W x H x D) Net Weight LCD Panel System Panel Resolution Multi-media Projector mm with motor zoom and focus Throw Distance Projection Lamp 5.3' ~ 40.0' (1.6 m ~ 12.2 's Manual AC LV-CA26 q Control Cable for ADB Port Type No. : LV-CA27 q DVI Cable Type No. : LV-CA29 q - Canon 7345 | lv7345_manual.pdf - Page 43
APPENDIX CONFIGURATIONS OF THE TERMINALS RGB INPUT TERMINAL (ANALOG) Terminal : HDB15-PIN Connect the display output terminal of the computer to this terminal with the VGA Cable (supplied). When connecting the Macintosh computer, MAC Adapter (not supplied) is required. Pin Configuration 54 32 1 - Canon 7345 | lv7345_manual.pdf - Page 44
. 30-2, Shimomaruko 3-chome, Ohta-ku, Tokyo 146-8501, Japan CANON U.S.A., INC. NEW YORK OFFICE One Canon Plaza, Lake Success, NY 11042-1198, U.S.A. CANON U.S.A., INC. LOS ANGELES OFFICE 15955 Alton Parkway, Irvine, CA 92718-3616, U.S.A. CANON CANADA, INC. 6390 Dixie Road Mississauga, Ontario L5T 1P7
-
 1
1 -
 2
2 -
 3
3 -
 4
4 -
 5
5 -
 6
6 -
 7
7 -
8
-
9
-
10
-
11
-
12
-
13
-
14
-
15
-
16
-
17
-
18
-
19
-
20
-
21
-
22
-
23
-
24
-
25
-
26
-
27
-
28
-
29
-
30
-
31
-
32
-
33
-
34
-
35
-
36
-
37
-
38
-
39
-
40
-
41
-
42
-
43
-
44
 |
 |

E
English
Multimedia Projector
Owner’s Manual
LV-7345LV-7340